Introduction to Red Velvet Pound Cake
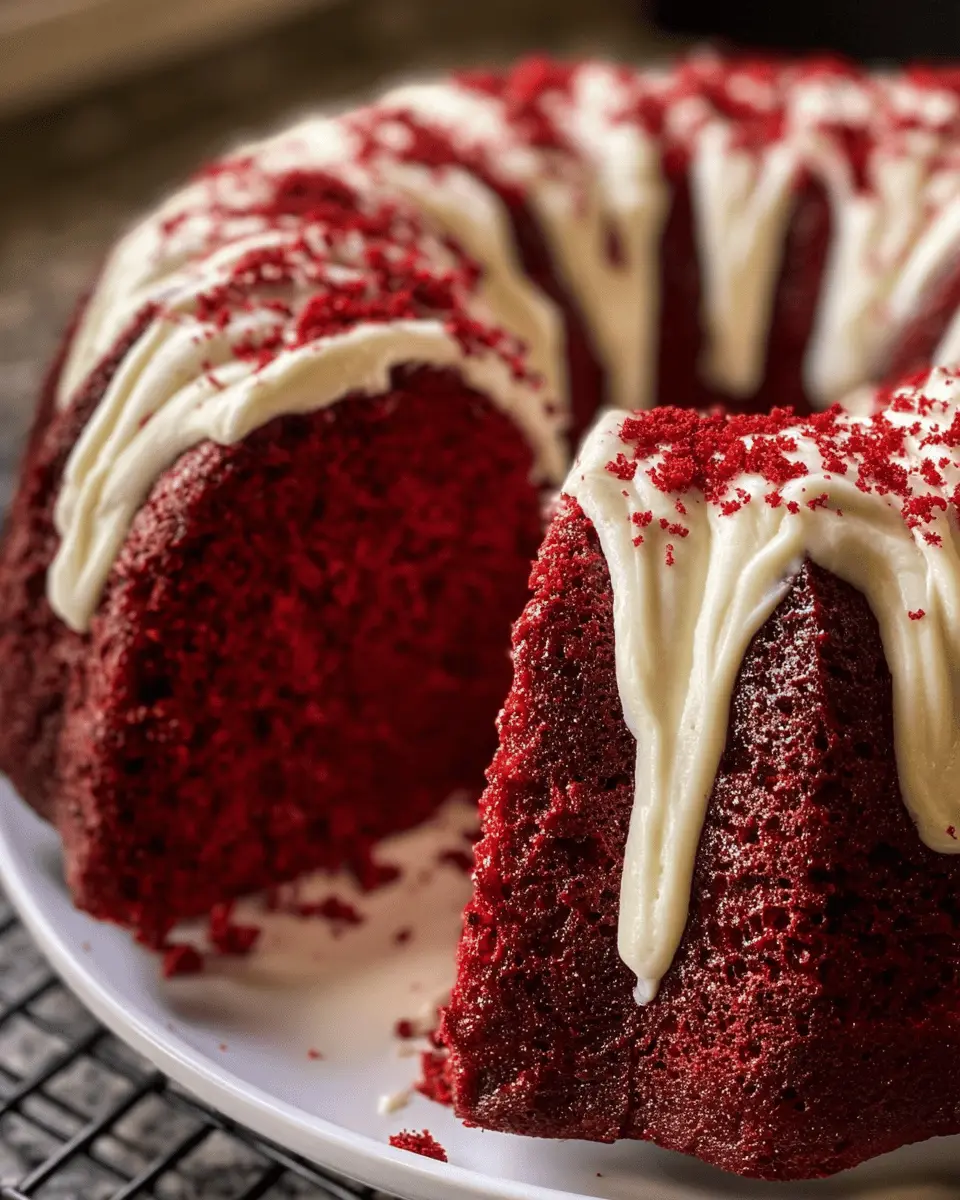
Red velvet pound cake offers a delightful twist on a classic favorite, making it an excellent choice for your next baking adventure. With its stunning red hue, velvety texture, and rich flavor, this cake isn’t just visually appealing; it also packs a flavorful punch that can impress your friends, family, or even that special someone. But what sets red velvet pound cake apart from your average dessert? Let’s dive into the reasons this cake deserves a spot in your recipe repertoire.
Why Choose Red Velvet Pound Cake for Your Next Baking Adventure?
When you think of dessert, what comes to mind? A treat that looks as good as it tastes? Red velvet pound cake achieves both objectives beautifully. Here are just a few reasons why you might want to whip up this cake:
- Unique Flavor Profile: Traditional red velvet cake has notes of cocoa mixed with the slight tang of buttermilk. When you transform this into a pound cake, you create a denser, richer treat that is utterly irresistible.
- Endless Versatility: Serve it plain, dusted with powdered sugar, or—best of all—with a smooth cream cheese frosting. The latter adds even more depth and creaminess, making each bite a luxurious experience.
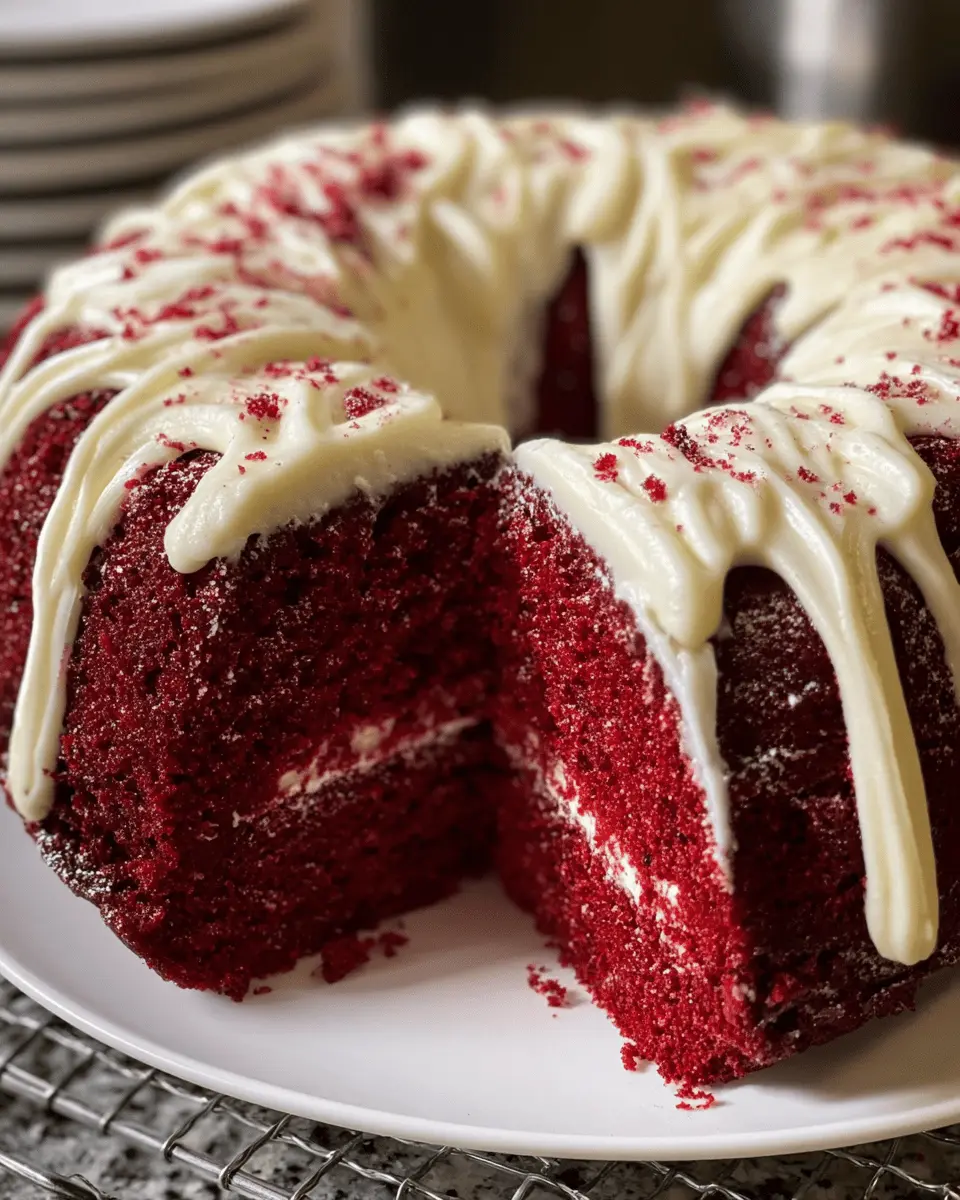
- Festive Appeal: The vibrant red color makes this cake a fantastic choice for special occasions, holidays, or even casual get-togethers. There’s something about red velvet that simply feels celebratory.
Baking a red velvet pound cake is not just about following a recipe; it’s a chance to create memories. Imagine gathering with friends, sharing stories over slices of cake, and savoring each other’s company.
For those interested in enhancing their baking skills, consider checking out resources like King Arthur Baking for tips and techniques to elevate your baking game. Plus, explore different variations, like using Turkey Bacon or Chicken Ham in delightful savory cakes, if you’re feeling adventurous!
In summary, the red velvet pound cake isn’t merely a cake; it’s an experience waiting to unfold. Whether you’re an experienced baker or a curious novice, this recipe is a perfect starting point to explore the world of baking decadence. As you embark on this culinary journey, remember that the best ingredient is always a sprinkle of love!
Ingredients for Red Velvet Pound Cake
Creating a delicious red velvet pound cake with cream cheese frosting isn’t just about following a recipe; it’s about gathering the right ingredients too. Here’s what you’ll need:
Essential Ingredients for the Cake
To get that signature texture and beautiful red hue, you’ll want to gather the following ingredients:
- All-purpose flour: Gives the cake its structure.
- Granulated sugar: For sweetness and moisture.
- Unsalted butter: Adds richness and flavor.
- Eggs: Essential for binding the ingredients together.
- Buttermilk: Keeps the cake moist and tender.
- Cocoa powder: Just a hint to complement the red color.
- Red food coloring: The star of the show for that iconic look.
- Baking powder and baking soda: To help your cake rise perfectly.
Ingredients for the Cream Cheese Frosting
No red velvet pound cake would be complete without a luscious frosting! For that tangy sweetness, you’ll need:
- Cream cheese: The base for your frosting, rich and creamy.
- Unsalted butter: Helps with the smooth texture.
- Powdered sugar: For sweetness that blends in seamlessly.
- Vanilla extract: Just a dash for that extra flavor kick.
Using these ingredients, you’re set for baking something truly scrumptious. Make sure to check out this guide to baking essentials for more insights on ingredient choices. Enjoy the process, and happy baking!
Preparing Red Velvet Pound Cake
Making a delicious red velvet pound cake is a rewarding experience, and it’s even better when you can share it with friends and family. Let’s dive into the steps to create this delightful dessert, each one intentional and rewarding.
Preheat and prepare your baking pan
Before you start mixing ingredients, it’s important to set your kitchen up for success. Preheat the oven to 325°F (160°C), allowing it to reach the perfect temperature while you prepare your batter. Line a 9×5 inch loaf pan with parchment paper and lightly grease it with butter or cooking spray. This will ensure easy release after baking.
Creaming the butter, oil, and sugar
In a large bowl, combine 1 cup of softened unsalted butter and 1/2 cup of vegetable oil. Using an electric mixer, beat on medium speed until the mixture becomes fluffy. The combination of butter and oil ensures moisture without being too heavy. Gradually add in 2 cups of granulated sugar, mixing until everything is well combined and the texture is light and airy. This step forms the cake’s foundation, creating that perfect crumb texture we all love.
Incorporating eggs and food coloring
Next up, add four large eggs, one at a time, beating well after each addition. It’s this step that enriches the flavor and adds structure to our cake. Once the eggs are fully mixed in, it’s time to add the star of the show: 2 tablespoons of red gel food coloring. This not only deepens the color but also enhances the overall flavor. As you mix, enjoy watching that beautiful red hue develop!
Mixing the dry ingredients
In a separate bowl, whisk together 2 cups of all-purpose flour, 1 teaspoon of baking powder, 1 teaspoon of baking soda, and a dash of salt. These dry ingredients will give our red velvet pound cake structure and stability. A good rule of thumb is to use a whisk to aerate your flour — a crucial tip for achieving a light, fluffy cake.
Alternating dry ingredients with buttermilk
Now comes the fun part! Gradually add the dry mixture to the wet ingredients, alternating with 1 cup of buttermilk. Start with the dry ingredients, then pour in half the buttermilk, and continue alternating until all the ingredients are combined. This technique helps keep the batter from getting too dense, ensuring an even and moist cake throughout.
Adding vinegar and finishing the batter
To enhance the cake’s flavor and stability, add 1 tablespoon of white vinegar to the batter. This may seem surprising, but the acid reacts with the baking soda, helping the cake rise beautifully. Gently fold until everything is combined, but be careful not to overmix. You want to keep that airy consistency.
Pouring into the pan and baking
Carefully pour the batter into your greased loaf pan, smoothing the top with a spatula for an even surface. Bake in the preheated oven for about 60-70 minutes, or until a toothpick inserted into the center comes out clean. The aroma will have your mouth watering, so be patient!
Cooling before frosting
Once baked, remove your cake from the oven and let it cool in the pan for about 10 minutes. After that, transfer it to a wire rack to cool completely. Allowing the cake to cool is essential for the frosting to adhere properly.
Making the cream cheese frosting
While the cake is cooling, whip up a delectable cream cheese frosting. Beat together 8 ounces of softened cream cheese, 1/2 cup of unsalted butter, and 4 cups of powdered sugar until smooth and fluffy. Add a teaspoon of vanilla extract for that extra touch. You can adjust the sugar based on your sweetness preference.
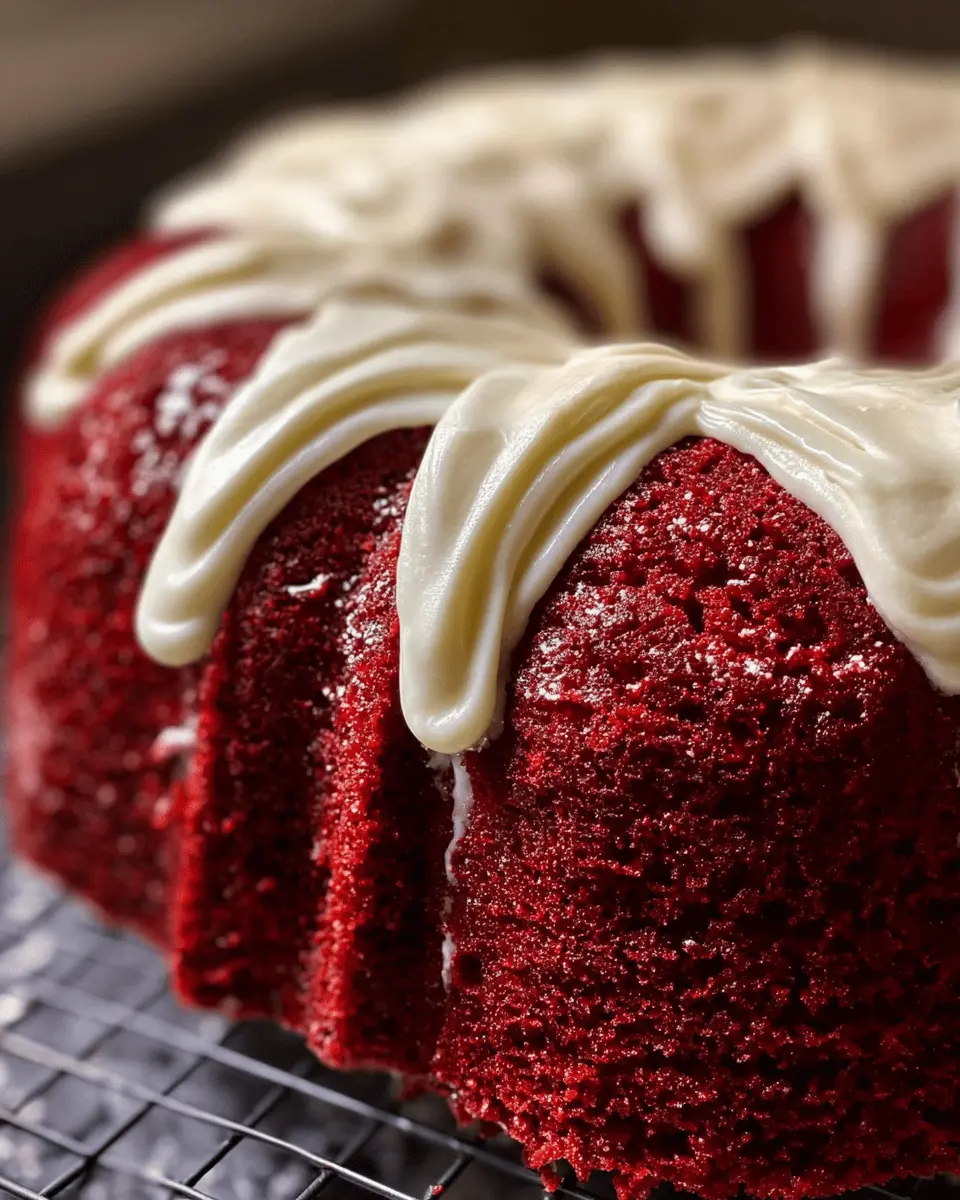
Frosting the cooled cake
Once completely cool, it’s time for the best part: frosting the cake! Spread the cream cheese frosting generously over the top of your red velvet pound cake, letting it cascade down the sides for that mouthwatering look.
This red velvet pound cake is sure to impress! Serve it with a cup of coffee or tea for a delightful treat. Enjoy every bite, and don’t forget to share with your loved ones! For more insights on cake baking, you can check out resources like King Arthur Baking or The Spruce Eats for tips and inspiration. Happy baking!
Variations on Red Velvet Pound Cake
When it comes to indulging in a delightful red velvet pound cake, the possibilities are endless. Whether you want to serve a crowd or have specific dietary needs, there are several fantastic variations to explore.
Red Velvet Cupcakes
Why not turn that luscious red velvet pound cake into individual servings? Red velvet cupcakes are a fun way to share this favorite dessert! Simply divide the batter into lined cupcake tins and adjust the baking time—check for doneness around 15-20 minutes. Top them off with a swirl of creamy cream cheese frosting for the ultimate treat. Not only are they delightful to eat, but they also make for beautiful presentations at parties or gatherings.
Gluten-Free Red Velvet Pound Cake
If you or someone you know is gluten-intolerant, fret not! Making a gluten-free version of red velvet pound cake is easier than you might think. Substitute all-purpose flour with your favorite gluten-free flour blend; it usually yields a surprisingly tasty cake. Just ensure your other ingredients are also gluten-free, like the baking powder. This way, everyone can enjoy a slice without worry.
Mini Red Velvet Cakes
Mini versions of your favorite desserts are all the rage! Creating mini red velvet cakes is a cute and creative way to serve them at events. Use small round cake pans to bake individual cakes, and layer them with cream cheese frosting in between. Decorate with sprinkles or fresh berries for an added touch. These mini cakes are perfect for a fun afternoon tea or birthday celebration!
For more creative cake experiences, check out this resource on cake variations for more inspiration! The options for personalizing your red velvet pound cake are as endless as your imagination!
Baking notes for Red Velvet Pound Cake
Common mistakes to avoid
When creating your red velvet pound cake, it’s easy to falter. Here are a few blunders to steer clear of:
- Overmixing the batter: This can lead to a dense cake. Mix just until the ingredients are combined.
- Using cold ingredients: Be sure to bring your eggs and butter to room temperature for a smoother batter.
- Skipping the sifting step: Sifting your dry ingredients is crucial for a light and fluffy cake. It prevents clumps and creates a beautiful base.
Tips for achieving the perfect texture
For that melt-in-your-mouth texture, consider these easy tips:
- Cream your butter and sugar well: Aim for a light and fluffy mixture; this incorporates air for leavening.
- Don’t rush the baking time: Each oven behaves differently,so keep an eye on your cake and do the toothpick test for doneness.
- Cool completely before frosting: If you frost too early, the cream cheese frosting may melt, ruining that gorgeous finish.
With these notes in hand, you’re well on your way to baking the most delightful red velvet pound cake! For more baking inspiration, check out the Joy of Baking website, which always offers fantastic insights.
Serving suggestions for Red Velvet Pound Cake
Pairing with Coffee or Tea
There’s something undeniably comforting about enjoying a red velvet pound cake alongside your favorite brew. Whether you’re a coffee aficionado or a tea lover, this dessert enhances your beverage experience. Try pairing it with a rich espresso or a fragrant chai tea. The creamy notes of the frosting complement the complex flavors, creating a delightful balance. For a fun twist, consider serving it as a brunch item with a frothy latte or vibrant herbal tea, sparking conversations and connections at the table.
Creative Presentation Ideas
Elevate your red velvet pound cake by experimenting with presentation! Consider slicing the cake into heart shapes for a romantic touch or serving it in individual portions tucked into whimsical cupcake liners. Drizzle extra cream cheese frosting on top and sprinkle with edible glitter or fresh berries for a pop of color. Perhaps a little mint sprig can add a refreshing touch!
For more inspiration, check out creative cake decorating tips on platforms like Food Network or Martha Stewart. Your cake will not only taste divine but be a visual feast as well!
Tips for making perfect Red Velvet Pound Cake
Importance of ingredient temperature
When crafting the perfect red velvet pound cake, consistency is key, and that begins with your ingredients. Ensure that your butter and eggs are at room temperature. This helps in creating an even batter, allowing for better incorporation of air, which is essential for that light and fluffy texture. If you’re short on time, a quick tip is to put cold eggs in a bowl of warm water for about 10 minutes.
Best practices for baking times
Baking is as much an art as it is a science. Since every oven is different, it’s crucial to check your cake for doneness starting at the minimum baking time. A toothpick inserted into the center should come out clean or with a few moist crumbs. For the most consistent results, consider using an oven thermometer to avoid temperature discrepancies. For more detailed baking tips, check out this guide on timing and temperatures to ensure your red velvet pound cake is perfectly baked each time.
How to store leftovers
If you find yourself with any leftover cake (though it might not last long), proper storage is essential. Wrap the cake tightly in plastic wrap or aluminum foil and store it at room temperature for up to three days. For longer storage, consider freezing it. Simply slice the cake, wrap it individually, and store in an airtight container. When you’re ready to enjoy, let it thaw at room temperature before indulging.
With these tips, you’re well on your way to baking a stunning red velvet pound cake that will impress your friends and family! Happy baking!
Time details for Red Velvet Pound Cake
Preparation time
Getting started on your red velvet pound cake is a breeze! Allocate about 20 minutes for preparation. You’ll gather your ingredients, which include flour, sugar, butter, eggs, and that distinct red food coloring that gives this cake its signature hue. If you want a foolproof guide on cake baking basics, consider checking out resources from the American Cake Decorating Association.
Baking time
Once your batter is ready, pour it into your prepared loaf pan and pop it into the oven. The baking time will be around 50 to 60 minutes. Keep an eye on it during the last few minutes; the smell is irresistible, and you’ll want to ensure it doesn’t overbake.
Cooling and frosting time
After your red velvet pound cake comes out of the oven, let it cool in the pan for about 10 to 15 minutes before transferring it to a wire rack. This cooling period is crucial to avoid sogginess. You’ll want to let it cool completely before slathering on that delicious cream cheese frosting—give it another 30 minutes or so. The result? A perfectly moist cake that’s ready to impress!
Nutritional information for Red Velvet Pound Cake
Calories and serving size
When you indulge in a slice of red velvet pound cake, it’s essential to be mindful of your portion sizes. Typically, a generous serving (about 1/12 of the cake) contains approximately 350 calories. While it’s a treat, enjoying it in moderation can fit into a balanced diet.
Breakdown of key nutrients
This delicious cake not only pleases your palate but also offers some key nutrients, including:
- Carbohydrates: About 50 grams per serving, providing energy for your day.
- Fats: Roughly 15 grams, which can help keep you satisfied.
- Protein: Around 5 grams, aiding in muscle repair and growth.
Incorporating nutrient-dense ingredients, such as butter and eggs, enhances the flavor and texture of your red velvet pound cake. For more detailed nutritional information, check out resources like USDA FoodData Central and Nutrition.gov. Remember, moderation is key; savor each bite!
FAQs about Red Velvet Pound Cake
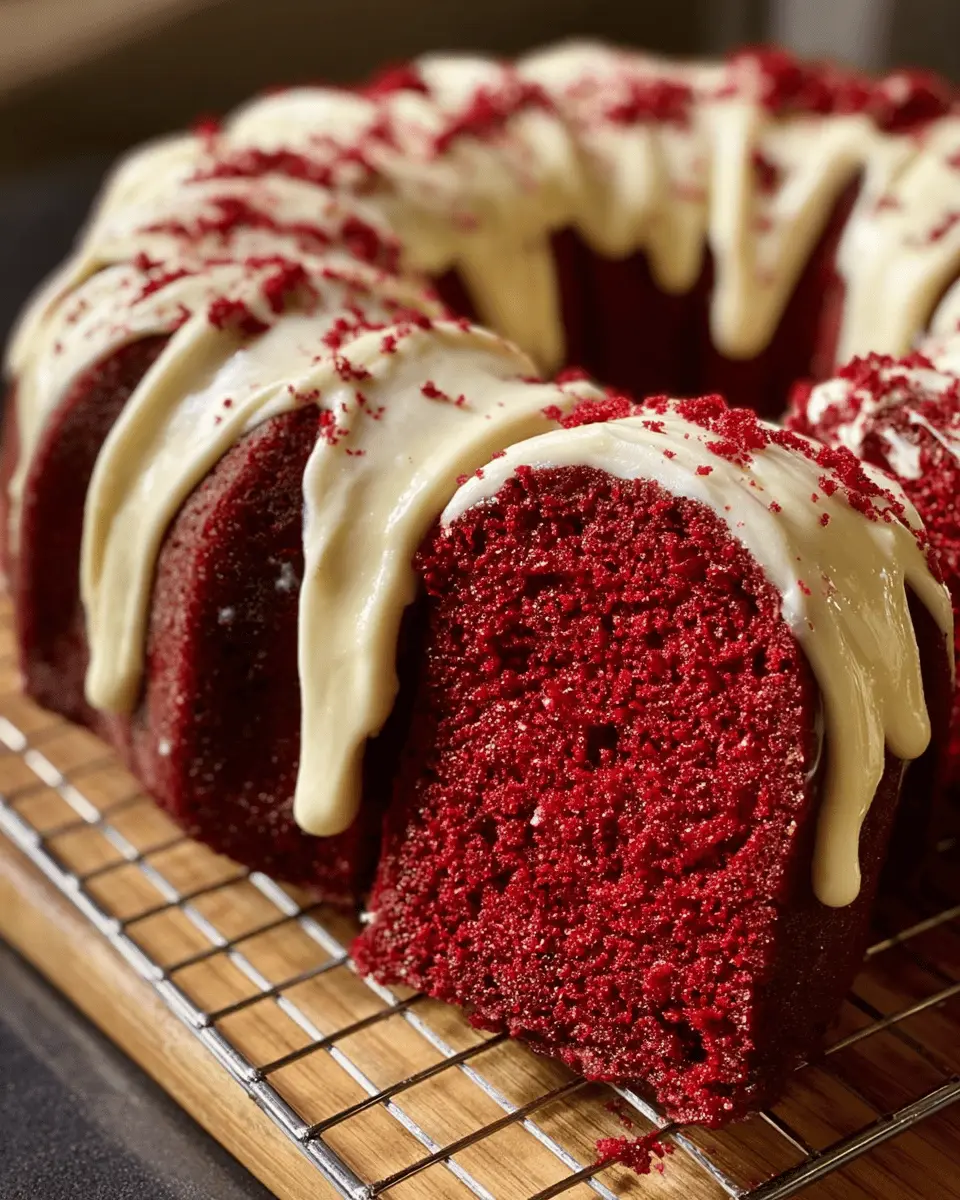
What is the secret to a vibrant red color?
Achieving that signature vibrant red in your red velvet pound cake is all about the right ingredients and a little kitchen magic. Traditionally, cocoa powder is used, and when combined with an acidic ingredient like buttermilk or vinegar, it enhances the red hue. You can also opt for high-quality liquid food coloring if you’re striving for an even deeper color. Just a few tablespoons can make a big difference! Remember, the texture of your cake can also impact color perception, so ensure it’s perfectly baked.
Can I use substitute ingredients in this recipe?
Absolutely! Life happens, and sometimes you need to tweak a recipe. Here are some substitute ingredients you can consider:
- Flour: Use a gluten-free blend if you prefer.
- Buttermilk: Make your own by mixing milk with vinegar or lemon juice.
- Butter: If you’re looking for a dairy-free option, coconut oil works wonders.
- Cocoa powder: Dark cocoa powder can give a richer flavor, but don’t overdo it—balance is key.
For a full guide on baking substitutions, check out this resource.
How long does the pound cake last?
When stored correctly, your red velvet pound cake should last about 4 to 5 days at room temperature, wrapped tightly in plastic wrap. If you want it to last longer, pop it in the fridge for up to a week. You can even freeze it! Just slice it beforehand and wrap each piece individually in plastic, then store in an airtight container. It can be kept frozen for about three months. Just thaw at room temperature before devouring!
Keeping these tips in mind will help you bake and enjoy your red velvet pound cake to the fullest! And if you have any other questions, feel free to ask!
Conclusion on Red Velvet Pound Cake
In conclusion, this red velvet pound cake is bound to be a star at your next gathering. The rich, velvety texture and the tangy cream cheese frosting create a delightful contrast that will leave your guests asking for seconds. Plus, the vibrant color adds a festive touch to any celebration.
Here’s why this cake will be a hit:
- Versatile Appeal: It caters to various taste preferences, making it suitable for birthdays, holidays, or casual get-togethers.
- Easy to Make: With straightforward steps, even novice bakers can impress their friends.
- Visual Impact: The eye-catching hue of the cake elevates your dessert table.
Consider serving it alongside a refreshing lemon or berry-infused drink for an extra layer of flavor. Whether you’re celebrating a milestone or just want to indulge, this cake is your go-to delight! For more sweet inspirations, check out The Spruce Eats for additional dessert ideas.
PrintRed Velvet Pound Cake: The Best Cream Cheese Frosting Recipe
Indulge in the rich and velvety flavors of Red Velvet Pound Cake topped with a luscious Cream Cheese Frosting. Perfect for any occasion!
- Prep Time: 20 minutes
- Cook Time: 60-70 minutes
- Total Time: 90 minutes
- Yield: 12 servings
- Category: Dessert
- Method: Baking
- Cuisine: American
- Diet: Vegetarian
Ingredients
- 2 cups all-purpose flour
- 1 1/2 cups granulated sugar
- 1 cup unsalted butter, softened
- 4 large eggs
- 1 cup buttermilk
- 2 tablespoons cocoa powder
- 1 tablespoon red food coloring
- 1 teaspoon vanilla extract
- 1 teaspoon baking powder
- 1/2 teaspoon baking soda
- 1/2 teaspoon salt
Instructions
- Preheat the oven to 350°F (175°C) and grease a bundt pan.
- In a mixing bowl, cream together the butter and sugar until light and fluffy.
- Add the eggs one at a time, beating well after each addition.
- Mix in the buttermilk, vanilla extract, and red food coloring.
- In another bowl, combine the flour, cocoa powder, baking powder, baking soda, and salt.
- Gradually add the dry ingredients to the wet ingredients, mixing until just combined.
- Pour the batter into the prepared bundt pan and smooth the top.
- Bake for 60-70 minutes or until a toothpick inserted in the center comes out clean.
- Let cool in the pan for 10 minutes before transferring to a wire rack to cool completely.
Notes
- For best results, use room temperature ingredients.
- For a richer flavor, let the cake sit overnight before frosting.
Nutrition
- Serving Size: 1 slice
- Calories: 350
- Sugar: 30g
- Sodium: 400mg
- Fat: 20g
- Saturated Fat: 12g
- Unsaturated Fat: 6g
- Trans Fat: 0g
- Carbohydrates: 40g
- Fiber: 2g
- Protein: 4g
- Cholesterol: 90mg