Introduction to Martha Washington Candies
A Brief History of Martha Washington Candies
Martha Washington Candies, often regarded as the epitome of homemade confections, have a delightful history rooted in American tradition. Named after the first lady herself, these candies became popular in the late 19th century, likely inspired by Martha Washington’s love for culinary arts. The classic recipe blends chocolate with creamy fillings, showcasing a rich variety of flavors, making them a sought-after treat during festive seasons and gatherings.
Legend has it that Martha Washington crafted these candies using nuts, dried fruits, and rich chocolate, perfect for entertaining distinguished guests at the presidential estate. Their luxurious nature made them a hit long before the mass production of candy began; in fact, a 2016 study found that artisanal candies were experiencing a renaissance among consumers who crave authentic, handmade flavors. For those interested in diving deeper, the history of candy in America can be explored here.
Why These Candies Are a Hit Among Young Professionals
Have you ever brought homemade treats to the office? It’s a game changer. Martha Washington Candies provide the perfect balance of nostalgia and sophistication, making them ideal for young professionals looking to impress their colleagues.
Here’s why they resonate so well:
-
Homemade Charm: In a fast-paced world, the process of making these candies can be a form of relaxation. The act of creating something from scratch is rewarding, offering a small break from busy schedules.
-
Versatile Flavors: With options like coconut, peanut butter, and dark chocolate, Martha Washington Candies cater to various palates. You can tweak ingredients to suit dietary preferences, making them a hit at gatherings—whether you’re celebrating with friends or holding a casual office event.
-
Social Media Appeal: In an age of Instagram and TikTok, beautifully crafted candies can instantly boost your online presence. Share your creation with vibrant images, and watch the likes roll in!
-
Connection and Sharing: These candies foster connections, whether you’re gifting them or sharing them at events. They’re not just treats; they tell a story of effort and care that everyone can appreciate.
So, ready to dive into making your own Martha Washington Candies? Your colleagues won’t forget the culinary touch you bring to the next gathering. It’s a slice of history wrapped in chocolate goodness!
Ingredients for Martha Washington Candies
Main Ingredients Explained
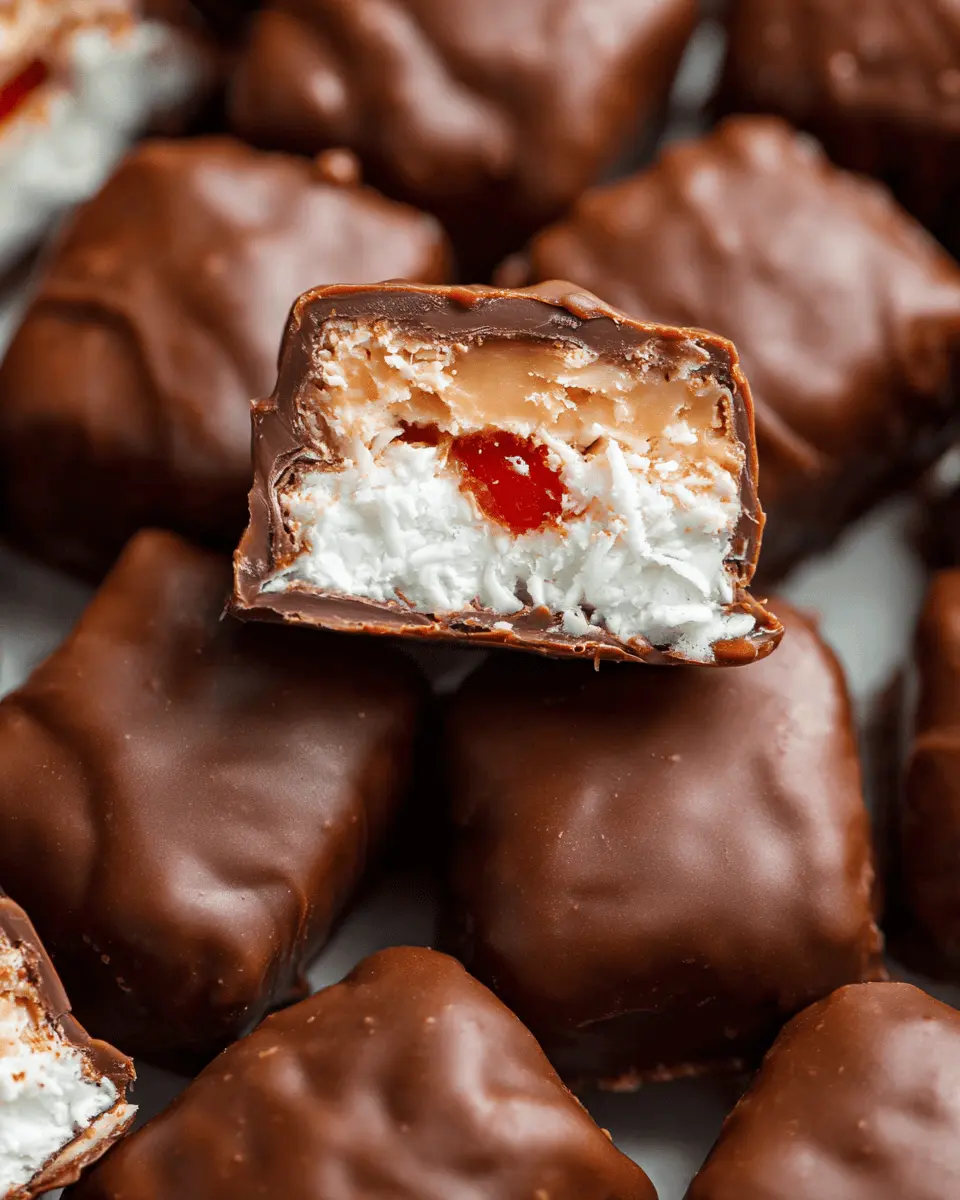
When it comes to Martha Washington Candies, the star of the show is definitely the creamy coconut filling. Here’s what you’ll need:
- Sweetened shredded coconut: This gives the candies their signature texture.
- Cream cheese: For that rich, indulgent creaminess.
- Powdered sugar: It adds sweetness and binds the mixture together.
- Vanilla extract: A hint of vanilla enhances the overall flavor.
- Milk chocolate: The perfect finish for coating these delightful treats.
It’s a simple lineup that combines to create a delightful taste experience. You might want to check out The Spruce Eats for more tips on ingredient selection!
Optional Ingredients for Customization
Want to put your spin on these Martha Washington Candies? Here are some fun ideas:
- Finely chopped nuts: Almonds or pecans can add a delightful crunch.
- Almond extract: For a slightly different aromatic note.
- Dried fruit: Consider adding bits of dried cherries or cranberries for a fruity twist.
- Dark chocolate: Swap out milk chocolate for a bolder flavor.
Feel free to explore these alternatives and make the recipe your own! By experimenting, you might just create your new favorite treat.
Step-by-Step Preparation of Martha Washington Candies
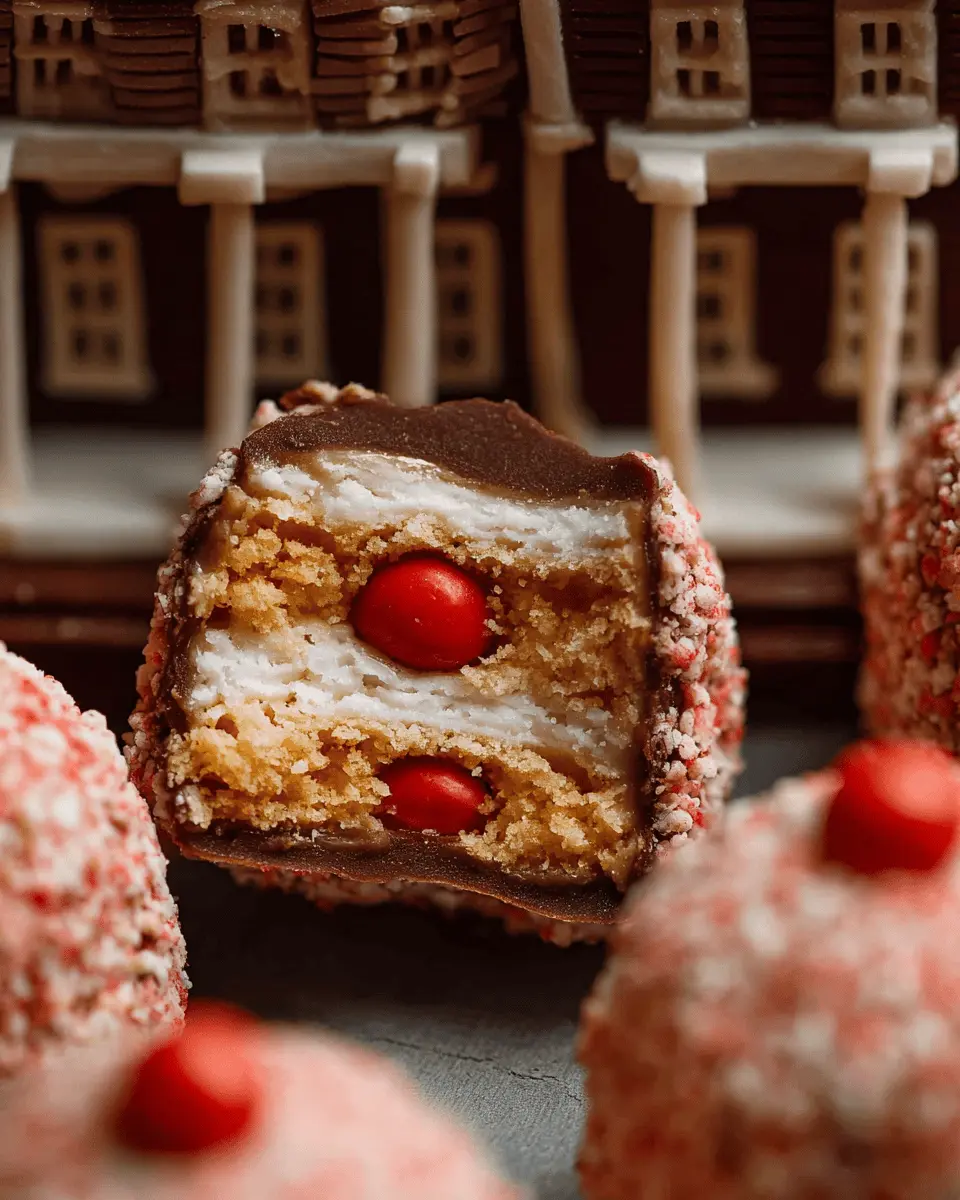
Creating your own Martha Washington Candies is a delightful way to indulge in homemade treats. These chocolate-dipped, coconut-filled confections are perfect for any sweet tooth or festive gathering. Let’s embark on this sugary adventure with a straightforward guide to making these treats!
Gather your ingredients and tools
Before diving into the kitchen, it’s essential to have everything you need. Here’s what you should gather:
Ingredients:
- 1 cup sweetened shredded coconut
- 1 cup chopped cherries (maraschino work best!)
- 1 cup chopped pecans
- 1 cup powdered sugar
- 1 cup cream cheese, softened
- 1 teaspoon vanilla extract
- 2 cups semisweet chocolate chips (for coating)
Tools:
- Mixing bowl
- Spoon or spatula
- Baking sheet
- Parchment paper
- Refrigerator
- Double boiler or microwave-safe bowl (for melting chocolate)
You can find many of these items at your local grocery store or online retailers like Amazon. Ensuring you have everything on hand will make the process smoother and more enjoyable!
Mix the base ingredients
In a medium mixing bowl, combine your cream cheese and powdered sugar. Use a spoon or spatula to thoroughly mix them until you have a smooth consistency. This is the foundational layer of your Martha Washington Candies, so take your time to eliminate any lumps.
Next, add the vanilla extract into the mix. This brings an aromatic sweetness that enhances the overall flavor. The combination of cream cheese and powdered sugar will create a rich, creamy base that’s perfect for holding everything together.
Fold in the coconut, cherries, and pecans
It’s time to add in the delightful ingredients that make these treats special! Gently fold in the shredded coconut, chopped cherries, and pecans, mixing thoughtfully to ensure an even distribution. The coconut adds a tropical flair, while the cherries and pecans enhance the texture and flavor profile.
You might notice how colorful and inviting the mixture looks at this stage! As you blend, be sure not to overmix — you want to maintain some texture for that delightful bite.
Shape the mixture into bite-sized balls
Using your hands, scoop out small portions of the mixture and roll them into bite-sized balls. A size similar to a walnut or golf ball works perfectly, making them easy to pop into your mouth. Place each ball on a baking sheet lined with parchment paper to prevent sticking.
As you shape your Martha Washington Candies, you might think about how much fun this could be as a group activity. Inviting friends over to help shape the candies can make for a delightful evening!
Chill the shaped candies
Once all your balls are shaped and on the baking sheet, pop them into the refrigerator for at least an hour. Chilling helps firm up the mixture, making it easier to coat with chocolate later. While the candies chill, this is the perfect time to tidy up your kitchen!
Melt the candy coating
When your Martha Washington Candies are nice and firm, it’s time to melt the chocolate. You can use a double boiler or microwave-safed bowl — just ensure you melt them slowly to avoid burning. If using a microwave, heat in short bursts of 20 seconds, stirring in between until smooth.
Chocolate not only coats your candies but also adds a decadent finish. Dark chocolate provides a rich contrast to the sweet interior, while milk chocolate will lend a creamier profile.
Coat the candies and let them set
Now comes the fun part! Dip each chilled candy ball into the melted chocolate, ensuring they are fully coated. A fork works well for this task, allowing you to shake off any excess chocolate before placing them back on the parchment-lined baking sheet.
After coating all the candies, let them sit at room temperature or refrigerate until the chocolate has set properly. In just a couple of hours, you’ll have luscious Martha Washington Candies that are ready to be enjoyed!
Creating these delightful treats can be a fantastic way to impress friends at parties or to savor during your downtime. So, go ahead, indulge in these delectable Martha Washington Candies made with love! And if you’re looking for more sweet inspiration, check out Food Network for additional recipes and tips. Happy candy making!
Variations on Martha Washington Candies
Martha Washington Candies are a delightful treat that can be personalized in many fun ways. Whether you want to impress at a gathering or simply indulge your sweet tooth, here are some variations to consider.
Tropical Twist with Pineapple
Why not take your Martha Washington Candies on a tropical vacation? Adding chopped dried pineapple to the filling gives your candies a juicy kick that’s both refreshing and unique. The sweet and tangy pineapple pairs beautifully with the chocolate coating, making each bite a mini getaway. To enhance the tropical feel, consider rolling them in shredded coconut before dipping them in chocolate for an extra flavor layer.
Nut Variations: Almonds or Walnuts
Nuts can add amazing texture and flavor to your Martha Washington Candies. While the traditional recipe calls for pecans, why not switch it up? Try using almonds for a subtle crunch or walnuts if you’re in the mood for a nuttier flavor profile. Chopped nuts blended into the filling will give your candies that extra flair. Just remember, a little goes a long way—too many nuts can overwhelm the sweet filling.
Flavor Experiments: Adding Extracts or Spices
Have you ever thought about experimenting with different flavors in your Martha Washington Candies? A dash of vanilla or almond extract can elevate the taste in unexpected ways. For a spiced twist, consider adding a sprinkle of cinnamon or a hint of orange zest. These little adjustments take your candy-making to the next level!
Why stick with the classics when there are so many ways to customize? Give these ideas a try and watch your homemade treats impress anyone lucky enough to indulge! For more ideas on flavor combinations, check out this resource for culinary inspiration.
Cooking Tips and Notes for Martha Washington Candies
How to Achieve the Perfect Coating
Creating the perfect coating for Martha Washington Candies requires a bit of patience and practice. First, make sure your chocolate is tempered properly. This ensures a shiny finish and a firm snap when you bite into the candy. Use a thermometer to keep the chocolate between 88°F and 90°F for dark chocolate, or slightly lower for milk chocolate. To help achieve a smooth coating:
- Use a fork or dipping tool: This allows excess chocolate to drip off, giving a thin and even layer.
- Let the chocolate set: After dipping, place the candies on parchment paper and allow them to chill. This prevents smudging and gives time for the chocolate to harden.
Maintaining the Right Consistency in Your Mixture
Getting the right consistency for your Martha Washington Candies filling is crucial for a delightful treat. Aim for a smooth, pliable mixture by following these steps:
- Watch your measurements: Too much powdered sugar can make the filling too dry. Start with smaller amounts and adjust as needed.
- Incorporate a fat: A dash of butter or cream helps create a creamy texture, making it easier to shape your candies.
- Mix well: Use an electric mixer if possible, to achieve that light and airy texture that melts in your mouth.
For more extensive tips on candy making, check out reliable resources like The Spruce Eats for expert advice and recipes. Happy candy making!
Serving Suggestions for Martha Washington Candies
Presentation Ideas for Gatherings
When showcasing Martha Washington Candies at your next gathering, presentation can elevate their appeal. Try placing them in decorative candy dishes or on a tiered dessert stand for an elegant touch. Adding edible flowers or greenery around the tray not only enhances the visual appeal but also adds freshness to the display. Personalized tags with flavor descriptions can engage guests, creating a delightful conversation starter.
Perfect Pairings with Drinks and Snacks
These delectable treats pair wonderfully with a variety of beverages. Consider serving them alongside:
- Coffee or Tea: The rich flavors of Martha Washington Candies complement a cup of your favorite brew, making for a cozy pairing.
- Sparkling Water or Lemonade: The acidity and effervescence will balance the sweetness of the candies beautifully.
- Cheese and Crackers: A cheese board with soft cheese like Brie or tangy goat cheese can enhance the experience, creating a delightful contrast.
Personalizing these pairings not only pleases the palate but also allows you to share the joy of homemade treats with friends. Celebrate the moment and enjoy!
For more ideas on elegant presentations, check out this resource for additional inspiration.
Time Breakdown for Martha Washington Candies
Preparation Time
Making Martha Washington Candies is a delightful process, and it takes about 25 minutes to prep your ingredients and get everything ready. Start by gathering your tools and checking your pantry is stocked with essentials like sweetened condensed milk, coconut, and pecans. Having everything organized can make your cooking experience smoother.
Cooking Time
Once you’re set, the actual cooking time is roughly 20 minutes. You’ll be combining ingredients and shaping the candies, which is where the fun really begins! If you find yourself distracted by a good podcast, don’t worry—this part can be somewhat forgiving.
Total Time
In total, you’re looking at around 45 minutes from start to finish before you bite into that sweet, creamy goodness. If you’re preparing treats for a gathering, consider making your Martha Washington Candies a day in advance. This lets the flavors settle and enhances the taste!
Feeling inspired? Check out this guide for more tips on candy making!
Nutritional Facts for Martha Washington Candies
When preparing Martha Washington Candies, understanding their nutritional profile can help you enjoy them guilt-free. Let’s break it down.
Calories per serving
Each serving of these delightful candies contains about 100 calories. This makes them a perfect little treat when you need a sweet fix without going overboard.
Carbohydrates and sugars content
These Martha Washington Candies primarily consist of carbohydrates, roughly 15 grams per serving, with about 10 grams coming from sugars. While that’s a good sugar boost, moderation is key if you’re keeping an eye on your intake.
Other nutritional information
- Fat: Approximately 4 grams
- Protein: Around 1 gram
- Fiber: Minimal, reflecting the candy’s sweetness.
For those curious about healthy sweets, it’s essential to balance occasional treats with whole-foods and maintain an active lifestyle. If you want some creative ideas on reducing sugar while enriching the taste, check out the American Heart Association’s guidelines on managing sugar intake.
Enjoying Martha Washington Candies once in a while adds joy to your days—just remember to savor each bite!
FAQs about Martha Washington Candies
Can I freeze Martha Washington Candies?
Absolutely! Freezing Martha Washington Candies is a fantastic way to extend their shelf life. To do this, simply place them in an airtight container or freezer bag. Make sure to layer parchment paper between the candies to avoid sticking. They can last up to three months in the freezer. Just remember to thaw them in the refrigerator overnight before enjoying.
How long do these candies last?
When stored properly in an airtight container at room temperature, Martha Washington Candies typically last for about one to two weeks. If you refrigerate them, you can extend their freshness up to a month. However, I recommend consuming them sooner rather than later to enjoy their delightful texture and flavor!
Can I use different kinds of nuts?
Definitely! While traditional recipes often call for pecans or walnuts, feel free to get creative with the nuts in your Martha Washington Candies. Almonds, hazelnuts, or even macadamia nuts can add a unique twist. Just be sure to chop them finely so they meld well with the rest of the ingredients. Make it your own!
Why Martha Washington Candies?
These candies are not just a treat; they are a nostalgic nod to American history. Named after the spouse of George Washington, they embody sweetness and tradition. If you want to dive deeper into the history, you might want to check out resources like History.com.
Engaging with Martha Washington Candies is not just about the recipe; it’s about creating delicious memories. So whip up your batch and enjoy every moment!
Conclusion on Martha Washington Candies
Recap of the joy of making candies at home
Making Martha Washington Candies is more than just a tasty endeavor; it’s an experience filled with joy and creativity! The process of combining coconut and chocolate can transport you back to simpler times when homemade treats were cherished. Each step—from mixing to shaping—lets you infuse your personality into these delightful bites. When you share them with friends or enjoy them yourself, you’re not only sharing a treat but creating lasting memories.
As you embark on this sweet adventure, consider involving family or friends. The laughter and camaraderie can turn candy making into a truly special occasion. If you’re looking for inspiration, check out recipe ideas on sites like Food Network and Martha Stewart for more delightful candy options. Happy candy making!
PrintMartha Washington Candies: Easy Indulgence for Homemade Treats
Martha Washington Candies are a delicious blend of chocolate and coconut that make for an easy homemade treat.
- Prep Time: 15 minutes
- Cook Time: 5 minutes
- Total Time: 50 minutes
- Yield: 24 candies
- Category: Desserts
- Method: No-bake
- Cuisine: American
- Diet: Vegetarian
Ingredients
- 2 cups shredded coconut
- 1 cup powdered sugar
- 1/4 cup unsweetened cocoa powder
- 1/2 cup sweetened condensed milk
- 1 teaspoon vanilla extract
- 2 cups chocolate chips
- 1 tablespoon coconut oil
Instructions
- In a bowl, mix together shredded coconut, powdered sugar, cocoa powder, sweetened condensed milk, and vanilla extract until combined.
- Form mixture into small balls and place on a baking sheet lined with parchment paper.
- Freeze for about 30 minutes until firm.
- In a microwave-safe bowl, melt chocolate chips and coconut oil together, stirring until smooth.
- Dip each frozen coconut ball into the chocolate, allowing excess to drip off.
- Return to the baking sheet and refrigerate until chocolate is set.
Notes
- For added flavor, try adding chopped nuts to the coconut mixture.
- Store any leftovers in an airtight container.
Nutrition
- Serving Size: 2 candies
- Calories: 100
- Sugar: 12g
- Sodium: 10mg
- Fat: 6g
- Saturated Fat: 4g
- Unsaturated Fat: 2g
- Trans Fat: 0g
- Carbohydrates: 12g
- Fiber: 1g
- Protein: 1g
- Cholesterol: 0mg