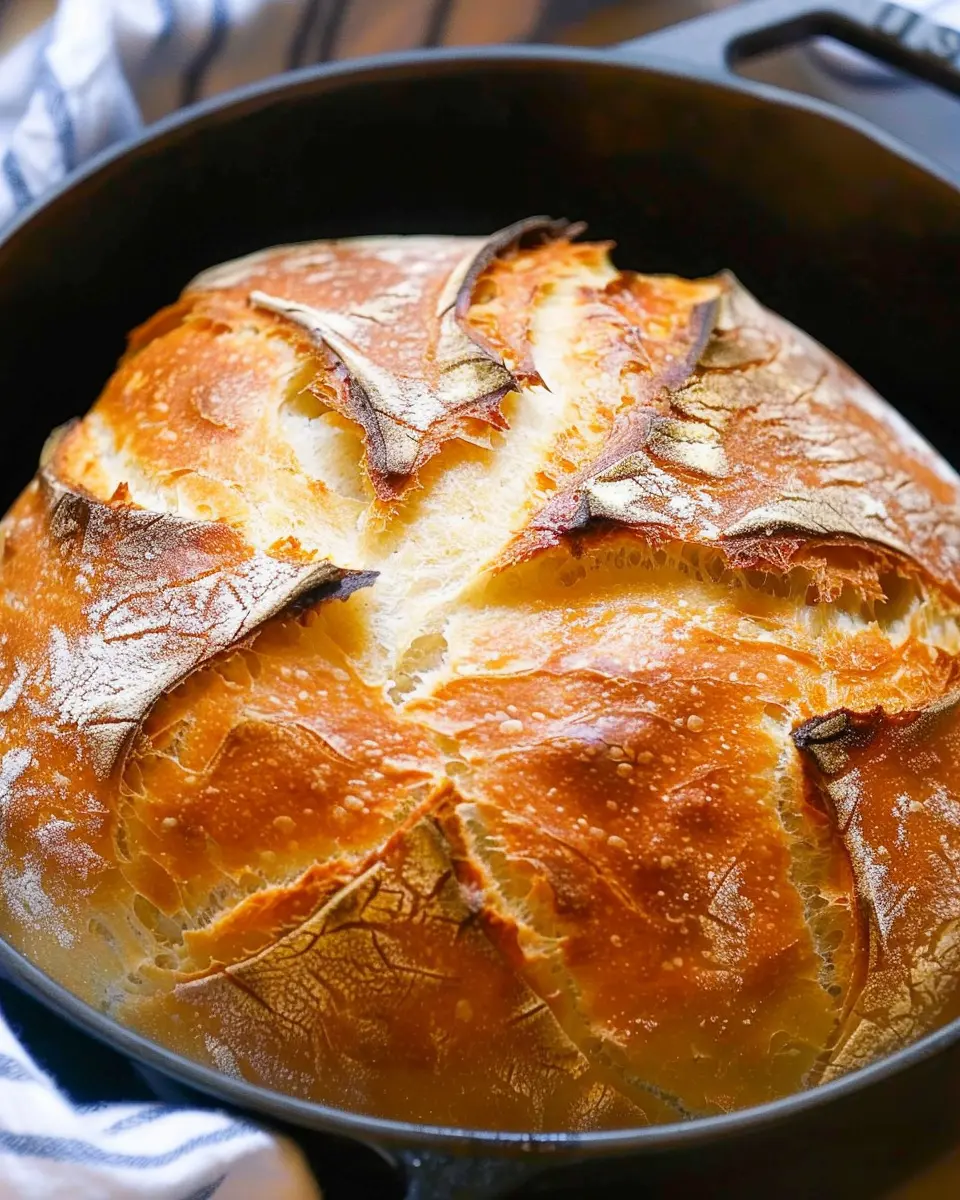
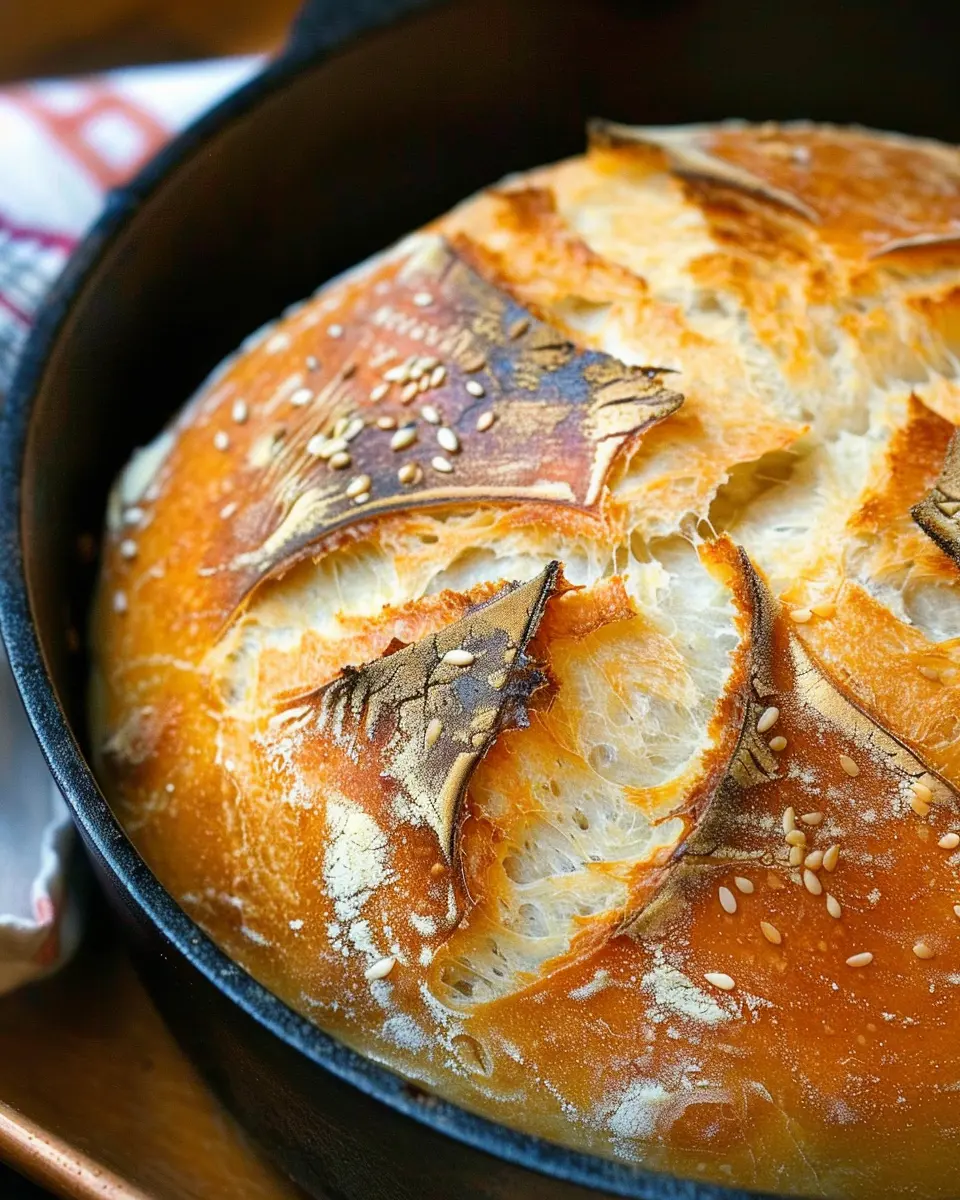
Introduction to Dutch Oven French Bread
When it comes to homemade bread, the magic of fresh loaves baking in your kitchen can never be understated. For young professionals juggling demanding schedules, learning to make Dutch Oven French Bread can be a delightful game-changer. Imagine the aroma wafting through your apartment, a warm crusty masterpiece cooling on your counter, ready for that perfect avocado toast or an elegant dinner party.
Why Homemade Bread is a Game-Changer for Young Professionals
Let’s face it—between the nine-to-five grind and social schedules that can fill up your calendar, taking the time to bake might seem daunting. However, the benefits are more significant than the time invested:
-
Budget-Friendly: Baking your own bread can save you a surprising amount on groceries. Artisan loaves often sell for $5 or more. With just a little flour, yeast, and water, you can make several loaves of delicious French bread for a fraction of the cost.
-
Health Benefits: The ability to control ingredients allows you to create a healthier alternative. You can avoid preservatives and additives present in store-bought bread and incorporate whole grains when you want to boost nutrition.
-
Satisfaction Guaranteed: There’s something incredibly satisfying about making your own food from scratch. According to the American Psychological Association, engaging in creative activities like baking can improve your mood and increase feelings of competence.
-
Time Efficiency: While the dough does require some rest periods, the hands-on time is quite minimal. Plus, most of the long waits can be filled with other tasty endeavors or simply unwinding after a long day.
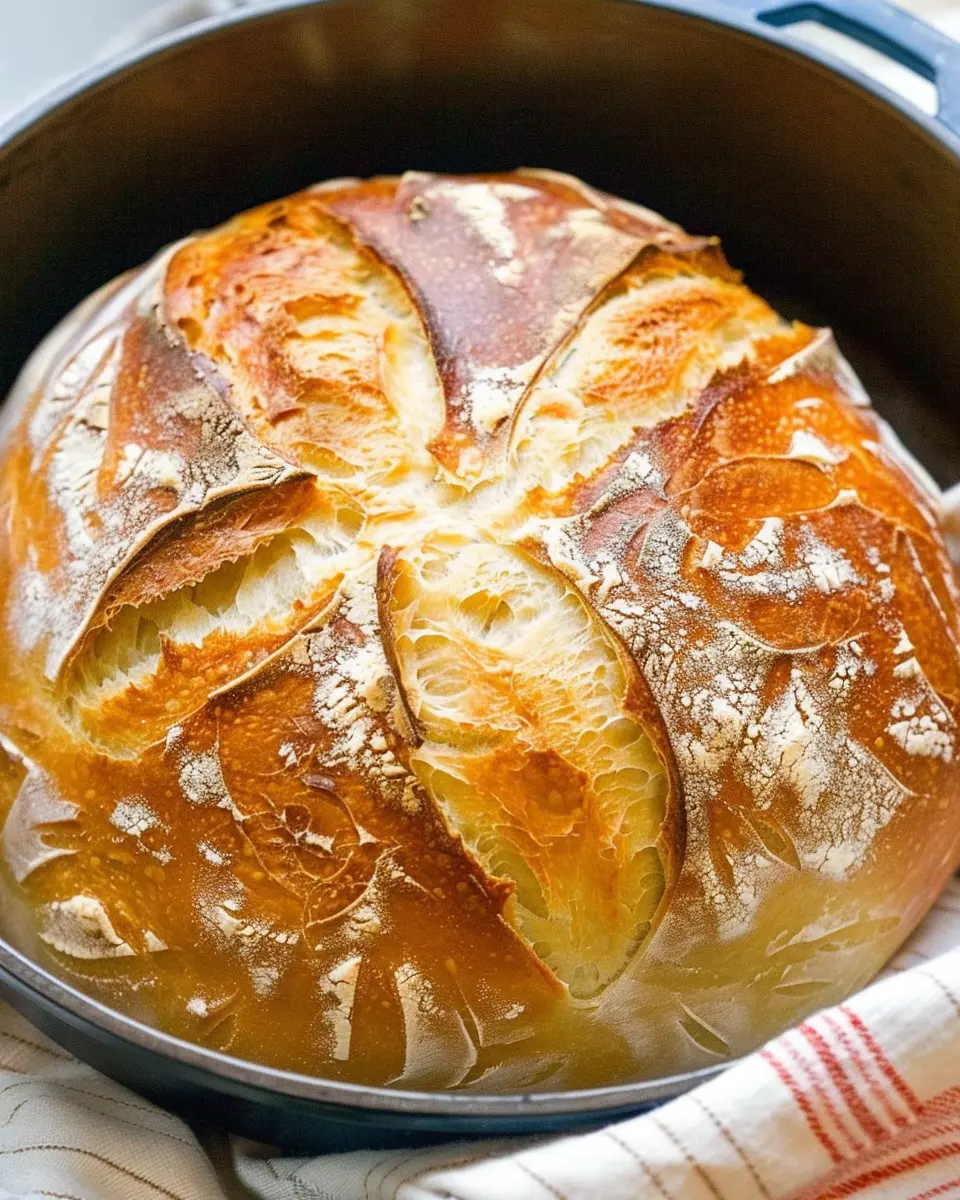
The Allure of Dutch Oven Baking
Dutch Oven French Bread not only boasts a crispy crust and airy interior but also requires very little specialized equipment. Do you own a cast-iron pot? If so, you already have what you need to get started. Plus, there’s something to be said about the slow-cooking magic that a Dutch oven creates, trapping steam and ensuring your bread rises perfectly.
Ready to give it a shot? Stay tuned for the full Dutch Oven French Bread recipe! And if you’re eager to dive deeper into the world of baking, consider checking out resources from the King Arthur Baking Company for more tips and techniques. Trust me; your taste buds will thank you.
Ingredients for Dutch Oven French Bread
Essential ingredients for a classic loaf
Making Dutch Oven French Bread at home is a rewarding experience, and the ingredients are surprisingly simple. Here’s what you’ll need for that perfect crusty loaf:
- Bread Flour: This is essential for getting the right texture. Choose a high-protein bread flour to give your bread the necessary structure.
- Water: Use warm water to activate the yeast properly. Aim for about 110°F (43°C) for optimal yeast growth.
- Instant Yeast: This yeast works quickly and doesn’t need to be proofed beforehand, making your life easier.
- Salt: A key flavor enhancer that also strengthens the dough.
- Sugar: Just a bit forms a lovely crust and helps balance out the savory notes.
Tips for choosing the right bread flour
When it comes to Dutch Oven French Bread, not all flours are created equal. Look for bread flour labeled with at least 12-14% protein content. This higher protein level will help develop gluten, resulting in that signature chewiness. You might even think about experimenting with whole wheat flour for added flavor and nutrition. For premium options, consider brands like King Arthur Flour or Bob’s Red Mill, which are renowned for their quality.
With a few essential ingredients and the right flour, you’re well on your way to baking a delicious loaf that will impress friends and family alike!
Step-by-step Preparation of Dutch Oven French Bread
Creating your own Dutch Oven French Bread may seem a bit daunting at first, but trust me, it’s worth every minute. Once you taste that crusty exterior and the soft, airy interior, you’ll be hooked. Let’s break this down into simple, easy-to-follow steps.
Mix the dough
Begin by gathering your ingredients: all-purpose flour, yeast, salt, and warm water. In a mixing bowl, combine about 3 cups of flour with 2 teaspoons of salt and 1 packet of active dry yeast. Consider opting for unbleached flour for a more authentic flavor. Now, slowly add around 1 ¼ cups of warm water. Mix it all with a wooden spoon or your hands until a shaggy dough forms. That’s it for the mixing part—no need for fancy gadgets here!
Knead the dough
Once your dough is mixed, it’s time for some hand therapy: kneading! Transfer the dough onto a lightly floured surface and knead it for about 8-10 minutes. You should see a smooth, elastic texture develop. If you’re new to kneading, think of this as giving your dough a little workout! If you find it too sticky, sprinkle a tad more flour as needed, but don’t overdo it.
First rise
After kneading, shape your dough into a ball and place it in a greased bowl, turning it to coat the surface in oil. Cover the bowl with a clean kitchen towel or plastic wrap and set it aside in a warm spot. Allow it to rise for about 1-2 hours, or until it doubles in size. You can preheat your oven to 200°F and then turn it off to create a cozy environment for your dough to rise. For a more in-depth look, check out this guide on dough rising techniques.
Shape the loaf
Once your dough has risen, lightly punch it down to release the air. Now comes the fun part: shaping! Transfer the dough to a floured surface and gently stretch and fold it into a rectangular shape, then roll it tightly from one end to the other to form a loaf. Tuck the ends underneath to create a smooth top.
Second rise
After shaping, you’ll want to let your loaf have its second rise. Place it seam side down in a proofing basket, or a bowl lined with a floured cloth. Cover it again and let it rise for another 30-60 minutes. During this time, preheat your oven to 450°F, placing your Dutch oven inside to heat as well.
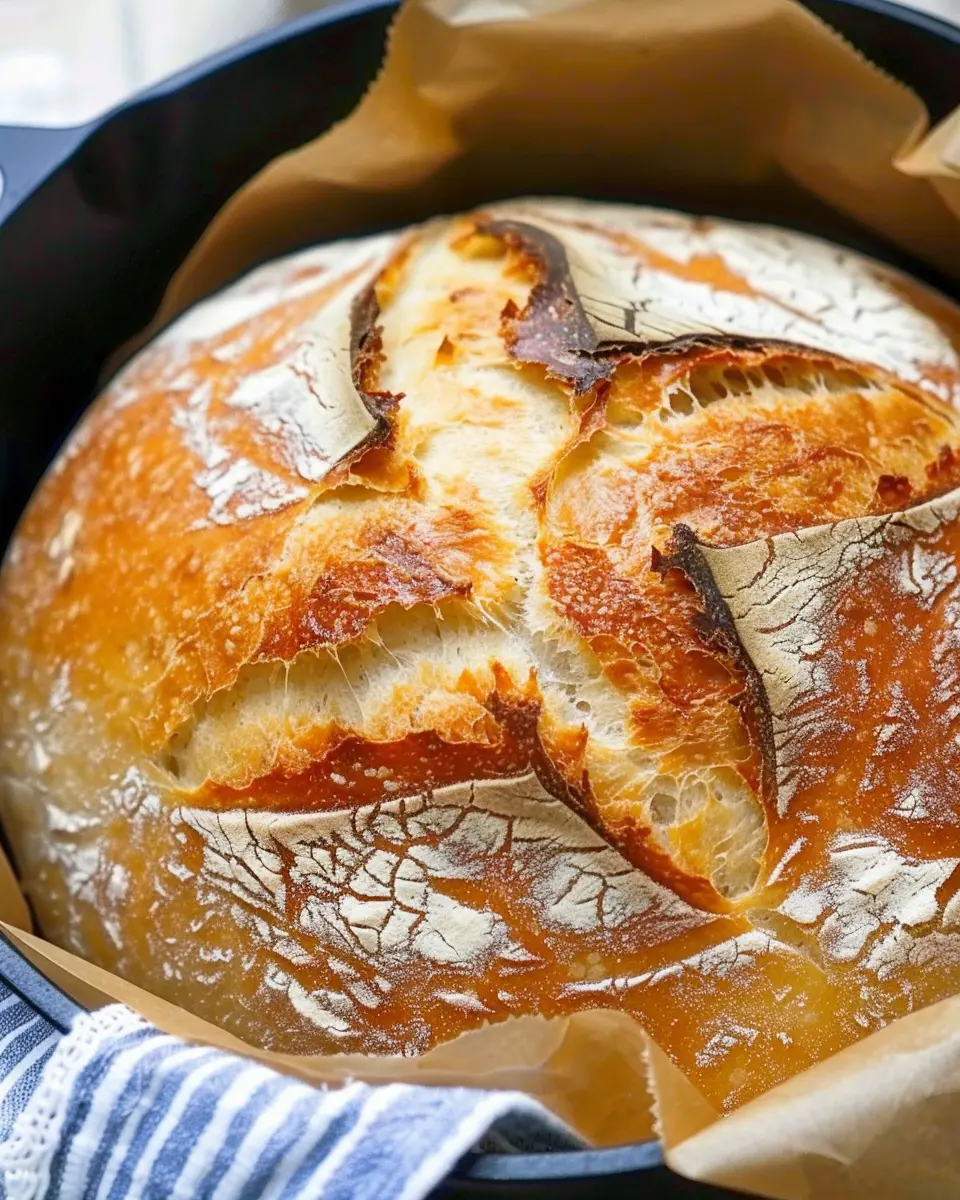
Slash and flour
This is where we get serious about the presentation! Once your dough has risen again, carefully flip it onto a piece of parchment paper for easy transferring into the pot. Using a sharp knife or a bread lame, make a few slashes on the surface—this allows for controlled steam release while baking. Dust the top lightly with flour to give it that classic look.
Bake
Now, for the grand finale! Carefully remove the preheated Dutch oven from the oven (watch out, it’s hot!). Lift the parchment with the loaf and gently place it inside. Cover it with the lid and bake for 30 minutes. After that, remove the lid and bake for an additional 15-20 minutes until the crust is a delightful golden brown. Don’t forget to turn the pan if it’s baking unevenly!
Cool and serve
Once out of the oven, transfer your loaf to a cooling rack and resist the urge to slice it too soon—let it cool for at least 30 minutes! This is crucial for achieving that perfect airy crumb. When you’re ready, slice into your beautiful Dutch Oven French Bread and enjoy it fresh with butter, or serve it alongside your favorite turkey bacon or chicken ham sandwich.
Remember, practice makes perfect! The more you bake, the more you’ll discover what works best for you and your kitchen. Happy baking!
Variations on Dutch Oven French Bread
Creating a delightful loaf of Dutch Oven French Bread is like having a blank canvas in your kitchen—perfect for culinary creativity! Here are a couple of exciting variations that can elevate your bread game to new heights.
Herb-infused Dutch Oven Bread
Why stick to plain bread when you can fill your home with the tantalizing aroma of herbs? Adding fresh or dried herbs can really amp up the flavor profile of your Dutch Oven French Bread. Consider these options:
- Rosemary and Thyme: A classic combination, these herbs add a fragrant earthiness.
- Basil and Oregano: Ideal for a twist that evokes Italian cuisine.
Simply mix about two tablespoons of your chosen herbs into the dry ingredients before you begin kneading. For a boost of flavor, steep the herbs in water or oil before adding them to the dough. Want to learn some tips on herb usage? Check out this guide on fresh herbs.
Whole Grain Dutch Oven Bread
If you’re looking to make your Dutch Oven French Bread a bit healthier, consider going the whole grain route! Using whole wheat flour not only increases the nutritional value but also provides a hearty texture.
- Substitution Ratio: You can replace about half of the white flour with whole wheat for added fiber and nutrients.
- Add-ins: Try mixing in seeds like flaxseeds or sunflower seeds for an extra crunch.
Keep in mind that whole grain bread may require a slightly longer resting time to achieve that perfect rise. Interested in the benefits of whole grains? Head over to this nutrition resource for more insights.
With these variations, your Dutch Oven French Bread can be tailored to your tastes and dietary preferences, making every loaf a unique experience. What flavors will you explore next?
Cooking Tips and Notes for Dutch Oven French Bread
Key Tips for Achieving the Perfect Crust
To create that crusty exterior we all love in Dutch Oven French Bread, preheat your Dutch oven while your dough is resting. This step ensures a hot environment that produces steam, crucial for a crispy crust. Additionally, scoring your dough with a sharp blade allows the bread to expand beautifully in the oven.
- Preheat the Dutch oven for at least 30 minutes.
- Use a clean, sharp knife for scoring.
- Consider adding a few ice cubes to the pot before covering to enhance steam.
Common Mistakes to Avoid
While making Dutch Oven French Bread can seem straightforward, some common pitfalls can lead to disappointment. Skipping the second rise? Big no-no! This step develops flavor and texture. Also, don’t underestimate the importance of using a kitchen scale to measure your flour accurately—too much can lead to dense bread.
- Always let the dough rise in a warm, draft-free area.
- Avoid opening the lid of the Dutch oven during baking, as this releases essential steam.
- Use a thermometer—ideally, your bread should reach an internal temperature of about 200°F (93°C) for perfect doneness.
By following these tips, you’ll elevate your baking game and enjoy homemade bread that’s as delightful to eat as it is to share! Looking for more bread recipes? Check out King Arthur Baking for inspiration and expert advice.
Serving Suggestions for Dutch Oven French Bread
Pairing with Soups and Stews
There’s nothing like a warm slice of Dutch Oven French Bread next to a cozy bowl of soup or stew. Imagine a rich, creamy tomato bisque or a hearty chicken stew warming you up on a chilly day. The crusty exterior and soft interior of the bread are perfect for dipping, soaking up every last drop of flavor.
Try these pairings:
- Minestrone soup: The robust flavors complement the bread’s richness.
- Beef stew: A classic combination that never goes out of style.
- Creamy potato soup: The bread adds a delightful contrast to the silky texture.
Creative Uses for Leftover Bread
If you find yourself with extra Dutch Oven French Bread, don’t let it go to waste! This bread can be transformed into delightful treats:
- Croutons: Cube the leftover bread, season, and bake until crispy for salads.
- Bread pudding: Mix with custard for a sweet, comforting dessert.
- French toast: Perfect for breakfast; just soak in an egg mixture and cook until golden.
These ideas not only minimize waste but also elevate your culinary skills. For more inspiration on using bread, check out The Bread Baker’s Apprentice. Happy baking!
Time Breakdown for Making Dutch Oven French Bread
Understanding the time commitment for making your own Dutch Oven French Bread can help you plan your baking day better! Here’s a simple breakdown:
Preparation time
Getting started takes just about 20 minutes. This includes gathering your ingredients—like flour, yeast, and salt—and mixing them into a dough. It’s the perfect time to pull in your favorite playlist or catch up on a podcast.
Rising time
You’ll want to let your dough rise for around 1 to 2 hours, allowing it to develop that perfect, airy texture. This can vary depending on your kitchen temperature; warmer environments speed up the process.
Baking time
The actual baking takes about 30 to 40 minutes. Preheating your Dutch oven is key here! You’ll love the aroma wafting through your home as it bakes.
Total time
Overall, you’re looking at a total of about 2 to 3 hours. It may seem long, but a large portion is hands-off time while the dough does its magic. Perfect for a leisurely weekend or any day you want to enjoy homemade bread.
For tips on optimizing your sourdough bread process, check out resources on The Bread Lab or King Arthur Baking. Happy baking!
Nutritional Facts for Dutch Oven French Bread
When it comes to homemade bread, enjoying it doesn’t have to come with a hefty price on your diet. Let’s break down the nutritional profile of this delightful Dutch Oven French Bread so you can savor every crusty bite without guilt.
Calories
A single slice of Dutch Oven French Bread contains approximately 80-100 calories. This makes it a versatile choice for everything from casual snacking to more elaborate meals without packing on excessive calories.
Carbohydrates
This delicious bread is rich in carbohydrates, offering about 15-20 grams per slice. While carbs often get a bad rap, they are an essential energy source, especially for those leading active lifestyles.
Fiber
You’ll find around 1-2 grams of fiber in each slice of Dutch Oven French Bread. While this may seem modest, every bit helps toward your daily fiber goals, aiding digestion and promoting fullness.
Protein
With about 2-3 grams of protein per slice, Dutch Oven French Bread complements various toppings, whether you’re adding turkey bacon, chicken ham, or enjoying it plain. Protein is essential for muscle repair and overall health, making this bread a well-rounded option.
For more in-depth nutritional guidance, you can visit the USDA’s FoodData Central. Be mindful of portions and enjoy your Dutch Oven French Bread as part of a balanced diet!
FAQs about Dutch Oven French Bread
Can I use all-purpose flour instead of bread flour?
Absolutely! While bread flour tends to give you a chewier texture due to its higher protein content, using all-purpose flour is perfectly fine for your Dutch Oven French Bread. The result might be slightly different in texture, but it will still be delicious. Just remember, if you opt for all-purpose flour, you might want to knead the dough a little longer to develop the gluten.
How do I store homemade bread?
Storing your freshly baked bread properly can keep it tasting great. Here are some handy tips:
- At Room Temperature: Store your Dutch Oven French Bread wrapped in a clean kitchen towel or in a paper bag to maintain crustiness.
- Longer Storage: For longer freshness, slice the bread and freeze it in a plastic bag. Just pop it in a toaster or let it thaw overnight when ready to enjoy!
For additional tips on bread storage, you might find this resource from the Bread Bakers Guild of America helpful.
What can I do if my dough is too sticky?
Sticky dough can be a challenge when making Dutch Oven bread. If you find your dough clinging to your hands or the counter:
- Add Flour Gradually: Sprinkle small amounts of flour onto your work surface and your hands while kneading.
- Use Oil: Lightly oil your hands to prevent sticking without adding too much flour.
Can I freeze Dutch oven bread?
Yes, you can definitely freeze your Dutch Oven French Bread! After the bread has completely cooled, slice it and wrap it well in plastic wrap or foil. Place the wrapped bread in a freezer-safe bag. It can last up to three months in the freezer. When you’re ready to enjoy, simply thaw it at room temperature or pop slices in the toaster for a quick reheating option.
Feel free to jump back and refer to these tips as you bake your masterpiece!
Conclusion on Dutch Oven French Bread
Embracing the Joy of Homemade Bread
Making Dutch Oven French Bread is not just about creating a delicious loaf; it’s about enjoying the entire process. From mixing the ingredients to the mouthwatering smell wafting through your kitchen, every step is a celebration.
Imagine the satisfaction of slicing into a crusty loaf that you made yourself – it’s both rewarding and delightful. Plus, homemade bread can elevate any meal or simply be enjoyed with a bit of butter.
So why wait? Dive into the world of bread-making, and let this be the start of something wonderful. Discover even more tips and inspiration on the delightful journey of baking bread here.
PrintDutch Oven French Bread: The Easy Way to Bake at Home
Create the perfect crusty bread with this easy Dutch oven method. Ideal for home bakers looking for a simple yet delicious recipe.
- Prep Time: 20 minutes
- Cook Time: 45 minutes
- Total Time: 18 hours 5 minutes
- Yield: 1 loaf
- Category: Bread
- Method: Baking
- Cuisine: French
- Diet: Vegetarian
Ingredients
- 3 cups all-purpose flour
- 1 1/4 teaspoons salt
- 1/4 teaspoon instant yeast
- 1 1/2 cups warm water
Instructions
- In a large bowl, mix together the flour, salt, and yeast.
- Add warm water and stir until a sticky dough forms.
- Cover the bowl and let it rest for 12-18 hours at room temperature.
- Once the dough has risen, preheat your Dutch oven in a hot oven.
- Shape the dough and place it in the hot Dutch oven.
- Cover and bake for 30 minutes, then uncover and bake for an additional 15 minutes.
- Remove from the oven and let cool on a wire rack before slicing.
Notes
- For a crispier crust, let the bread cool completely before slicing.
- You can add herbs or spices to the dough for extra flavor.
Nutrition
- Serving Size: 1 slice
- Calories: 150
- Sugar: 0g
- Sodium: 100mg
- Fat: 0.5g
- Saturated Fat: 0g
- Unsaturated Fat: 0g
- Trans Fat: 0g
- Carbohydrates: 30g
- Fiber: 1g
- Protein: 4g
- Cholesterol: 0mg