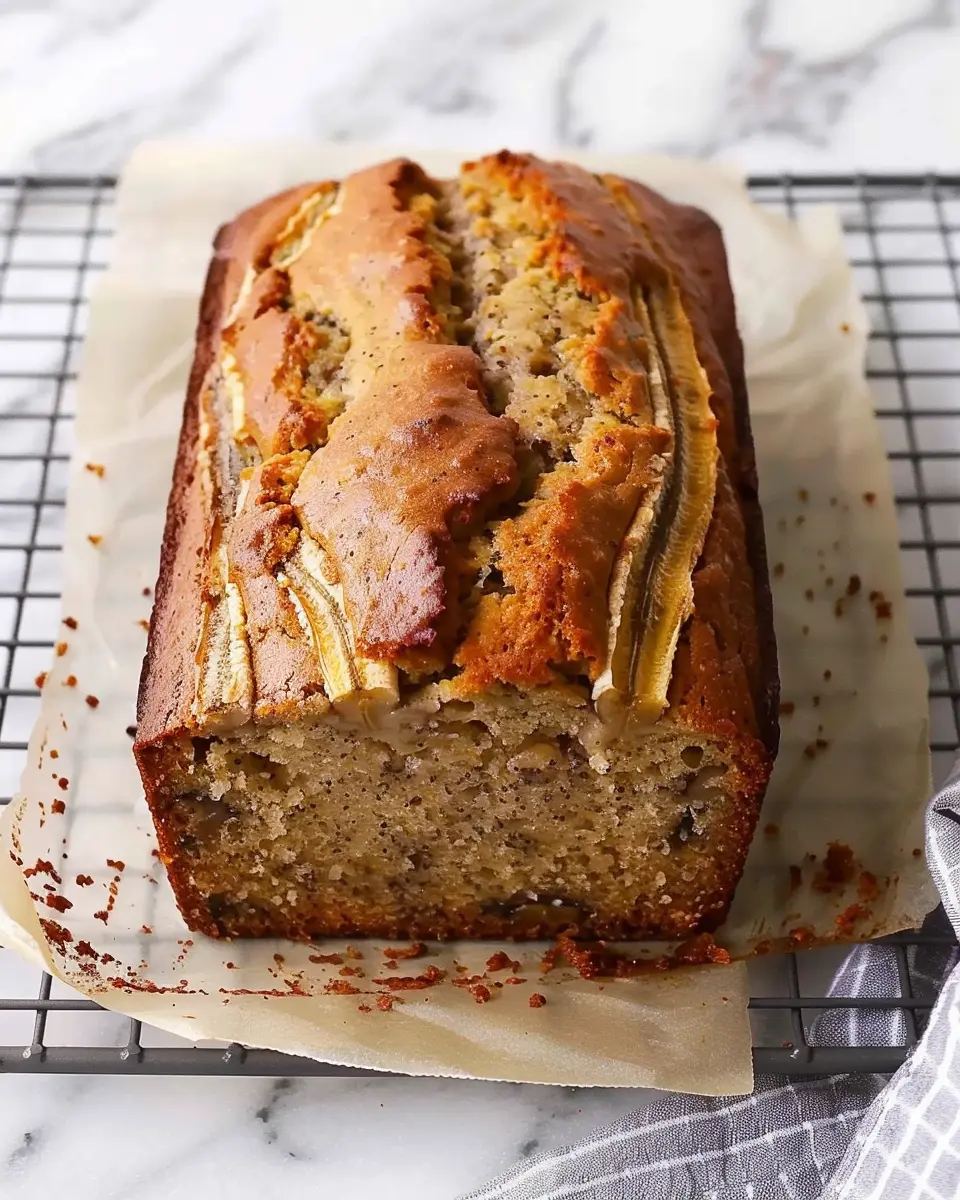
Introduction to Bisquick Sausage Balls
The comfort of homemade snacks
There’s something incredibly comforting about homemade snacks, isn’t there? In our busy lives, we often crave a little indulgence, but it can be tough to find the time to whip up something from scratch. This is where Bisquick sausage balls come into play. With their savory flavors and fluffy textures, they offer a delicious taste of nostalgia while being quick to prepare. Imagine cozying up on a weekend morning with a warm plate of these delightful bites, perfect for sharing with friends or savoring solo while catching up on your favorite shows.
Bisquick sausuage balls are ideal for any occasion, whether you’re hosting game day gatherings or just relaxing at home. With just a few simple ingredients—namely bisquick mix, sausage (beef, turkey bacon, or chicken ham work beautifully), cheese, and some spices—you can create a platter of mouthwatering snack-size treats that everyone loves. It’s a simple yet satisfying way to turn a few pantry staples into something truly special. Plus, if you want to put your personal spin on them, consider incorporating herbs or spices you enjoy!
Why Bisquick sausage balls are perfect for young professionals
For young professionals, time is a precious commodity. With demanding work weeks and social calendars packed to the brim, the last thing you want to do is fret over complicated recipes. That’s why bisquick sausage balls shine brightly in your culinary toolkit! Not only are they quick to prepare—usually only taking about 30 minutes from start to finish—but they also pack well for lunches and snack breaks.
Imagine being able to pull a few of these savory morsels from your lunch bag, paired with a crisp salad or your favorite dipping sauce. They provide the energy boost needed for those afternoon slumps, allowing you to push through your tasks effectively. And if you’re planning to entertain last-minute guests, you’ll be the star of the evening with minimal effort!
Are you ready to dive into this easy, delicious world of bisquick sausage balls? Let’s get started and elevate your snacking game! For further inspiration, check out how to elevate your everyday meals here.

Ingredients for Bisquick Sausage Balls
Essential ingredients for your sausage balls
Creating delicious bisquick sausage balls starts with the right set of ingredients. Here’s what you’ll need:
- Bisquick Mix: This is the base that ties everything together, providing that perfect, fluffy texture.
- Ground Beef: Opt for medium ground beef for a juicy flavor; it’ll complement the other ingredients beautifully.
- Turkey Bacon: For a leaner option, turkey bacon adds a great smoky flavor while keeping things light.
- Chicken Ham: This adds a unique twist—ideal for a savory bite that elevates your sausage balls.
- Cheddar Cheese: Sharp or mild, cheese adds richness and a gooey texture that’s hard to resist.
- Milk: Just a splash will help bind everything, making your sausage balls moist and delicious.
Choosing the right sausage and cheese
When it comes to the ground beef, selecting a quality product is key. Look for organic or grass-fed options for the best flavor and health benefits. As for the cheese, fresh grated cheddar from a block melts better than pre-shredded versions and gives a more robust flavor. Want to step it up? Consider adding some spicy pepper jack for a kick!
For more tips on choosing quality ingredients, visit Food Network’s guide to selecting cheeses.
By investing in quality ingredients, your bisquick sausage balls will not only taste great but will also impress anyone who tries them! So gather these essentials and let’s get cooking!
Preparing Bisquick Sausage Balls
Making Bisquick sausage balls is an absolute delight, perfect for parties, game days, or even a cozy family gathering. These savory bites combine ground beef, cheese, and the signature Bisquick mix, resulting in a mouthwatering treat that’s easy to whip up. Ready to get started? Let’s walk through the steps together.
Gather Your Ingredients
Before diving into the mixing and baking, you’ll want to gather all your ingredients. Trust me, having everything at the ready will make your cooking experience smooth and enjoyable! Here’s what you’ll need:
- 1 pound of ground beef
- 2 cups of shredded cheese (cheddar or your favorite)
- 2 cups of Bisquick mix
- 1/2 cup of milk
- Optional: Spices like garlic powder, onion powder, or a hint of cayenne for a little kick
If you’re not sure what type of cheese to use, consider checking out this cheese guide that dives into flavor pairings and texture tips. It’s an excellent resource for all cheese lovers!
Mix the Sausage and Cheese
Next up, it’s time to combine the ground beef with the cheese. In a large mixing bowl, add your pound of ground beef and the shredded cheese. For an added flavor twist, sprinkle in optional spices like garlic powder or onion powder—these can elevate your Bisquick sausage balls to new heights!
Using your hands (this part is fun!), mix everything together until well combined. Don’t be shy; just make sure the cheese and beef components are evenly distributed for consistent flavor in every bite.
Combine the Bisquick and Mix
Now that your beef and cheese are ready, it’s time to incorporate the Bisquick mix. Add the 2 cups of Bisquick directly into your mixing bowl. Next, pour in 1/2 cup of milk. This mixture will give your balls that soft and fluffy texture that makes them irresistible.
Continue to mix everything together until a cohesive dough forms. If the mixture feels too crumbly, don’t hesitate to add a splash more milk. Remember, the goal is to achieve a sturdy yet slightly sticky dough that holds together when you shape it.
Forming the Sausage Balls
Once your dough is ready, it’s shaping time! Preheat your oven to 375°F (190°C) while you roll the mixture into balls. Take a generous tablespoon of the mixture and roll it into a nice round shape—about 1 inch in diameter works well. Place the shaped balls on a greased baking sheet, leaving a bit of space between them to allow for even cooking.
If you’re cooking for a crowd, consider doubling the recipe; chances are, these will disappear quickly! Plus, why not impress your friends with your cooking prowess? Trust me, they’ll be asking for the recipe.
Baking to Perfection
Your Bisquick sausage balls are almost ready! Pop them into the preheated oven and bake for about 20 to 25 minutes, or until they’re golden brown and cooked through. Keep an eye on them, as oven times can vary.
While they bake, prepare to enjoy the heavenly aroma filling your kitchen, a sure sign that you’re about to indulge in something delicious. You can serve these delightful bites with a side of mustard or your favorite dipping sauce for an extra flavor boost.
With these steps, you’ll be well on your way to making the perfect Bisquick sausage balls that are not just tasty but also a hit at any gathering. Enjoy your culinary adventure!

Variations on Bisquick Sausage Balls
When it comes to Bisquick sausage balls, the possibilities are truly endless! Here are some fun variations to kick your snack game up a notch.
Adding Spices for a Flavor Boost
Want to elevate the flavor profile of your bisquick sausage balls? Spice things up! Consider incorporating a mix of:
- Garlic powder: A classic, adds depth.
- Onion powder: For that savory kick.
- Cayenne pepper: Bring in the heat, if you dare!
- Italian seasoning: A Mediterranean twist works wonders.
These spices can transform a simple ball into a flavor-packed treat that will have your friends asking for the recipe.
Cheesy Alternatives with Different Cheeses
Let’s talk cheese. Switching your cheese choice can completely change the taste of your bisquick sausage balls. Here are a few cheesy alternatives you might love:
- Cheddar: Always a crowd-pleaser, sharp cheddar adds a rich flavor.
- Pepper Jack: If you like things spicy, opt for pepper jack.
- Feta: For a tangy twist, crumbled feta can really impress.
Feel free to experiment and mix cheese varieties; after all, variety is the spice of life!
Healthier Options with Turkey Sausage
If you’re looking to lighten things up, swapping traditional sausage for turkey sausage is a smart move. It’s lower in fat while still offering great flavor. Plus, using whole-grain Bisquick can up the health factor even more. For added health benefits, try these variations:
- Incorporate finely chopped veggies like spinach or bell peppers into the mix.
- Opt for low-fat cheese to keep things guilt-free.
With these creative twists on bisquick sausage balls, you’re sure to create a snack that’s both delicious and exciting. If you’re interested in additional variations or tips, check out this article for more ideas!
Cooking Tips and Notes for Bisquick Sausage Balls
Ensuring the Perfect Texture
To achieve the ideal texture for your Bisquick sausage balls, focus on two key elements: consistency and moisture. Make sure to mix the ingredients just until combined; overmixing can lead to dense, tough bites. If your dough feels too dry, add a splash of milk or a bit more cheese to enhance moisture. Conversely, if it’s too wet, a little extra Bisquick can help balance it out.
Storage Tips for Leftovers
Got leftovers? No problem! Store your bisquick sausage balls in an airtight container in the refrigerator for up to 3-4 days. When you’re ready to enjoy them again, simply reheat in the oven at 350°F for about 10-15 minutes to restore their deliciousness. For longer storage, consider freezing them. Freeze individually on a baking sheet, then transfer to a freezer bag. This way, you can pull out just the right amount whenever you crave a snack or quick meal!
For more meal prep ideas, check out Kitchen Stories or Food Network!

Serving Suggestions for Bisquick Sausage Balls
Ideal Dipping Sauces and Accompaniments
When you serve Bisquick sausage balls, the right dipping sauces can elevate your snack game to a whole new level. Here are some top picks:
- Honey Mustard: A classic combination that complements the savory flavor of the balls.
- Ranch Dressing: Creamy and tangy, it pairs wonderfully with the spicy notes from the sausage.
- Sweet Chili Sauce: For those who love a kick, this sauce adds a delightful sweetness and heat.
Don’t hesitate to offer a variety! Having multiple options keeps things exciting, and it allows your guests to experiment with flavors.
Creating a Platter for Gatherings
For a successful gathering, presentation matters just as much as taste. Consider these tips to create a stunning platter featuring your Bisquick sausage balls:
- Mix and Match: Include different types of sausage balls, like those made with Turkey Bacon or Chicken Ham, for variety.
- Seasonal Vegetables: Add colorful veggies like cherry tomatoes, cucumber slices, or bell pepper strips to bring contrast.
- Cheese Selection: Small cubes of cheese or cheese spreads complement the savory flavor perfectly and make for a fun bite.
By thoughtfully organizing the platter, you’ll not only tantalize the taste buds but also delight the eyes of your guests. For more inspiration on platter arrangements, check out this article on party platter ideas.
With these serving suggestions, your Bisquick sausage balls will be a hit!
Time breakdown for Bisquick Sausage Balls
When it comes to whipping up delicious bisquick sausage balls, having a solid time breakdown can be a game-changer, especially for busy young professionals. Let’s break it down!
Preparation time
Getting your ingredients together and mixing them up will take about 20 minutes. This includes gathering your Bisquick, cheese, and turkey bacon, as well as prepping your workspace. Pro tip: pre-shredding the cheese can save you some extra minutes!
Baking time
Once your sausage balls are formed, pop them in the oven for about 25-30 minutes. You’ll know they are ready when they turn golden brown and your kitchen starts to smell heavenly. It’s truly the reward for your efforts!
Total time
In total, you’re looking at around 50 minutes from start to finish. This is a quick recipe perfect for a last-minute appetizer or snack. For more inspiration on quick meals, check out Food Network’s time-saving tips for busy nights!
Nutritional facts for Bisquick Sausage Balls
When you whip up a batch of Bisquick sausage balls, it’s good to know what you’re nourishing your body with. Here’s a quick breakdown of their nutritional profile to help you make informed choices.
Calories per serving
Each serving of Bisquick sausage balls typically contains around 90-100 calories. This makes them a great bite-sized snack or appetizer without completely derailing your diet.
Protein content
These delicious morsels pack a protein punch, offering about 5-6 grams per serving. It’s an excellent source of energy, especially if you’re on the go or hitting the gym later in the day.
Sodium level
Keep an eye on the sodium content in your Bisquick sausage balls, which usually hovers around 250-300 mg per serving. If you’re concerned about your sodium intake, consider using low-sodium beef sausage or turkey bacon for a healthier twist.
For more information on balanced snacking, check out resources like Nutrition.gov or the American Heart Association. They offer valuable insights that can help personalize your snacking habits. Enjoy making and sharing your delicious Bisquick sausage balls!
FAQs about Bisquick Sausage Balls
Creating delicious Bisquick sausage balls at home can raise a few questions. Here are some common inquiries to help you get the most out of this tasty snack.
Can I freeze Bisquick sausage balls?
Absolutely! Freezing your Bisquick sausage balls is a great way to have a quick snack ready whenever you need it. Simply lay them out on a baking sheet in a single layer after cooking, freeze until solid, and then transfer them to a freezer bag or container. They can be stored in the freezer for up to three months. When you’re ready to enjoy them, just reheat from frozen!
How do I heat up leftovers?
Leftover Bisquick sausage balls can be easily reheated. Preheat your oven to 350°F (175°C). Place the sausage balls on a baking sheet and warm them for about 10-15 minutes until heated through. You can also microwave them for a quicker option—just blast them for about 30 seconds to 1 minute. For more tips on reheating, check out this food safety guide.
What can I substitute for Bisquick?
If you’re out of Bisquick or looking for a gluten-free option, you can easily make your own baking mix. Combine equal parts all-purpose flour, baking powder, and salt. Alternatively, gluten-free flour blends work well too! Just keep in mind that the texture may vary slightly, but the flavor will still shine through.
With these tips, you can confidently prepare and enjoy your Bisquick sausage balls whether for a gathering or a cozy night in. Enjoy!
Conclusion on Bisquick Sausage Balls
Embracing Homemade Goodness
Making Bisquick sausage balls at home not only brings comfort and satisfaction, but it also allows you to put your unique spin on a beloved classic. Whether you prefer turkey bacon, chicken ham, or even veggie sausages, adapting this recipe to fit your lifestyle is a breeze.
Imagine hosting a game day or casual gathering and having these delightful bites fresh out of the oven. It’s an easy way to impress your guests while enjoying the wholesome goodness of homemade snacks. Plus, if you’re curious about different flavor combinations or dips, the sky’s the limit! Try pairing them with your favorite sauces or condiments for a personalized touch.
The joy of cooking is in experimenting and creating delicious memories, so gather your ingredients and embrace the kitchen courage. You created something special—and that’s a victory worth celebrating! For more tips on recipe variations and hosting ideas, check out resources like Food Network or Taste of Home. Enjoy!
PrintBisquick Sausage Balls with Turkey Bacon: Easy Game Day Snack

These Bisquick Sausage Balls are a delicious and easy snack perfect for game day. Made with turkey bacon, they are both tasty and healthier!
- Prep Time: 10 minutes
- Cook Time: 25 minutes
- Total Time: 35 minutes
- Yield: 20 servings
- Category: Snack
- Method: Baking
- Cuisine: American
- Diet: Low Carb
Ingredients
- 1 pound sausage
- 1 cup Bisquick mix
- 1 cup shredded cheese
- 1/2 cup turkey bacon, cooked and crumbled
- 1/4 cup milk
Instructions
- Preheat the oven to 375°F (190°C).
- In a large bowl, combine sausage, Bisquick mix, cheese, turkey bacon, and milk.
- Mix until well combined, then form into small balls.
- Place the balls on a baking sheet.
- Bake for 20-25 minutes or until golden brown.
Notes
- Serve warm for best flavor.
- Can be served with dipping sauces.
Nutrition
- Serving Size: 3 balls
- Calories: 150
- Sugar: 1g
- Sodium: 400mg
- Fat: 10g
- Saturated Fat: 3g
- Unsaturated Fat: 5g
- Trans Fat: 0g
- Carbohydrates: 8g
- Fiber: 0g
- Protein: 10g
- Cholesterol: 30mg