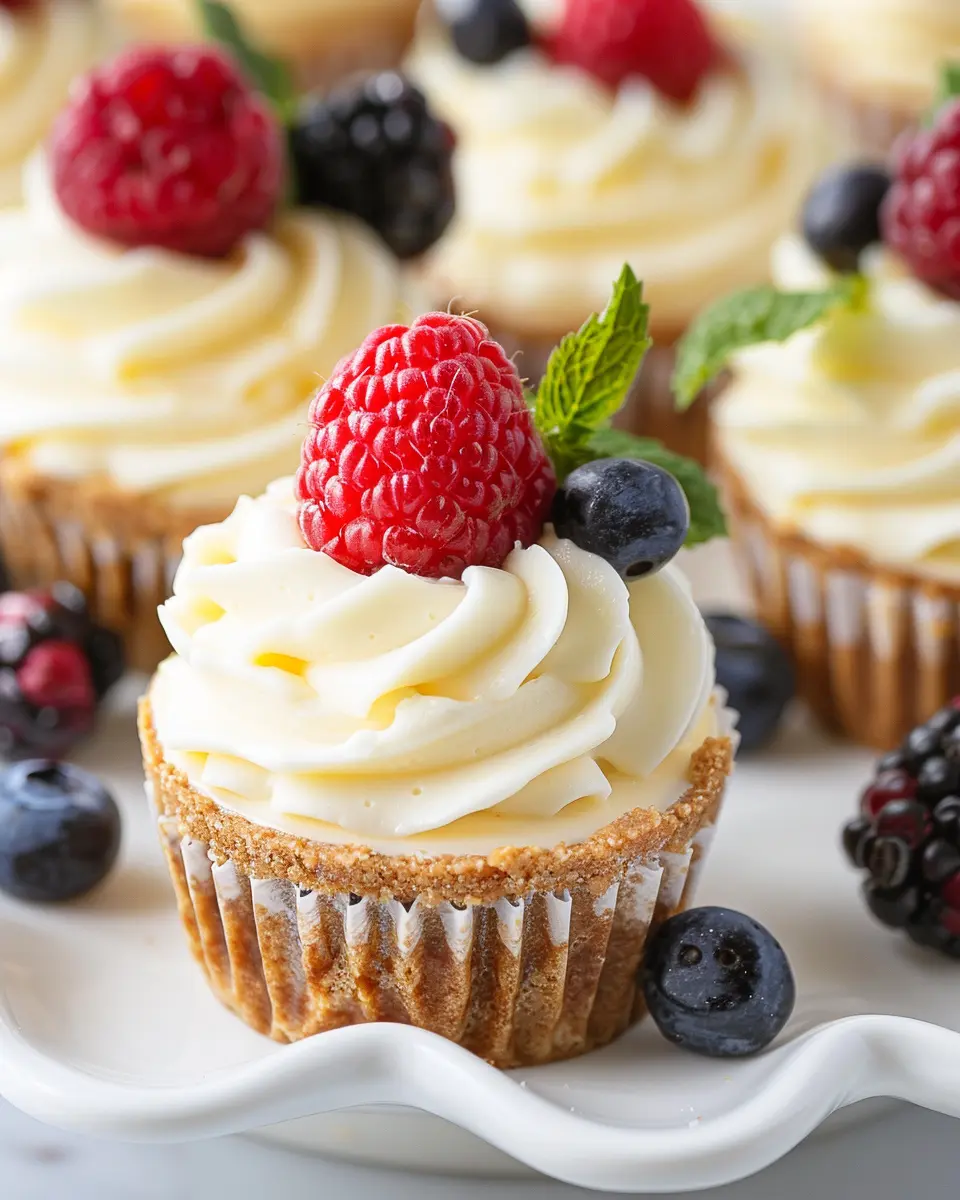
Introduction to Mini Cheesecake Cups
If you’ve ever felt overwhelmed by the thought of making a full-sized cheesecake, you’re not alone. Cheesecake is delicious but can be a bit of a project—think about all that mixing, baking, cooling, and slicing. Enter mini cheesecake cups, the delightful game changer in homemade desserts that makes cheesecake accessible, manageable, and, above all, fun!
Why Mini Cheesecake Cups Are a Game Changer for Homemade Desserts
Mini cheesecake cups offer the perfect solution for those seeking both flavor and convenience. These charming little servings can be customized to suit any occasion, from a casual movie night to a fancy dinner party. The individual serving size makes them not just adorable but incredibly easy to handle. You can serve them straight from the fridge, making cleanup a breeze. Say goodbye to messy cheesecake slices!
Here’s why mini cheesecake cups stand out:
-
Portion Control: No more overindulging with an enormous slice. Each cup is just the right size for a sweet treat. This means you can enjoy a dessert without the guilt!
-
Limitless Customization: Want to experiment with flavors? Each cup can be different! From classic vanilla to adventurous matcha, the options are endless. You could even top them with a swirl of fresh fruit puree or a sprinkle of crushed cookies for added texture.
-
Incredible Presentation: These mini desserts look stunning! Their layered appearance in clear cups is irresistibly tempting and makes for an appealing centerpiece at gatherings. Check out this resource on presentation tips for creative ideas.
-
Easy to Adapt: Whether you stick to traditional cream cheese or opt for a healthier alternative like Greek yogurt, mini cheesecake cups are incredibly forgiving and adaptable.
Imagine serving these delightful little treats at your next get-together. Not only will your guests love them, but you’ll also enjoy the ease of preparation. So grab your mixing bowl and dream up your ideal flavor combination—your ultimate mini cheesecake cups adventure awaits!
Ingredients for Mini Cheesecake Cups
Creating delicious mini cheesecake cups begins with selecting the right ingredients. Let’s break it down!
Essential ingredients for the crust
For that perfect crunch, you’ll want:
- Graham cracker crumbs: These provide a buttery, sweet base.
- Sugar: A bit of sweetness enhances the flavor.
- Butter: Melted unsalted butter helps bind everything together.
The crust is foundational; it’s where the flavor and texture journey begins. For a twist, consider using crushed Oreos or Nilla wafers to tap into fun flavor combos.
Key ingredients for the cheesecake filling
The heart of your mini cheesecake cups lies in the filling, which requires:
- Cream cheese: Choose full-fat for a rich and creamy texture.
- Sugar: Regular granulated sugar balances the creaminess.
- Eggs: Essential for the smooth, rich consistency.
- Vanilla extract: A splash of this will elevate the overall taste.
Remember, room temperature cream cheese is easier to blend, leading to fewer lumps!
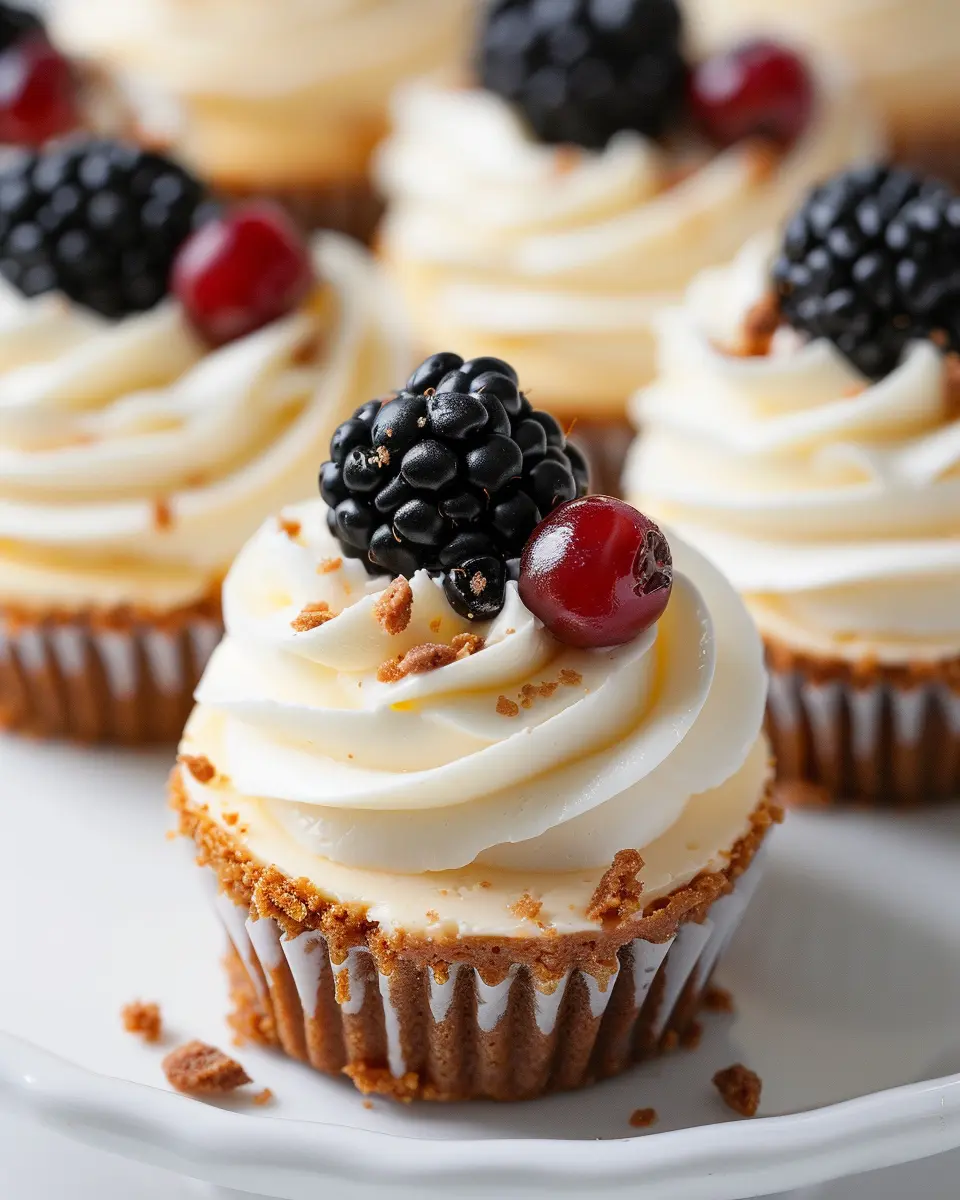
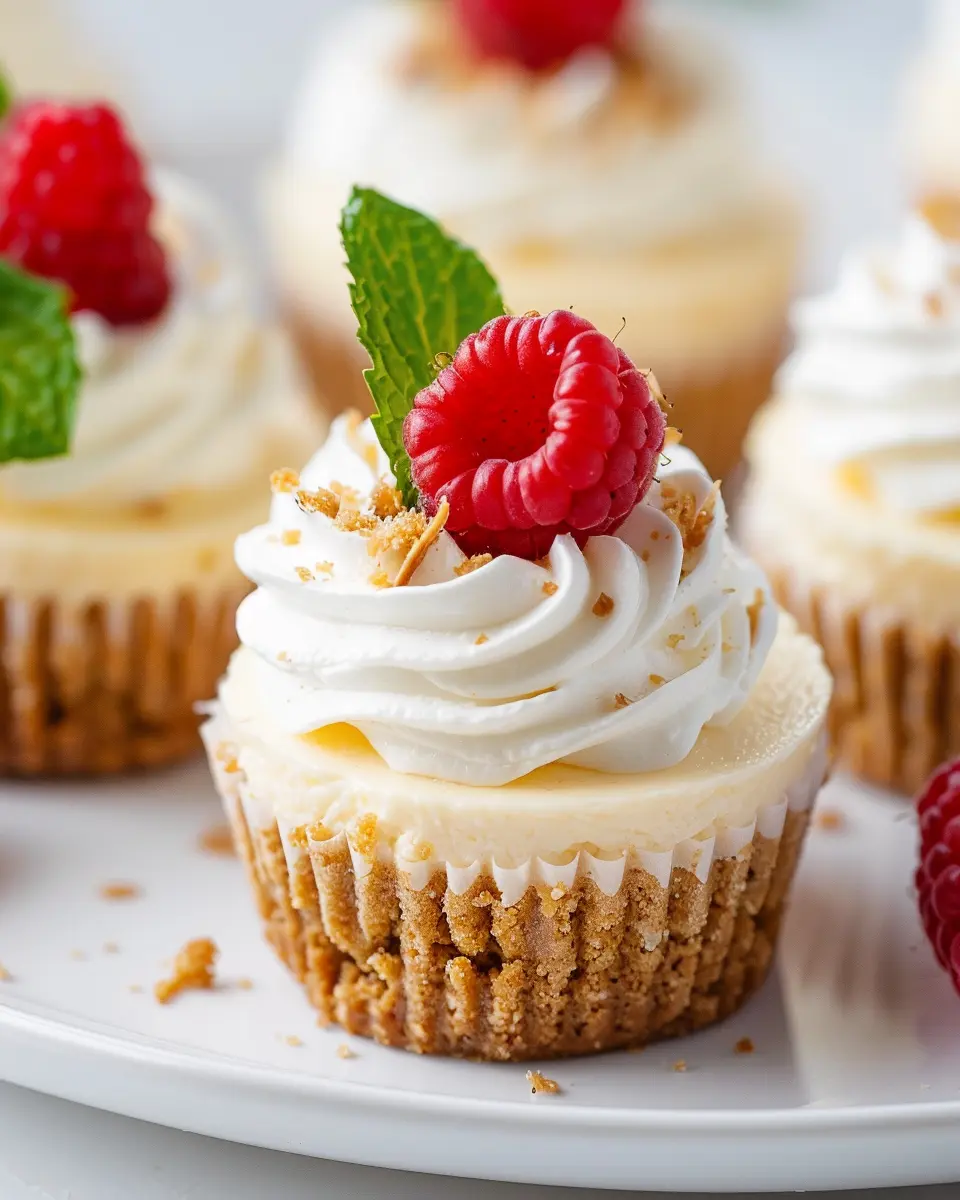
Toppings that elevate your mini cheesecakes
Now, let’s add some flair with toppings! Consider:
- Fresh fruit: Strawberries, blueberries, or raspberries add a pop of color and freshness.
- Chocolate drizzle: Melted chocolate takes it to the next level.
- Whipped cream: A dollop adds both charm and deliciousness.
Experimenting with toppings can make your mini cheesecake cups uniquely yours. For more inspiration, check out ideas from thekitchn.com or foodnetwork.com!
With these ingredient insights, you’re well on your way to crafting delightful mini cheesecakes that will impress friends and family alike! Enjoy the process!
Preparing Mini Cheesecake Cups
Making mini cheesecake cups is a delightful culinary adventure that not only satisfies the sweet tooth but also brings a touch of elegance to any occasion. Let’s walk through the steps together, ensuring you can create these petite delights with ease.
Preheat the oven and prepare the muffin pan
Before diving into the mixing bowl, it’s essential to set your kitchen up for success. Preheating your oven to 325°F (163°C) is vital, as it allows for even baking, which is crucial for achieving that perfect creamy texture. While your oven warms up, grab a standard 12-cup muffin pan and line it with cupcake liners. This will ensure your mini cheesecake cups come out smoothly and make for easy serving.
Want to elevate your cheesecakes even further? Consider spritzing a bit of cooking spray on the muffin pan liners. This extra step helps with easy removal and can prevent any sticking that might occur during baking. Your guests will thank you!
Make the graham cracker crust
Now that your oven is preheating, it’s time to focus on that delicious graham cracker crust, the base of our mini cheesecake cups. Here’s how to whip it up quickly:
- Ingredients:
- 1 cup graham cracker crumbs
- 1/4 cup granulated sugar
- 1/2 teaspoon cinnamon (optional)
- 1/4 cup melted butter
- In a mixing bowl, combine the graham cracker crumbs, sugar, and cinnamon.
- Pour in the melted butter and mix until the texture resembles wet sand. The butter helps bind the crumbs and sugar together.
Using a measuring spoon, scoop a tablespoon of this mixture into each muffin cup. Gently press down with your fingers or the back of a spoon to form a solid base. This process ensures you get that satisfying crunch with each cheesecake bite.
Prepare the cheesecake batter
Next up is the cheesecake batter. This is where the magic happens! The key to a creamy and rich filling lies in your choice of ingredients and how well they are mixed.
- Ingredients:
- 16 oz (2 packages) cream cheese, softened
- 1 cup granulated sugar
- 1 teaspoon vanilla extract
- 2 large eggs
- In a large mixing bowl, beat the softened cream cheese with an electric mixer until smooth. This step is crucial — ensuring no lumps for that dreamy texture.
- Gradually add in the sugar, followed by the vanilla extract, mixing until well combined.
- Finally, add in the eggs, one at a time, and mix just until blended. Be cautious not to overmix; you want to avoid incorporating too much air.
For those interested in a tangier flavor, consider swapping out some cream cheese for sour cream or Greek yogurt. It can add a delightful twist to your mini cheesecake cups!
Fill the muffin cups and bake
Now that your batter is ready, it’s time to assemble everything:
- Using a ladle or a piping bag, spoon the cheesecake mixture over the prepared graham cracker crust in each muffin cup.
- Fill each cup about 2/3 full to allow enough room for rising.
- Bake for 18-20 minutes until the edges are set but the center remains slightly jiggly. This indicates your mini cheesecake cups are perfectly baked.
During baking, consider making a simple fruit topping to enhance your cheesecakes. A quick compote made from fresh berries mixed with a bit of sugar can be the ideal finishing touch!
Cool and chill the cheesecake cups before serving
Patience is key at this stage. Once you remove the mini cheesecakes from the oven, allow them to cool in the pan for about 10 minutes. After cooling, transfer them to a wire rack to cool completely. Once cooled, cover them with plastic wrap and transfer them to the refrigerator for at least 2-3 hours, or overnight if possible. Chilling is essential as it helps your mini cheesecake cups set properly and develop flavor.
When you’re ready to serve, feel free to top with your homemade fruit compote, chocolate sauce, or even a dollop of whipped cream. These mini cheesecake cups are perfect for any gathering or even just a cozy night in!
Experiment, have fun, and enjoy the delicious results of your efforts!
Variations on Mini Cheesecake Cups
When it comes to delightfully bite-sized desserts, mini cheesecake cups take the cake! They’re versatile and can easily cater to various taste buds. Let’s explore some scrumptious variations that you can whip up for any occasion.
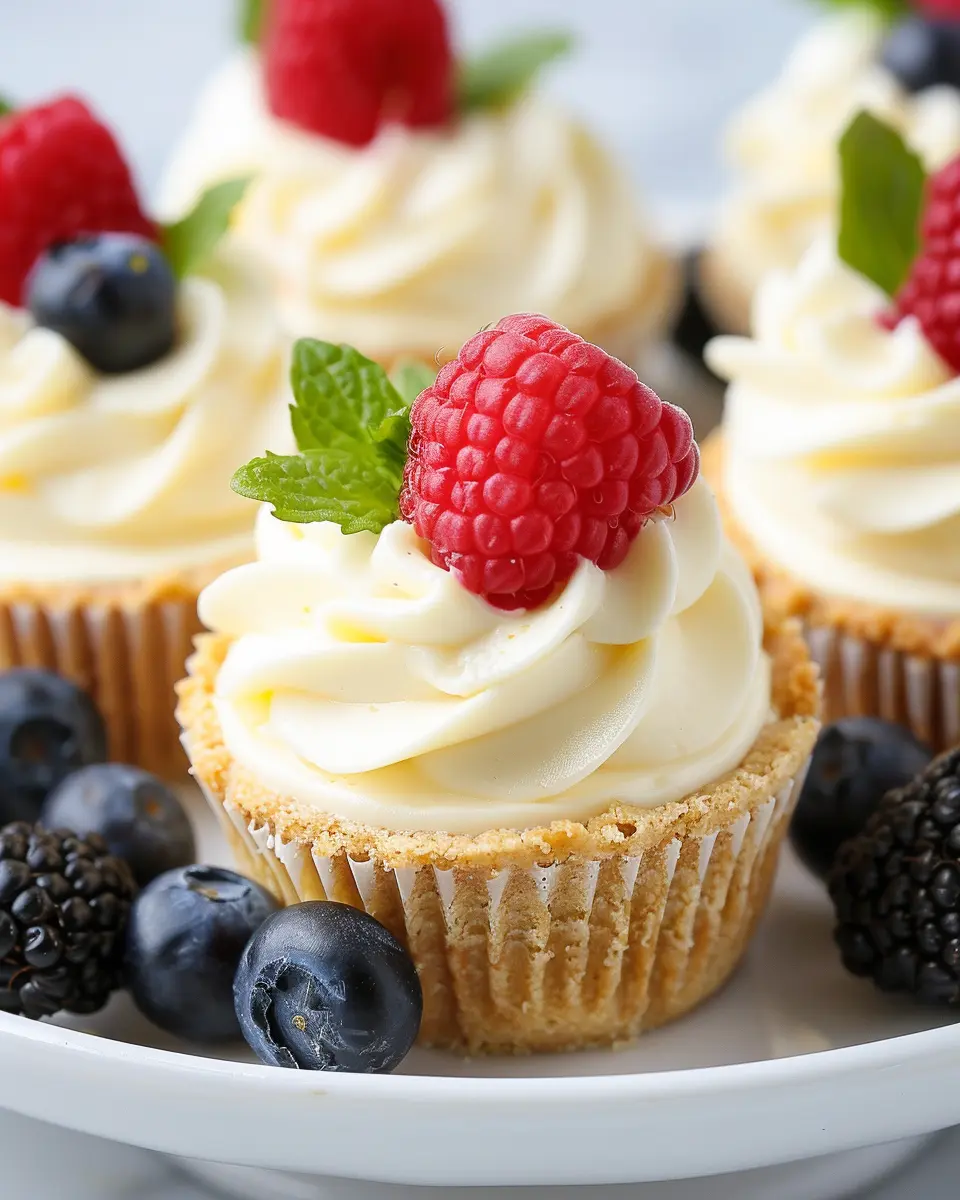
Berry Mini Cheesecake Cups
Bright, fresh, and bursting with flavor! Berry mini cheesecake cups are perfect for summer gatherings. Simply top your cheesecake filling with a medley of mixed berries—strawberries, blueberries, and raspberries work beautifully together. Not only do they add a pop of color, but berries are also packed with antioxidants. For a fun twist, consider adding a drizzle of honey or a sprinkle of lemon zest for that extra zing.
Chocolate Mini Cheesecake Cups
For the chocolate lovers out there, chocolate mini cheesecake cups are an absolute must-try! Incorporate melted chocolate into your cream cheese mixture to create a rich and velvety filling. You can even fold in some crushed chocolate cookies for added texture. Top these off with a dollop of whipped cream and chocolate shavings for an elegant yet indulgent treat. Did you know that dark chocolate has health benefits, too? It contains flavonoids which may contribute to heart health.
Vegan Mini Cheesecake Cups
Catering to a plant-based crowd? No worries! Vegan mini cheesecake cups can be just as delicious. Instead of cream cheese, use blended cashews or coconut cream as your base. Sweeten with maple syrup or agave nectar, and cool in the fridge to achieve that creamy cheesecake consistency. Top with your favorite fruit or a vegan chocolate ganache for a satisfying finish. These treats are not only kinder to animals but also packed with plant-based goodness.
With these three variations, your mini cheesecake cups can easily become the star of your dessert table. Whether you go for fruity freshness, a rich chocolate indulgence, or a dairy-free option, there’s something that everyone will enjoy! For more detailed guides, check out this source for insights on ingredient benefits. Happy baking!
Cooking Tips and Notes for Mini Cheesecake Cups
Avoiding cracks in your cheesecake
One of the most common issues with cheesecakes, including mini cheesecake cups, is the dreaded cracks. To help prevent this, make sure to mix your batter on low speed. Overmixing can incorporate too much air, which expands and can cause cracks during baking. Additionally, consider baking your cheesecakes in a water bath. This gentle heating method keeps the temperature consistent, promoting a smooth texture.
The importance of chilling for texture
Chilling your mini cheesecake cups is crucial for achieving that rich, creamy texture. After baking, let them cool at room temperature for about an hour, then transfer them to the fridge for at least four hours (or overnight, for best results). This not only helps set the cheesecake but also enhances the flavors. If you’re tempted to skip this step, think twice: a well-chilled cheesecake is a delight, while a warm one can be overly soft and difficult to serve.
For more tips about baking cheesecakes, check out this insightful article from Serious Eats.
Serving Suggestions for Mini Cheesecake Cups
Creative ways to embellish your mini cheesecakes
When it comes to mini cheesecake cups, the fun is in the presentation! Start by layering different flavors in your cups, such as a peppermint layer for a seasonal touch or a rich chocolate ganache for a more decadent twist. Top with seasonal fruits, such as sliced strawberries or blueberries, and consider adding a dollop of whipped cream for that extra flair. A sprinkle of crushed graham crackers or nuts can provide an appealing crunch.
For an interactive dessert experience, you could set up a mini toppings bar, inviting guests to customize their own cups. Ingredients like caramel sauce, chocolate shavings, or candied citrus peel can take your dessert to the next level.
Pairing options for a delightful dessert experience
To elevate your mini cheesecake cups, don’t overlook the power of beverages! Pair them with a refreshing herbal tea or a creamy coffee drink that complements the rich flavors. If you’re feeling adventurous, a scoop of sorbet can add a refreshing contrast, especially during warmer months. Consider combining your cheesecakes with a light fruit salad for added freshness or even a delicious muffin on the side.
So, what are you waiting for? Unleash your creativity and delight your guests with stunning mini cheesecake cups that are as tasty as they are beautiful! For more ideas on enhancing your dessert table, check out this guide for inspiration.
Time Breakdown for Mini Cheesecake Cups
Preparation Time
Getting started with your mini cheesecake cups is a breeze! The preparation usually takes about 15 minutes. This includes gathering your ingredients and mixing the creamy filling.
Baking Time
Next, you’ll need 10 minutes for baking these delightful morsels. It’s just enough time for your crust to become golden brown while the filling sets perfectly!
Chilling Time
After baking, patience is key! Allow your mini cheesecake cups to chill for at least 2 hours. This step ensures they achieve that dreamy, velvety texture we all love.
Total Time
In total, you’re looking at about 2 hours and 25 minutes from start to finish. Perfect for a weekend treat or a spontaneous gathering! If you’re interested in other delicious cheesecake variations, check out dessert blogs like Joy of Baking or Sally’s Baking Addiction for more inspiration.
Nutritional Facts for Mini Cheesecake Cups
When you’re indulging in mini cheesecake cups, it’s good to know what you’re savoring. Here’s a quick breakdown of their nutritional content that makes these little delights enjoyable without the guilt.
Calories per serving
Each mini cheesecake cup packs around 150 calories, making it a delightful treat that won’t derail your healthy eating goals. Perfect for portion control!
Sugar content
With approximately 10 grams of sugar, these mini cheesecake cups provide that sweet satisfaction without going overboard. It’s an excellent balance for those who are mindful of their sugar intake.
Protein content
These treats offer about 3 grams of protein per serving. While not a protein powerhouse, they complement a well-rounded diet when enjoyed in moderation.
For more information about balancing treats with a healthy lifestyle, consider checking out resources like the American Heart Association or Nutrition.gov. You’ll find valuable tips on managing your diet while still enjoying the flavors you love!
FAQs about Mini Cheesecake Cups
When it comes to mini cheesecake cups, you might have a few questions swirling around in your mind. Let’s dive into some common queries!
Can I make these mini cheesecakes ahead of time?
Absolutely! One of the best things about mini cheesecake cups is that they can be prepared in advance. Make them the day before your event and store them in the fridge. Just be sure to keep them covered to maintain freshness. In fact, some say that the flavors deepen and improve after sitting for a while. If you’re hosting a party, this is a fantastic time-saver!
What’s the best way to store mini cheesecake cups?
Storing your mini cheesecake cups properly is crucial to keeping them delicious. Place them in an airtight container and keep them in the fridge for up to five days. If you find yourself with leftovers, you can also freeze them! Just make sure to wrap them in plastic wrap and then place them in a freezer-safe container. Thaw them in the fridge overnight before serving for the best taste.
Can I substitute any ingredients in the mini cheesecake recipe?
Definitely! Cooking should be fun, and ingredient swaps are a great way to adapt recipes to your taste. Here are some ideas:
- Cream Cheese: Use Greek yogurt or a non-dairy cream cheese for a lighter option.
- Sweeteners: If you prefer something natural, consider honey or maple syrup instead of sugar.
- Crusts: Swap traditional graham crackers for crushed oreos or gluten-free crackers for a different twist.
Feel free to get creative with flavors by adding fruit toppings or a dash of vanilla extract. The possibilities are endless!
For more tips on cheesecake variations, check out The Cheesecake Factory Secrets for inspiration. Enjoy your baking adventure!
Conclusion on Mini Cheesecake Cups
The joy of homemade mini cheesecakes and the memories they create
When you whip up a batch of mini cheesecake cups, you’re not just making a dessert; you’re creating a delightful experience to share with friends and family. These little bites of heaven make every gathering memorable, sparking joy and conversations around the table.
Imagine a cozy evening with loved ones, each person holding their own cup of creamy cheesecake topped with fresh fruit. Each bite brings back cherished memories, reminiscent of family celebrations and festive occasions.
If you want to explore more about the art of cheesecake crafting or find some fun topping ideas, check out Serious Eats for expert tips. So, roll up those sleeves and get ready to craft your own moments with these charming mini cheesecake cups!
PrintMini Cheesecake Cups: Easy Indulgence for Your Sweet Tooth

These Mini Cheesecake Cups are a delightful and easy treat for any occasion. Perfectly portioned, they satisfy your sweet tooth without the guilt of a full cheesecake.
- Prep Time: 15 minutes
- Cook Time: 25 minutes
- Total Time: 2 hours 40 minutes
- Yield: 12 mini cheesecakes
- Category: Dessert
- Method: Baking
- Cuisine: American
- Diet: Vegetarian
Ingredients
- 1 cup crushed graham crackers
- 1/4 cup melted butter
- 16 ounces cream cheese, softened
- 1 cup powdered sugar
- 1 teaspoon vanilla extract
- 2 large eggs
- 1 cup sour cream
- 1/4 cup fresh berries (for topping)
Instructions
- Preheat your oven to 325°F (160°C).
- In a bowl, combine the crushed graham crackers and melted butter, then press the mixture into the bottom of muffin tins lined with paper cups.
- In another bowl, beat the cream cheese until smooth, then gradually add the powdered sugar and mix until well combined.
- Add the vanilla extract and eggs, one at a time, mixing well after each addition, then fold in the sour cream.
- Pour the cheesecake mixture over the prepared crusts in each cup.
- Bake for 20-25 minutes, or until the centers are set but slightly jiggly.
- Remove from the oven and let cool completely before refrigerating for at least 2 hours.
- Serve topped with fresh berries.
Notes
- For a chocolate version, add cocoa powder to the cream cheese mixture.
- Feel free to substitute the berries with other fruits or toppings of your choice.
Nutrition
- Serving Size: 1 mini cheesecake
- Calories: 210
- Sugar: 12g
- Sodium: 150mg
- Fat: 12g
- Saturated Fat: 7g
- Unsaturated Fat: 3g
- Trans Fat: 0g
- Carbohydrates: 22g
- Fiber: 1g
- Protein: 3g
- Cholesterol: 40mg