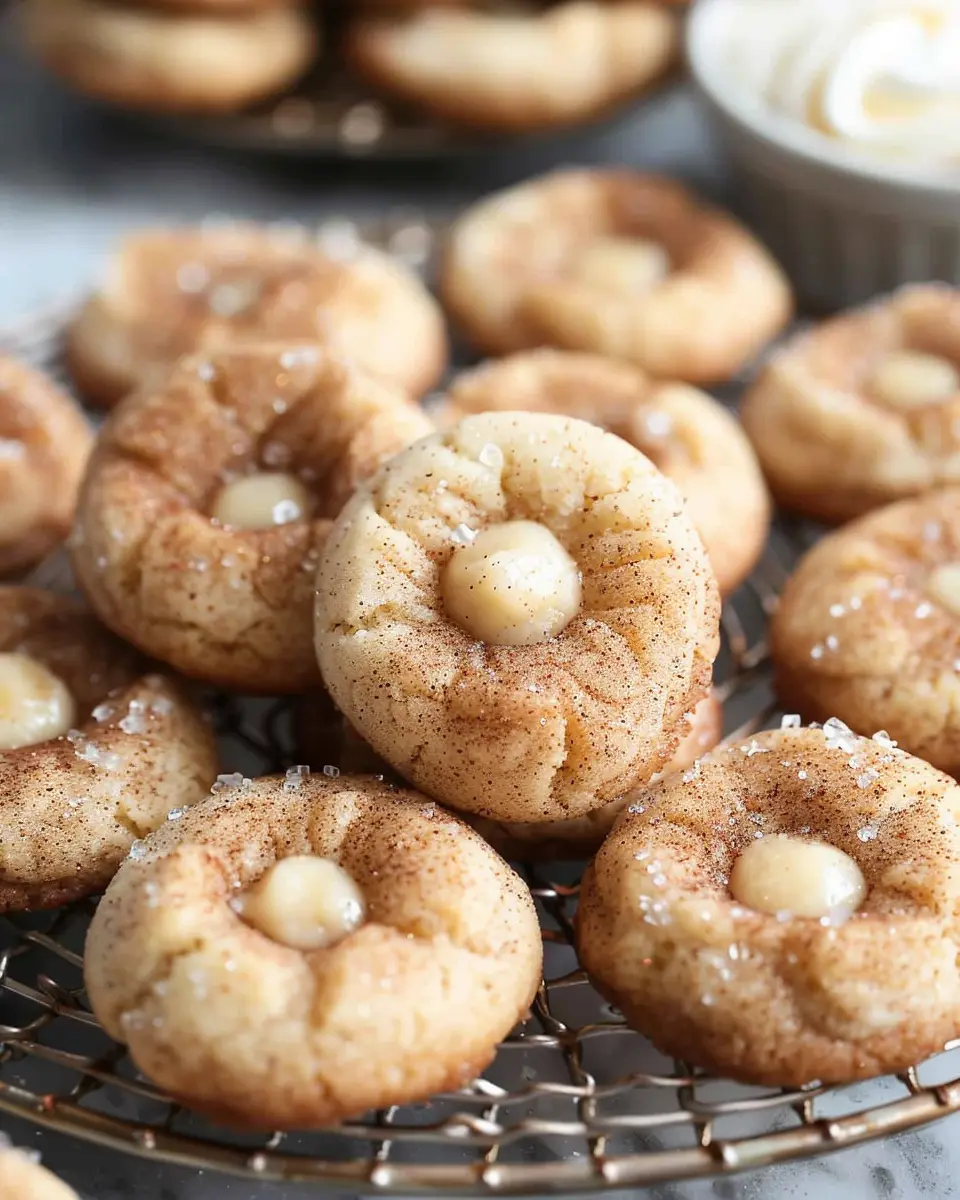
Introduction to Eggnog Snickerdoodle Thumbprint Cookies
What’s the holiday spirit without a delicious cookie? As we dive into the festive season, it’s the perfect time to indulge in treats that remind us of cozy gatherings, twinkling lights, and the joyful laughter of loved ones. One cookie that captures this heartwarming essence is the Eggnog Snickerdoodle Thumbprint Cookie. Imagine soft, buttery cookies infused with the comforting flavors of holiday eggnog, topped with a sweet filling that delights the senses—what could be more inviting?
Eggnog is a beloved holiday staple, and its creamy richness makes it a fantastic ingredient for baking. According to The Food Network, eggnog has been a traditional drink enjoyed by many during the holiday season. So why not take that cherished flavor and translate it into a delicious cookie? Using the classic snickerdoodle as a base gives our Eggnog Snickerdoodle Thumbprint Cookies a warm, spiced profile that’s perfectly complemented by a dollop of eggnog-flavored filling.
Creating these cookies is not just about baking; it’s about making memories. Whether you’re baking solo, with roommates, or even outside with friends on a chilly day, sharing cookies can spark moments of joy. Plus, these thumbprint cookies are sure to impress at holiday get-togethers or cookie exchanges!
Here’s what you can expect when making these delightful cookies:
- Creamy Eggnog Flavor: The eggnog adds a sumptuous richness that’s hard to resist.
- Soft and Chewy Texture: The snickerdoodle base is super soft, with a hint of cinnamon that rounds out the flavors beautifully.
- Customizable Fillings: While we’ll share a specific eggnog filling recipe, feel free to get creative! Consider using caramel or chocolate ganache for a decadent touch.
So, gather your ingredients and get ready to whip up a batch of these irresistible Eggnog Snickerdoodle Thumbprint Cookies. They’re perfect for sharing with friends or for enjoying yourself during quiet evenings spent by the fireplace. Happy baking!

Ingredients for Eggnog Snickerdoodle Thumbprint Cookies
When it comes to whipping up a batch of Eggnog Snickerdoodle Thumbprint Cookies, the magic truly begins with the ingredients. Here’s your guide to sourcing everything you’ll need to create these festive treats.
Essential ingredients for the cookie dough
To get started on your cookie dough, gather the following essentials:
- All-purpose flour: The base of your dough, giving it structure.
- Butter: Unsalted, softened to make those cookies rich and buttery.
- Granulated sugar: For sweetness and a crisp edge.
- Brown sugar: Adds moisture and a hint of chewiness.
- Egg: This will help bind the ingredients together.
- Baking powder: Let’s those cookies rise and stay fluffy.
- Cinnamon: A key player for that warm, festive flavor.
- Nutmeg: Essential for bringing out the classic eggnog taste.
- Salt: Just a pinch to balance the sweetness.
Ingredients for the eggnog ganache filling
The finishing touch for your Eggnog Snickerdoodle Thumbprint Cookies is the eggnog ganache:
- Eggnog: Use your favorite store-bought variety or make it from scratch for a homemade touch.
- Heavy cream: This will help create a smooth and luscious ganache.
- White chocolate chips: For sweetness and a creamy texture, they melt beautifully with the cream.
Now that you’ve got your shopping list, you’re well on your way to creating these delicious cookies that will surely impress friends and family during the holiday season! If you’re curious about alternative flavors to enhance your cookies, check out this article on baking spices for more inspiration. Happy baking!
Preparing Eggnog Snickerdoodle Thumbprint Cookies
Cozy nights and festive gatherings call for some delicious treats, and what better way to bring the holiday spirit to your kitchen than with Eggnog Snickerdoodle Thumbprint Cookies! These cookies are a delightful blend of classic snickerdoodle flavor with the rich essence of eggnog, making them perfect for any holiday celebration. Let’s dive into the step-by-step process of preparing these scrumptious cookies.
Step 1: Preheat your oven and gather your tools
Before you dive into mixing and rolling, it’s key to set the stage. Preheat your oven to 350°F (175°C) to ensure it’s nice and ready for baking. While that’s happening, gather your tools to keep things efficient. You’ll need:
- Baking sheets
- Parchment paper
- Mixing bowls
- A hand mixer or stand mixer
- Measuring cups and spoons
- A cookie scoop or spoon for shaping the dough
Having everything at your fingertips will make the baking process smoother and more enjoyable!
Step 2: Cream the butter and sugars to perfection
In a large mixing bowl, combine one cup of softened unsalted butter, ¾ cup of granulated sugar, and ¾ cup of packed brown sugar. Using your mixer, beat this mixture until it’s light and fluffy, which usually takes about 2-3 minutes. Remember, this step isn’t just for flavor; it also creates the right texture. Research suggests that creaming butter and sugar helps to incorporate air into the batter, which ultimately affects the cookies’ final form—puffy, soft, and utterly delightful!
Step 3: Incorporate the egg and vanilla for a creamy mixture
Next, add one large egg and two teaspoons of vanilla extract into your creamed mixture. Beat them together until fully combined. This adds richness and a lovely aroma to our cookies. Notably, using pure vanilla extract can elevate your flavor profile—don’t skimp on quality!
Step 4: Combine dry ingredients and form the dough
In another bowl, whisk together two and a half cups of all-purpose flour, two teaspoons of cream of tartar, one teaspoon of baking soda, and a dash of salt for balance. Gradually mix the dry ingredients into the wet mixture until well combined. This might take some muscle, but keep mixing until you have a smooth dough that sticks together. It should feel a bit soft but manageable.
Step 5: Shape and roll the dough balls
Once your dough is ready, scoop out about a tablespoon of dough and roll it into a ball using your palms. Aim for uniform size for even baking. You can then roll these balls in a mixture of cinnamon and sugar (1 tablespoon cinnamon and 2 tablespoons sugar) to give that classic snickerdoodle finish.
Step 6: Bake and create those signature thumbprints
Place your dough balls about two inches apart on the prepared baking sheets. Using your thumb (or the back of a spoon), gently press down in the center of each ball to create a small indentation—hence the name thumbprint cookies! Bake for about 10-12 minutes until the edges are slight golden color. Allow them to cool for a few minutes on the tray before transferring to a wire rack.
Step 7: Make the eggnog ganache filling
While your cookies are cooling, prepare the eggnog ganache. In a small saucepan, heat ½ cup of heavy cream until just simmering. Remove from heat and add in 1 cup of white chocolate chips along with a splash of eggnog and a pinch of nutmeg for that festive touch. Stir until smooth and glossy—this rich filling will take your cookies to the next level!
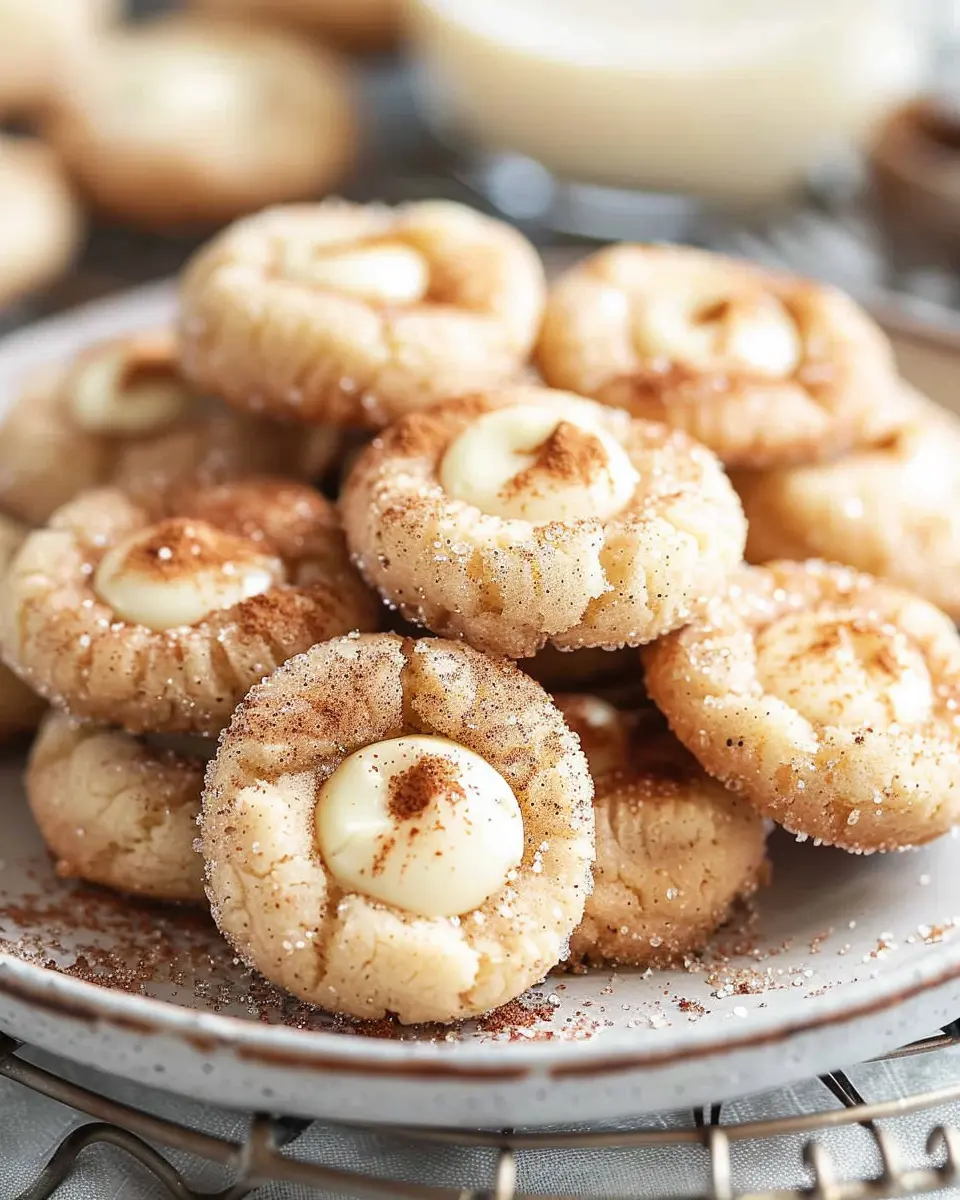
Step 8: Fill the cookies and let them set
Once your cookies are cooled and the ganache is ready, it’s time for the final touch! Carefully spoon the eggnog ganache into the thumbprint of each cookie. Let them sit for about 30 minutes to allow the ganache to set.
Now you’re ready to share these delightful Eggnog Snickerdoodle Thumbprint Cookies with friends and family. Whether at a holiday party or simply to enjoy at home, these cookies are sure to impress and bring warmth this season!
For more delicious holiday recipes, check out Food Network for festive ideas sure to elevate your cookie game!
Variations on Eggnog Snickerdoodle Thumbprint Cookies
When it comes to the festive season, Eggnog Snickerdoodle Thumbprint Cookies are a delightful treat, but what if you have dietary restrictions? Not to worry! Let’s explore some tasty variations.
Nut-free option for cookie lovers
For those who love cookies but need to avoid nuts, creating a nut-free version of your Eggnog Snickerdoodle Thumbprint Cookies is super easy! Replace any nut flour with all-purpose flour or a gluten-free blend if you wish to keep it gluten-free as well. This allows you to maintain that fluffy, soft texture without the risk of allergens. Be sure to check that your baking powder and other ingredients are nut-free, as it is often an overlooked source of potential allergens.
If you’re looking for rich flavor, you can even add a touch of cinnamon or nutmeg to enhance that classic eggnog profile!
Dairy-free version for lactose intolerance
For those with lactose intolerance or who simply prefer a dairy-free diet, a delightful dairy-free version of your Eggnog Snickerdoodle Thumbprint Cookies is at your fingertips! Substitute regular milk with almond milk, coconut milk, or any non-dairy alternative. This helps recreate that creamy eggnog-like texture while keeping everyone happy.
When it comes to butter, swap it out for coconut oil or a vegan butter alternative. These swaps won’t compromise on the taste and will keep your cookies buttery and delicious. If you want to enhance the eggnog flavor further, consider using dairy-free eggnog available at your local grocery store. The addition of dairy-free options ensures that no one has to miss out on the holiday magic.
For more creative variations, don’t hesitate to check out resources from credible sites like Coconut Milk Recipe or The Dairy-Free Kitchen. Enjoy your festive baking!
Cooking tips and notes for Eggnog Snickerdoodle Thumbprint Cookies
Ensuring the perfect texture
When it comes to Eggnog Snickerdoodle Thumbprint Cookies, achieving the right texture is essential. For a soft and chewy cookie, be sure not to overmix the dough once you add the flour. Overmixing can lead to tougher cookies. Using room-temperature butter will also help create that delightful melt-in-your-mouth quality. Keep an eye on baking times; every oven is different, so pulling them out just as they start to turn golden will yield the best results. For a festive twist, consider adding a pinch of nutmeg or cinnamon to the thumbprint filling for an extra layer of flavor.
Making ahead for convenience
One of the best parts about these Eggnog Snickerdoodle Thumbprint Cookies is their make-ahead potential. You can prepare the dough and refrigerate it for up to three days before baking. This not only allows the flavors to meld but also makes it a breeze to whip up fresh cookies whenever the craving strikes. You could also freeze baked cookies—just make sure to store them in an airtight container. Try these helpful resources on cookie storage to keep your treats fresh longer.
So why not give these tips a go? Your holiday baking experience will be smoother and even more enjoyable!
Serving suggestions for Eggnog Snickerdoodle Thumbprint Cookies
Pairing with holiday beverages
When it comes to enjoying Eggnog Snickerdoodle Thumbprint Cookies, the right beverage can elevate the experience. Consider pairing these festive cookies with a steaming cup of spiced apple cider or a rich hot chocolate topped with whipped cream. The cozy flavors harmonize beautifully, bringing out the warm spices of the cookies. Don’t forget to add a sprinkle of cinnamon on top for that extra holiday touch! For a refreshing non-alcoholic option, a creamy peppermint latte can also complement the sweet and spicy notes of the cookies.
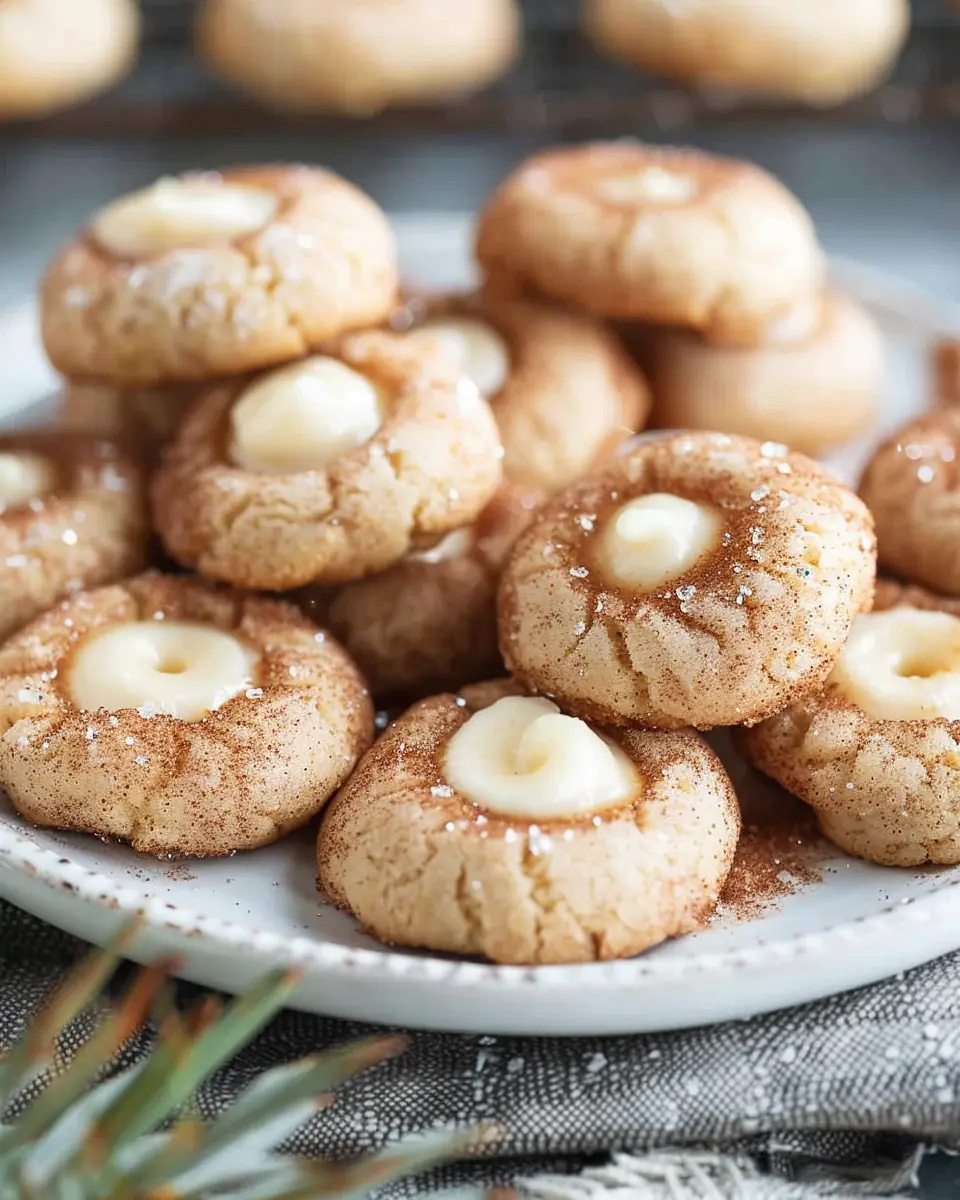
Presentation ideas for festive gatherings
Creating a stunning display for your Eggnog Snickerdoodle Thumbprint Cookies can be as delightful as baking them. Arrange the cookies on a large, decorative platter or tiered cake stand for a touch of elegance at your holiday gathering. Consider adding some evergreen sprigs, cinnamon sticks, or star anise around the cookies to make the presentation pop. Alternatively, you can package them in clear treat bags tied with festive ribbons for a charming, shareable treat. Your friends and family will appreciate the thoughtful presentation as much as the delicious flavors!
For more festive ideas, check out Martha Stewart for inspiration.
Time Breakdown for Eggnog Snickerdoodle Thumbprint Cookies
When you’re eager to indulge in some festive flavors, knowing how much time you’ll need can make all the difference. Here’s a quick breakdown for making these delightful Eggnog Snickerdoodle Thumbprint Cookies.
Preparation Time
Get started with around 15 minutes of prep. This includes gathering your ingredients and mixing the dough. It’s that simple! Plus, you can blast some holiday tunes while you work—what better way to get into the spirit?
Baking Time
These cookies will need about 12-15 minutes in the oven. Keep an eye on them; the goal is a golden edge with a slightly soft center. The smell filling your kitchen will be worth it!
Total Time
In just about 30 minutes, you’ll go from ingredients to cookies ready to be devoured! Perfect for a cozy evening in or as a sweet contribution to a holiday gathering. So, what are you waiting for? Start baking and let the festive aroma take over your space.
For more tips and variations, check out this article on baking essentials. Happy baking!
Nutritional Facts for Eggnog Snickerdoodle Thumbprint Cookies
When indulging in these delightful Eggnog Snickerdoodle Thumbprint Cookies, it’s essential to have a clear idea of their nutritional profile. Here’s a breakdown to help you enjoy them guilt-free!
Calories per Cookie
Each cookie packs approximately 150 calories. This makes it a sweet treat that won’t completely derail your day.
Breakdown of Sugars and Fats
You’ll find about 8 grams of sugar and 6 grams of fat per cookie. While they satisfy your sweet tooth, the balance of fats helps keep your energy steady.
Total Carbs
In terms of carbohydrates, each Eggnog Snickerdoodle Thumbprint Cookie contains roughly 20 grams. These carbs come with a delightful blend of spices that not only please the palate but also keep the cozy holiday vibes alive.
If you’re looking to make healthier choices, consider pairing these cookies with a warm cup of herbal tea. Learn more about managing sugar intake and making sweet treats healthier on resources like Nutrition.gov and Healthline. Enjoy baking and snacking mindfully!
FAQs about Eggnog Snickerdoodle Thumbprint Cookies
Can I use store-bought eggnog for the filling?
Absolutely! Using store-bought eggnog can save you time and still deliver delicious results. Just make sure to select a high-quality eggnog that has a rich flavor. If you’re feeling adventurous, consider adding a dash of nutmeg or cinnamon to enhance the flavor even more. For those looking for a homemade experience, check out this simple eggnog recipe.
How do I store these cookies for maximum freshness?
To keep your Eggnog Snickerdoodle Thumbprint Cookies at their best, store them in an airtight container at room temperature. If you plan on keeping them for more than a few days, you might want to consider freezing them. To freeze, simply place the cooled cookies in a single layer in a freezer-safe container. They can last up to three months—perfect for prepping ahead of time!
Is there a way to make them gluten-free?
Yes, you can easily adapt this recipe for a gluten-free version! Simply substitute all-purpose flour for a gluten-free blend that is suggested for baking. Brands like Bob’s Red Mill or King Arthur Flour offer excellent options that provide a great texture without sacrificing flavor. Always make sure to check that your other ingredients, like baking powder, are gluten-free as well. For more gluten-free baking tips, this guide on gluten-free baking can be quite helpful.
Now you’re equipped with everything you need to make these delightful Eggnog Snickerdoodle Thumbprint Cookies! Whether you’re baking for the holidays or just indulging your sweet tooth, these cookies are sure to impress. Happy baking!
Conclusion on Eggnog Snickerdoodle Thumbprint Cookies
Why these cookies should top your holiday baking list
When you’re planning your holiday baking, Eggnog Snickerdoodle Thumbprint Cookies deserve a prime spot on your list. These delightful cookies not only capture the essence of the festive season but also bring a cozy nostalgia with every bite. The rich flavor of eggnog infused into soft, cinnamon-sugar cookie bases makes for a perfect treat to share with friends and family—or even to enjoy solo while wrapped up in a blanket.
Thought you might want some festive inspiration? Check out The Kitchn for ideas on other holiday sweets that pair perfectly with these cookies. Plus, the thumbprint design adds a touch of whimsy, making them visually appealing for any holiday gathering. So, why not whip up a batch and spread some cheer? Your taste buds will thank you!
PrintEggnog Snickerdoodle Thumbprint Cookies: The Best Holiday Treat

Delicious Eggnog Snickerdoodle Thumbprint Cookies perfect for the holiday season!
- Prep Time: 30 minutes
- Cook Time: 12 minutes
- Total Time: 42 minutes
- Yield: 24 cookies
- Category: Dessert
- Method: Baking
- Cuisine: American
- Diet: Vegetarian
Ingredients
- 2 cups all-purpose flour
- 1 tsp baking powder
- 1/2 tsp baking soda
- 1/4 tsp salt
- 1 cup unsalted butter, softened
- 1 cup granulated sugar
- 1/2 cup brown sugar
- 1 large egg
- 1/2 cup eggnog
- 2 tsp vanilla extract
- 1 tsp ground nutmeg
- 1 tbsp cinnamon sugar for rolling
Instructions
- Preheat your oven to 350°F (175°C).
- In a bowl, mix together the flour, baking powder, baking soda, and salt.
- In another large bowl, cream together the butter, granulated sugar, and brown sugar until smooth.
- Add the egg, eggnog, vanilla extract, and nutmeg; mix until combined.
- Gradually add the flour mixture to the wet ingredients, and stir until well combined.
- Form the dough into balls and roll in the cinnamon sugar.
- Place on a baking sheet and make a thumbprint in the center of each cookie.
- Bake for 10-12 minutes or until golden.
- Allow to cool completely before serving.
Notes
- For a richer flavor, add a pinch of cloves.
- Store in an airtight container to maintain freshness.
Nutrition
- Serving Size: 1 cookie
- Calories: 120
- Sugar: 10g
- Sodium: 50mg
- Fat: 7g
- Saturated Fat: 4g
- Unsaturated Fat: 2g
- Trans Fat: 0g
- Carbohydrates: 15g
- Fiber: 0g
- Protein: 1g
- Cholesterol: 25mg