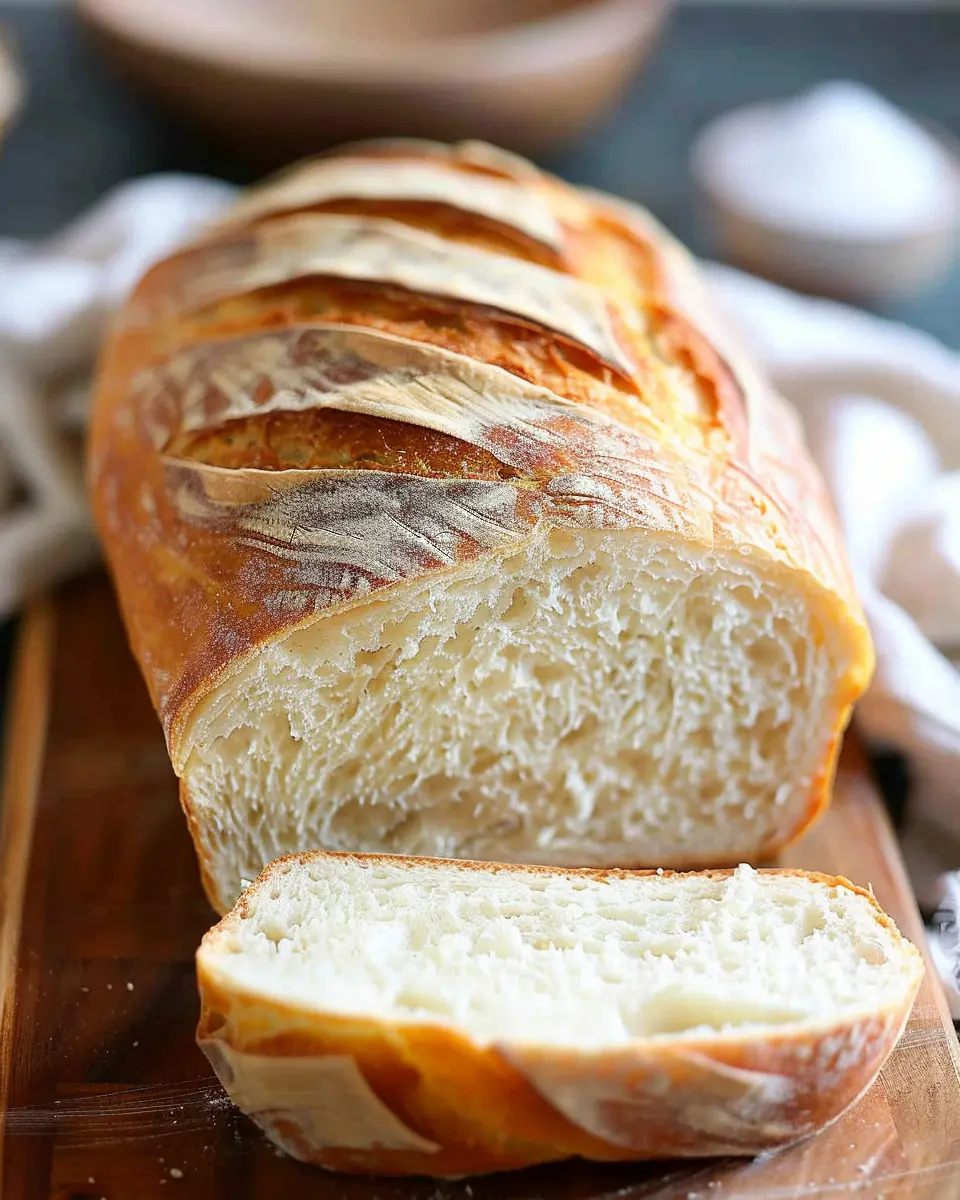
Introduction to Homemade Bread
Have you ever walked into a bakery and been greeted by the warm, inviting aroma of fresh bread? There’s something incredibly special about the experience of bread-making. Homemade bread not only fills your kitchen with an irresistible scent, but it also offers a satisfaction that store-bought bread simply can’t match. So why should you consider trying your hand at this age-old craft?
The Magic of Making Your Own Bread
Making homemade bread is more than just a cooking project; it’s an experience that connects you to the timeless art of baking. As you mix, knead, and let your dough rise, you become part of a culinary tradition that spans centuries. Moreover, you have complete control over your ingredients. Imagine crafting bread with organic flour, fresh herbs, or even unique add-ins like olives or dried fruits. This level of customization can elevate your meals and ensure the bread is made exactly to your taste.
Scientific studies have shown that homemade foods tend to be healthier and contain fewer preservatives than processed alternatives. According to the Harvard T.H. Chan School of Public Health, cooking at home allows you to monitor ingredients carefully, creating nourishing options for you and your loved ones.
Cost-Effective and Comfortable
In addition to tasting better, homemade bread can also be surprisingly cost-effective. With only a few basic ingredients—flour, water, yeast, and salt—you can whip up a batch of bread that rivals any bakery. Plus, nothing beats the comfort of slicing into a loaf you’ve made yourself! Whether you’re enjoying turkey bacon and avocado toast for breakfast or crafting a gourmet sandwich for lunch, your homemade bread will serve as the perfect foundation.
A Community Experience
Don’t underestimate the power of sharing your bread-making adventures with friends and family. Imagine inviting them over for a homemade dinner, the centerpiece being a steaming loaf of bread straight from your oven. Baking together can be a delightful way to bond, and everyone can participate in the fun!
As you embark on your bread-making journey, remember that practice makes perfect. So roll up your sleeves, dive into our full recipe, and unleash your inner artisan baker! You may just find that baking bread becomes your favorite kitchen pastime.
Ingredients for Homemade Bread
Baking homemade bread can be one of the most rewarding experiences in your culinary journey. It’s not just about the delicious aroma filling your kitchen; it’s about creating something warm and comforting. Here’s what you’ll need to get started:
Essential Ingredients
-
Flour: All-purpose flour works perfectly, but you might also want to experiment with whole wheat or bread flour for added flavor.
-
Yeast: Active dry yeast or instant yeast will do the trick. For best results, ensure it’s fresh! Check out the Yeast FAQ for tips on storing it.
-
Warm Water: About 110°F is perfect—too hot and you’ll kill the yeast!
-
Sugar: A teaspoon helps activate the yeast. If you’re trying to reduce sugar in your diet, consider honey or agave.
-
Salt: A crucial ingredient, enhancing flavor and controlling fermentation.
-
Oil or Butter: This adds richness. Choose your favorite—olive oil is a great option!
Remember, the simplicity of these ingredients is part of the magic of homemade bread. Do you have a favorite type of bread? Perhaps you’d like to try adding herbs or seeds for a unique twist!
Step-by-step Preparation of Homemade Bread
Making homemade bread can be one of the most rewarding kitchen experiences. With just a handful of ingredients and a little bit of time, you can create a fragrant, warm loaf that’s perfect for any occasion. Here’s how you can whip up your very own bread at home in a few simple steps.
Prepare the dough
To get started, gather your ingredients. You’ll need:
- 4 cups of all-purpose flour
- 1 packet of active dry yeast (about 2¼ teaspoons)
- 1 ½ cups of warm water (around 110°F or 43°C)
- 2 tablespoons of sugar
- 2 teaspoons of salt
- 2 tablespoons of olive oil
In a large mixing bowl, dissolve the yeast and sugar in warm water. Let it sit for about 5-10 minutes until it becomes frothy. This proofing step is crucial—it’s what gives your homemade bread its rise and fluffiness. Once bubbly, add the olive oil and salt, then gradually mix in the flour. You can also explore some bread-making tutorials for more insights.
Knead the dough
Now it’s time to get your hands a little messy. Transfer your mixture onto a lightly floured surface and begin kneading the dough. Kneading is essential for developing the gluten that will give your bread its structure. Continue kneading for about 8-10 minutes, or until the dough is smooth and elastic. If you want to check if you’ve achieved the right consistency, do the “windowpane test”: stretch a small piece of dough between your fingers; if it forms a thin, translucent membrane without breaking, you’re good to go!
First rise
Place the kneaded dough into a lightly greased bowl and cover it with a clean kitchen towel or plastic wrap. Now, it’s time for the dough to rise! Let it sit in a warm area for about 1 to 1.5 hours or until it doubles in size. If you’re in a hurry, you can place the bowl in a slightly warm oven (just a few minutes on low heat will do) to speed up the process.
Shape and second rise
Once your dough has risen, punch it down gently to release the air. Knead it for another minute or so and then shape it into a loaf. Place the shaped dough into a greased loaf pan, or you can form a round rustic boule and place it on a baking sheet. This is a perfect time to get creative! Consider adding seeds, herbs, or even cheese for extra flavor. Cover it again and allow it to rise for another 30-45 minutes. This second rise ensures your bread is light and airy when baked.
Bake the bread
Preheat your oven to 375°F (190°C). Once the dough has risen again, bake it for 25-30 minutes until it’s golden brown and sounds hollow when tapped on the bottom. The enticing aroma will fill your kitchen, and you’ll want to savor that moment! Let the bread cool on a wire rack for at least 15 minutes before slicing. This cooling step is essential; slicing too early may result in a gummy texture.
Isn’t it amazing how simple ingredients can transform into something so delightful? Whether you enjoy it as a side or use it for a delicious sandwich loaded with Turkey Bacon and Chicken Ham, your homemade creation will definitely impress!
For more exciting bread recipes and tips, check out King Arthur Baking, which offers excellent resources for all things bread-related. Happy baking!
Variations on Homemade Bread
When it comes to crafting delicious homemade bread, there are endless possibilities. Let’s explore a couple of delightful variations that can add personality to your loaves!
Whole Wheat Homemade Bread
If you’re looking for a healthier alternative, whole wheat homemade bread is the way to go. Not only does it provide a nutty flavor that complements a variety of toppings, but it’s also packed with nutrients. To make this bread, simply substitute a portion of the white flour with whole wheat flour. Here’s a quick recipe to get you started:
-
Ingredients:
-
3 cups whole wheat flour
-
1 cup warm water
-
2 tablespoons honey
-
2 teaspoons yeast
-
1 teaspoon salt
-
Instructions:
- Combine warm water, honey, and yeast. Let it sit for 5-10 minutes until frothy.
- Mix in flour and salt until a dough forms.
- Knead for 10 minutes until elastic.
- Let it rise until doubled in size.
- Shape into a loaf and bake at 375°F for 30-35 minutes.
Want more tips? Check out Whole Grains Council for expert insights on incorporating whole grains into your diet.
Herb-Infused Homemade Bread
For a flavorful twist, consider making herb-infused homemade bread. Fresh or dried herbs such as rosemary, thyme, and basil can elevate your bread from simple to extraordinary. Imagine tearing into a warm loaf that fills your kitchen with an irresistible aroma! Here’s a straightforward way to infuse those gorgeous flavors into your bread:
-
Ingredients:
-
4 cups all-purpose flour
-
1 cup warm water
-
1 tablespoon olive oil
-
2 teaspoons dried herbs (your choice)
-
2 teaspoons yeast
-
1 teaspoon salt
-
Instructions:
- Mix warm water, oil, and yeast in a bowl. Let it froth.
- Stir in flour, salt, and herbs until well combined.
- Knead the dough for about 8 minutes.
- Allow to rise until puffy, then shape into a loaf.
- Bake at 375°F for approximately 25-30 minutes.
Ready to embark on your baking journey? Trust me, experimenting with homemade bread can be as rewarding as it is delicious!
Cooking Tips and Notes for Homemade Bread
Making homemade bread can be a delightful experience, and with a few tips, you’ll produce a loaf that’s sure to impress!
Choose the Right Flour
Using bread flour, which has a higher protein content, enhances elasticity and leads to a fluffier loaf. You can blend in whole wheat flour for added nutrients and flavor.
Don’t Rush the Yeast
Allow your yeast to bloom properly. This process activates the yeast and ensures a strong rise. If you’re unsure, a quick test with warm water (not too hot!) can help—add a pinch of sugar, and if it bubbles in 10 minutes, you’re good to go.
Knead with Care
Taking your time while kneading is crucial. Aim for about 8-10 minutes until the dough is smooth and elastic. This builds the gluten structure that gives bread its wonderful texture.
Rest, Rise, and Repeat
Be patient; dough needs time to rise. A warm, draft-free spot is ideal, and remember that a longer, slower rise often results in better flavor.
For more detailed techniques, check out resources from The Bread Lab and Serious Eats. Happy baking!
Serving Suggestions for Homemade Bread
Homemade bread is a delightful treat that pairs beautifully with various toppings and accompaniments. Whether you’re enjoying it fresh out of the oven or saving some for later, here are a few serving ideas to elevate your experience.
Sweet Starts
- Fruit Spreads: Try slathering your warm homemade bread with jam or honey for a sweet breakfast. Apricot or berry jams work wonderfully!
- Nut Butters: A classic choice, peanut or almond butter adds a delicious protein boost. Add banana slices for an extra kick.
Savory Selections
- Turkey Bacon & Avocado Toast: Top your bread with crispy turkey bacon, mashed avocado, and a sprinkle of salt for a hearty brunch option.
- Chicken Ham Sandwiches: Layer slices of chicken ham with fresh greens, cheese, and mustard for a satisfying lunch.
Flavorful Extras
- Olive Oil & Balsamic Vinegar: For a simple appetizer, dip your homemade bread in oil and vinegar, allowing the flavors to dance on your palate.
- Cheese Board: Serve sliced bread with an assortment of cheeses, crackers, and fruits. This is a hit for gatherings!
These serving ideas will undoubtedly inspire you to revisit your homemade bread time and time again. For even more strategies, check out the American Heart Association for healthy topping options!
Time Breakdown for Homemade Bread
When you’re ready to bake your first loaf of homemade bread, it’s essential to understand the time commitment involved. Here’s a concise breakdown to help you manage your schedule:
Preparation time
You’ll need about 15-20 minutes to gather your ingredients and mix them together. This initial step is crucial, setting the foundation for your delicious bread.
Rising time
Patience is key here! Allow the dough to rise for 1-2 hours. This is when the magic happens, as the yeast works its wonder to form a light and airy loaf.
Baking time
Once your dough has risen, pop it in the oven for 25-35 minutes. The smell that fills your kitchen will be well worth the wait!
Total time
In total, you’re looking at about 2-3 hours from start to finish. While that might sound like a commitment, most of that time is hands-off, allowing you to tackle other tasks or relax.
For an even better experience, check out expert sources on bread-making techniques, like King Arthur Baking, which provides tips perfect for both beginners and seasoned bakers. Happy baking!
Nutritional Facts for Homemade Bread
When considering the nutritional value of homemade bread, it’s essential to know what you’re actually consuming. Here’s a quick breakdown of key nutritional components:
Calories
On average, a slice of homemade bread contains about 80-100 calories. This can vary based on the ingredients you choose, like whole grains versus white flour. Tracking your caloric intake can help you maintain a balanced diet, especially when paired with healthy toppings.
Carbohydrates
One slice typically has around 15-20 grams of carbohydrates. These are your body’s primary energy source! Opting for whole grain flour can increase fiber content, promoting better digestion and nutrient absorption. To learn more, check out this fiber facts from Harvard.
Protein
Each slice delivers about 3-5 grams of protein, thanks to the wheat flour and any additional ingredients like seeds or grains. Protein is crucial for muscle repair and overall health, making homemade bread a great addition to your meals. Want to ramp up the protein? Consider adding nuts or seeds to your loaf for an extra boost!
For a detailed recipe that keeps all these nutritional benefits in mind, be sure to check out our full homemade bread recipe!
FAQs about Homemade Bread
Why is my bread dense?
Struggling with dense homemade bread? You’re not alone! This common issue can stem from a few key factors. First, check your yeast. If it’s expired, it might not rise properly. Also, consider how you measure your flour; too much can lead to heaviness. Aim for a light touch when scooping or use a kitchen scale for accuracy. Lastly, insufficient kneading can also result in a dense loaf. Knead your dough until it’s smooth and elastic—that’s where the magic happens!
Can I use a bread machine for this recipe?
Absolutely! A bread machine can be a game-changer for making homemade bread. Just follow the recipe instructions, adjusting as necessary for machine settings. Most machines work well with the same ingredients, but be sure to check the manual for any specific instructions regarding the order of ingredients. If you’re short on time, this method delivers delicious results with minimal fuss.
How do I store homemade bread?
To keep your homemade bread fresh and tasty, consider these storage tips:
- Room Temperature: Wrap your bread in a clean kitchen towel or a paper bag. This keeps it from drying out while allowing some moisture to escape.
- Freezing: Planning to keep your bread longer? Slice it and freeze it in a zip-top bag. Just pop a slice in the toaster straight from the freezer!
- Avoid the Fridge: Storing bread in the fridge may prevent mold but can dry it out quickly.
For more insights, check out King Arthur Baking for expert bread storage and recipe tips! Your homemade bread deserves to shine, so keep these FAQs handy. Happy baking!
Conclusion on Homemade Bread
Making homemade bread is not just about the final product; it’s about the experience. There’s something so rewarding about kneading the dough, watching it rise, and finally enjoying that warm loaf fresh out of the oven. Whether you’re hosting a brunch or just seeking comfort food on a quiet evening, your practical skills will shine with each slice.
Consider experimenting with different flavors and ingredients, like adding herbs, nuts, or even turkey bacon for a unique twist! As you gather around the table, sharing your creation, you’ll realize that homemade bread is more than sustenance—it’s a tradition worth celebrating. For more tips on enhancing your baking, check out The Flour You Use and explore endless possibilities. Remember, the kitchen is your playground!
PrintHomemade Bread Made Easy: Your Guide to Delicious Baking
Learn how to make delicious homemade bread with our easy guide!
- Prep Time: 15 minutes
- Cook Time: 35 minutes
- Total Time: 1 hour 50 minutes
- Yield: 1 loaf
- Category: Bread
- Method: Baking
- Cuisine: American
- Diet: Vegetarian
Ingredients
- 4 cups all-purpose flour
- 1 tablespoon sugar
- 1 tablespoon salt
- 2 1/4 teaspoons active dry yeast
- 1 3/4 cups warm water
Instructions
- In a large bowl, combine flour, sugar, salt, and yeast.
- Add warm water and stir until a dough forms.
- Knead the dough on a floured surface for about 10 minutes.
- Place the dough in a greased bowl, cover, and let rise until doubled in size, about 1 hour.
- Punch down the dough, shape it into a loaf, and place it in a greased loaf pan.
- Cover and let rise again for 30 minutes.
- Bake at 375°F (190°C) for 30-35 minutes or until golden brown.
Notes
- Use a kitchen scale for more accurate measurements.
- Add herbs or spices for extra flavor.
Nutrition
- Serving Size: 1 slice
- Calories: 120
- Sugar: 1g
- Sodium: 200mg
- Fat: 1g
- Saturated Fat: 0g
- Unsaturated Fat: 1g
- Trans Fat: 0g
- Carbohydrates: 23g
- Fiber: 1g
- Protein: 4g
- Cholesterol: 0mg