Introduction to Thumbprint Cookies
What are thumbprint cookies and why are they beloved?
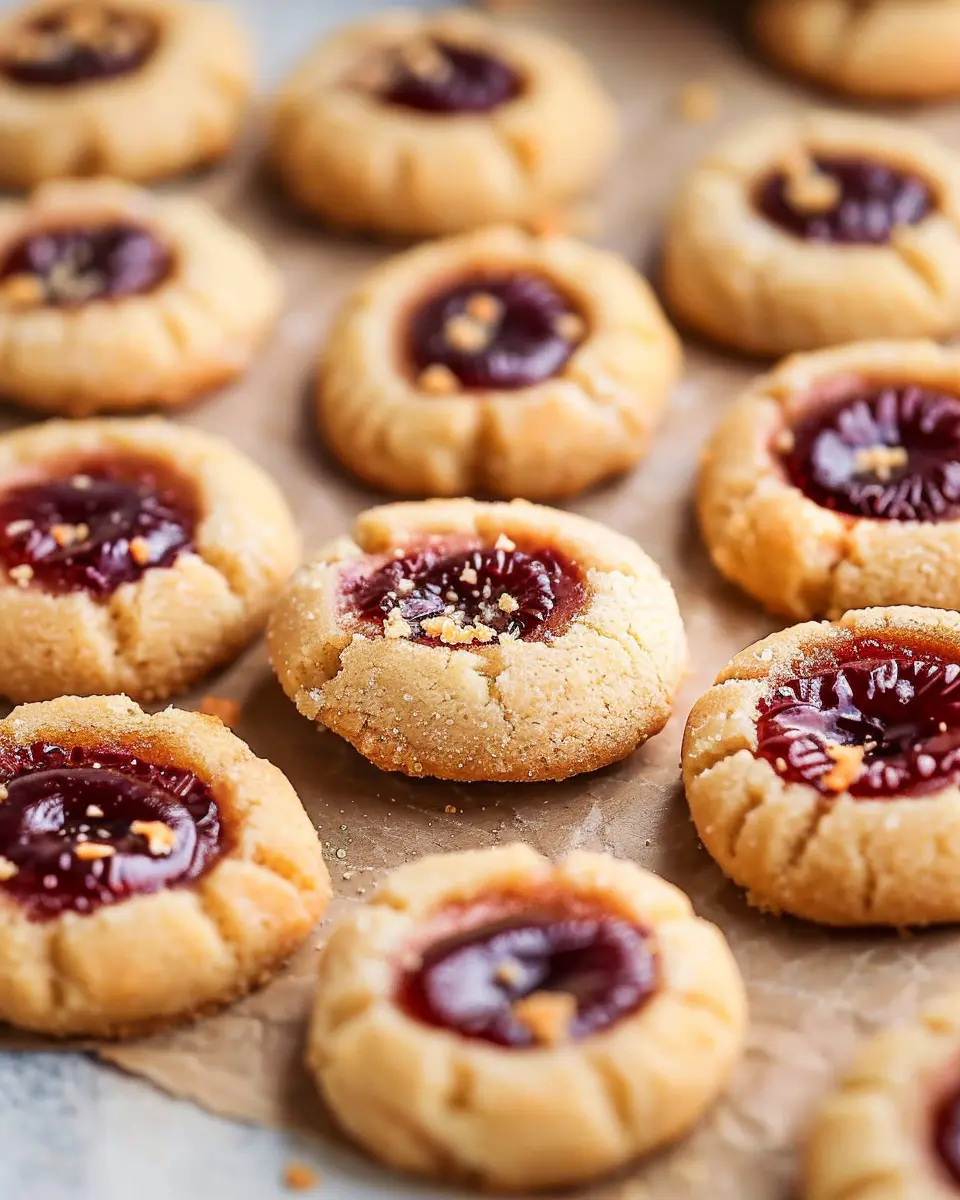
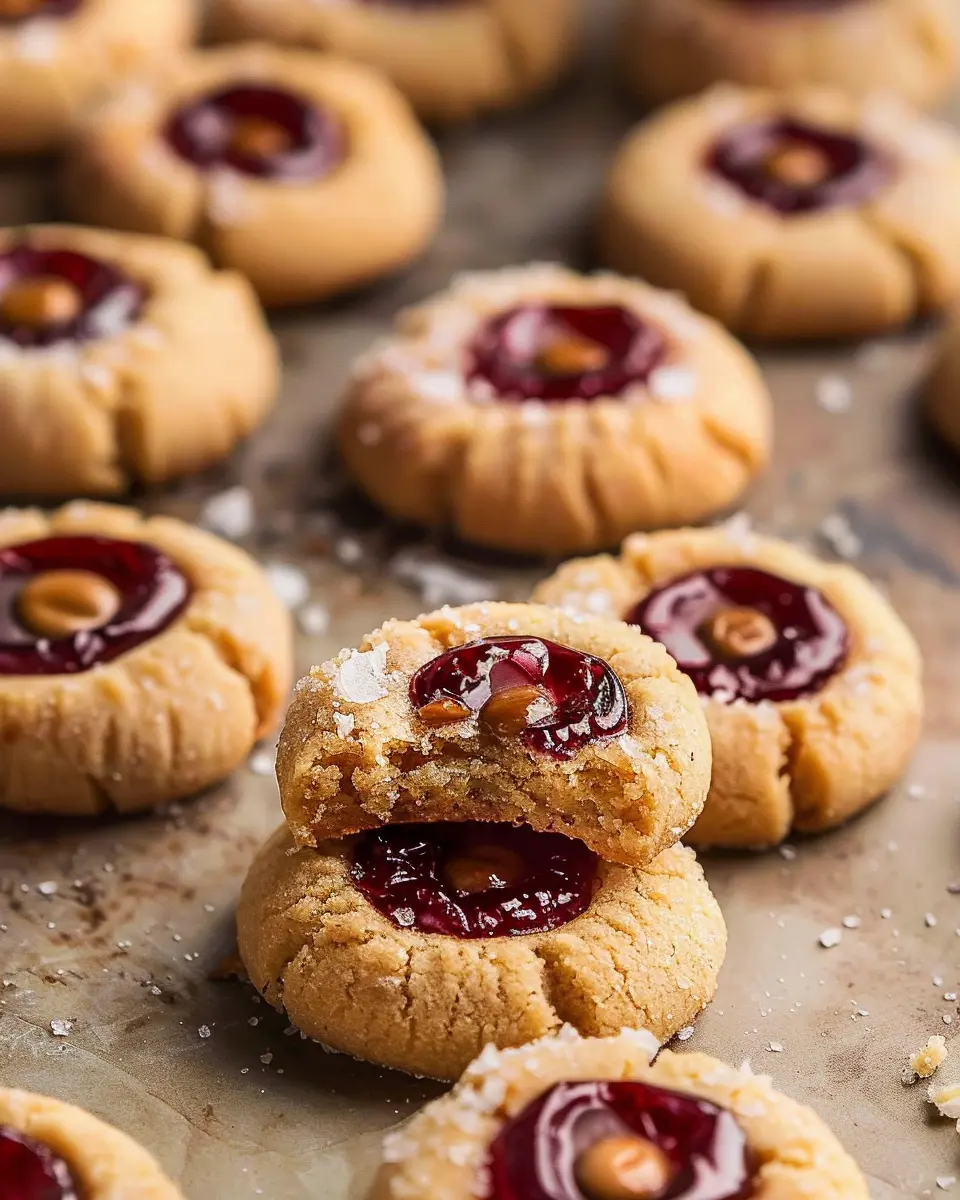
Thumbprint cookies are delightful little treats that bring a smile with each bite. Known for their distinctive shape—a small indentation filled with sweet jam or chocolate—these cookies are not only a feast for the eyes but also a delight for the taste buds. It’s no wonder they hold a special place in the hearts of cookie lovers everywhere. Their simplicity and versatility allow you to customize the filling to match your mood or the season, making them perfect for holiday gatherings, afternoon teas, or simply as a sweet treat to brighten your day.
A brief history of thumbprint cookies
The origins of thumbprint cookies can be traced back to various European traditions, with roots in both Swedish and Jewish cuisines. You might have heard these cookies referred to as “Hallongrotta” in Sweden, which translates to “raspberry cave,” highlighting the jam-filled nature of the treat. According to the History of Cookies, recipes similar to thumbprint cookies have spanned decades, evolving with each culture that embraced them. They’re not only a nostalgic childhood memory for many but also a cherished recipe passed down through generations. The global love for these cookies highlights how food can connect us, regardless of where we come from.
Benefits of making thumbprint cookies at home
Making thumbprint cookies at home isn’t just a culinary endeavor; it’s an experience that offers several benefits:
- Creativity: You can choose from an array of fillings—think raspberry, apricot, chocolate, or even peanut butter!
- Healthier Alternatives: You control the ingredients, so feel free to use organic sugar or gluten-free flour if needed.
- Quality Time: Baking can be a wonderful way to spend time with friends or family, creating memories alongside delicious treats.
- Gift Potential: These cookies make great homemade gifts. Imagine presenting a beautifully packaged box of your thumbprint cookies to a friend!
So, why not gather your ingredients, roll up your sleeves, and dive into this delightful baking adventure? You’ll discover firsthand why thumbprint cookies have timeless appeal. Happy baking!

Ingredients for Thumbprint Cookies
Essential ingredients for the perfect thumbprint cookies
When it comes to baking thumbprint cookies, using quality ingredients is key. Here’s a quick rundown of what you’ll need:
- Butter: Use unsalted, softened butter for a rich flavor.
- Sugar: Granulated sugar not only sweetens your cookies but helps achieve that perfect texture.
- Flour: All-purpose flour provides the structure you need.
- Egg yolk: This helps bind the ingredients and adds a lovely richness.
- Vanilla extract: For an aromatic boost that elevates each bite.
- Jam or preserves: Choose your favorite flavor—raspberry, apricot, or even chocolate works wonders!
Pro tip: The ratio of butter to flour can affect the cookie’s texture. Better Homes & Gardens mentions it’s all about finding the right balance for your preferred finish.
Ingredient substitutions for dietary preferences
We all have unique dietary preferences, and luckily, thumbprint cookies can be quite flexible! Here are some smart substitutions:
- Butter: Use coconut oil or vegan block butter for a dairy-free option.
- Sugar: Swap granulated sugar for coconut sugar or a sugar alternative like stevia for a healthier option.
- Flour: Almond or oat flour can be fantastic gluten-free alternatives.
No matter what substitutions you choose, your thumbprint cookies will still shine at your next gathering! Ready to indulge?
Preparing Thumbprint Cookies
Making thumbprint cookies is a delightful process that combines simple ingredients with a splash of creativity. This traditional treat is not just easy to make; it’s also a fantastic way to spend a cozy afternoon in the kitchen. So, roll up your sleeves and get ready to enjoy some delicious homemade cookies!
Gather Your Ingredients
Before diving into the baking process, it’s essential to gather all your ingredients. Here’s what you’ll need:
- 1 cup unsalted butter, softened
- 2/3 cup granulated sugar
- 1/3 cup brown sugar, packed
- 1 large egg yolk
- 1 teaspoon vanilla extract
- 2 cups all-purpose flour
- 1/4 teaspoon salt
- Your choice of jam or preserves for filling (raspberry, apricot, or even chocolate)
Having everything on hand will make the baking process smoother and more enjoyable. Plus, it’s a great way to keep everything organized!
Mix the Dry Ingredients
Start by whisking together your dry ingredients in a bowl. Combine the all-purpose flour and salt, ensuring that they’re well mixed. This step is crucial as it helps to evenly distribute the salt throughout your cookie dough. If you’re interested in tracking your nutrition, check out some expert insights on the benefits of measuring your ingredients properly here.
Cream the Butter and Sugars
Next, grab your mixer or a large bowl and beat the softened butter with the granulated and brown sugars until the mixture is light and fluffy. This usually takes about 2-3 minutes and is where the magic begins. When the sugar and butter are well combined, they create air pockets that give your thumbprint cookies a tender texture.
Incorporate the Egg Yolk and Vanilla
Once your butter and sugars are airy, it’s time to add the egg yolk and vanilla extract. The yolk adds richness to the dough, while the vanilla brings a warm, familiar flavor. Mix until everything is smoothly combined—don’t worry if it seems a bit loose at this stage; that’s perfectly normal!
Combine the Wet and Dry Mixtures
Now, it’s time to bring everything together. Gradually add the dry ingredient mixture to the wet ingredients, stirring gently until combined. Be careful not to overmix; you want the dough to hold together without becoming tough.
Shape and Roll the Cookie Dough
With your dough ready, scoop out tablespoon-sized portions and roll them into balls. Don’t worry about keeping them perfectly uniform; a little variation adds character! Once you’ve formed the balls, roll them in granulated sugar for a sweet finish before placing them on a baking sheet lined with parchment paper.
Create the Indents and Chill
Here comes the fun part! Using your thumb (or the back of a spoon), gently press down the center of each ball to create that signature thumbprint shape. This is where the jam will go, so make sure the indent is deep enough. To help your dough maintain its shape while baking, refrigerate the cookies for at least 30 minutes.
Bake and Fill with Jam
Preheat your oven to 350°F (175°C) and bake the cookies for about 12-15 minutes or until the edges are lightly golden. Right after you take them out, you might want to press down the centers again if they puffed up during baking. Once cooled, fill the indents with your choice of jam. A simple raspberry or classic apricot preserves work beautifully here!
Enjoy your freshly baked thumbprint cookies with a cup of tea or coffee, and don’t forget to share them with loved ones! For more delightful cookie recipes, consider exploring this comprehensive cookie guide. Happy baking!
Variations on Thumbprint Cookies
Unique jam fillings to consider
When it comes to thumbprint cookies, the filling options can make all the difference. While traditional choices like raspberry or strawberry jam are delightful, don’t shy away from more adventurous flavors! Consider using:
- Blueberry or peach jam for a sweet-tart twist.
- Almond or hazelnut spread for a chocolatey indulgence.
- Lemon curd for a refreshing zing.
Exploring these unique fillings can elevate your cookie game and surprise your guests!
Experimenting with different nuts and toppings
The texture of your thumbprint cookies can be varied easily by incorporating different nuts and toppings. Here are a few ideas to get you inspired:
- Roll your cookies in chopped pecans, almonds, or walnuts before baking.
- Top with a sprinkle of sea salt or shredded coconut for added flavor.
- Drizzle with melted chocolate after they cool for an elegant finish.
By experimenting, you can create a delightful medley of flavors that will have everyone asking for your secret recipe.
Gluten-free and vegan options for thumbprint cookies
For those who may have dietary restrictions, thumbprint cookies can easily be adapted. For gluten-free versions, substitute all-purpose flour with almond or coconut flour. For a vegan-friendly option, opt for plant-based butters and use flax eggs (1 tablespoon ground flaxseed mixed with 2.5 tablespoons of water) instead of traditional eggs.
Not only are these variations tasty, but they also open up your cookie platter to a wider array of friends and family! For more tips on gluten-free baking, check out Gluten-Free Baking Tips from King Arthur Baking.
Remember, the best part about thumbprint cookies is that they’re versatile, so don’t hesitate to get creative in the kitchen!
Baking Notes for Thumbprint Cookies
Common pitfalls and how to avoid them
When making thumbprint cookies, one common pitfall is over-creating the indentations. Too deep, and the jam might overflow during baking; too shallow, and you won’t have enough filling. Aim for a gentle press with your thumb to create the perfect nest for that delicious filling.
Tips for achieving the perfect cookie texture
For cookies that are soft yet crispy, make sure to use room temperature butter. It should be creamy and spreadable, which helps in achieving that delightful texture. Also, chilling the dough for at least 30 minutes can prevent spreading, resulting in defined edges and a lovely chewy center.
Storage tips for maintaining freshness
To keep your thumbprint cookies fresh, store them in an airtight container at room temperature for up to a week. If you want to extend their lifespan, consider freezing them after baking. They can last for up to three months this way. Just remember to layer them with parchment paper to prevent sticking!
For more detailed tips on baking cookies, check out The Spruce Eats. Happy baking!

Serving Suggestions for Thumbprint Cookies
Perfect pairings with beverages
When you’re enjoying thumbprint cookies, consider pairing them with a warm beverage for a cozy experience. A cup of rich, freshly brewed coffee complements the sweetness beautifully. Alternatively, a classic cup of chai tea, with its aromatic spices, enhances the flavor profile of these delicious cookies. Looking for something a bit more refreshing? Try a glass of cold almond milk or herbal iced tea—the nutty or floral notes will work wonders with your treats.
Creative presentation ideas for gatherings
Make your thumbprint cookies the star of the show at your next gathering! Present them on a decorative platter or tiered stand for a touch of elegance. You can also individualize each cookie by placing them in colorful liners or boxes tied with twine. Adding a personal touch, like a handwritten note, can make guests feel special—imagine each cookie being a little gift!
How to make thumbprint cookies a festive treat
To elevate your thumbprint cookies for the holidays, consider using seasonal flavors! Swap in spiced jams or even peppermint-infused chocolate for a wintery twist. Arranging them alongside festive candies or holiday ornaments can create a visually appealing centerpiece that delights guests of all ages. For an extra layer of fun, involve your friends in decorating—the possibilities for creativity are endless!
By using these serving suggestions, your thumbprint cookies will not only taste amazing but also impress everyone at the table!
Time Details for Thumbprint Cookies
Preparation Time
Getting your ingredients together for thumbprint cookies is a breeze! You’ll need approximately 15 minutes to cream the butter, sugar, and mix the other ingredients. It’s a great way to unwind after a long day.
Baking Time
Once you’ve shaped your cookie dough and filled them with your favorite jam, they’ll need about 12-15 minutes in the oven. Keep an eye on them; the perfect thumbprint cookie should have a light golden color.
Total Time
In total, you’re looking at around 30-35 minutes from start to finish. This recipe is not only quick but leaves you with delicious cookies to share! Want to explore more cookie variations? Check out this cookie baking guide for additional tips and tricks!
Nutritional Information for Thumbprint Cookies
Calories per cookie
When indulging in thumbprint cookies, it’s essential to know what you’re treating yourself to. Each cookie typically contains around 100-130 calories, depending on the size and the ingredients used. This makes them a delightful yet moderate choice for a sweet snack that won’t completely derail your daily caloric goals.
Sugar content
One of the standout features of these cookies is their sugar content. On average, you can expect each cookie to contain approximately 10-12 grams of sugar. Keep in mind that this can vary based on the type of jam or filling you choose. Opting for reduced-sugar variations or natural fruit preserves can help lower this number significantly.
Other nutritional considerations
While thumbprint cookies certainly satisfy your sweet tooth, it’s important to look at the bigger picture.
- Fat: Typically, these cookies will have around 5-7 grams of fat, primarily from butter.
- Carbohydrates: With about 15-20 grams per cookie, they can give you a quick energy boost.
- Protein: They offer a minimal amount of protein (around 1-2 grams), which means they’re best enjoyed as a treat rather than a meal replacement.
If you’re interested in more detailed nutritional insights, sites like NutritionData provide extensive breakdowns on various ingredients. Remember, moderation is key, but you can still savor the sweetness of thumbprint cookies while being mindful of your overall intake!
FAQs about Thumbprint Cookies
When it comes to baking thumbprint cookies, you might have a few questions on your mind. Don’t worry; we’ve got you covered!
What can I substitute for butter in the recipe?
If you’re looking to swap out butter in your thumbprint cookies, there are several options to consider:
- Coconut Oil: This provides a delightful flavor and maintains the right texture.
- Vegetable Oil: A simple swap for butter, just be sure to use a light flavor.
- Applesauce: It’s a great lower-fat option and adds moisture, though it will change the cookie texture a bit.
For detailed guidance, check out this article on substituting baking ingredients.
How can I make thumbprint cookies without eggs?
Making thumbprint cookies without eggs is easier than you think! Here’s what you can use:
- Flaxseed Meal: Mix 1 tablespoon of ground flaxseed with 2.5 tablespoons of water and let it sit for a few minutes. This works beautifully as an egg replacement!
- Chia Seeds: Similar to flaxseed, combine 1 tablespoon of chia seeds with 2.5 tablespoons of water, let it sit, and use it in your recipe.
These ingredients not only bind the dough but also contribute nutritional benefits.
What’s the best way to store thumbprint cookies?
To keep your thumbprint cookies fresh and delicious:
- Airtight Container: Store them in an airtight container at room temperature for up to a week.
- Freezing: If you want to save some for later, freeze them in a single layer on a baking sheet before transferring to a container. They can last for about 3 months in the freezer.
For more tips on cookie storage, visit Cookie Storage 101.
Feel free to experiment with these options; baking is all about having fun! If you have more questions, don’t hesitate to ask!
Conclusion on Thumbprint Cookies
Homemade thumbprint cookies bring an undeniable joy, creating not just delightful treats but also heartwarming memories. The tactile experience of pressing your thumb into the dough and filling it with your favorite jam is both satisfying and nostalgic.
Now, why not take your baking adventure a step further? Experiment with flavors—try using chocolate ganache, caramel, or even savory fillings! Share your unique creations on social platforms or in baking communities to inspire others.
Gather your friends and family for a fun baking session, mixing and matching ingredients. Together, you’ll craft delicious thumbprint cookies and cherish these moments for years to come. Happy baking!
PrintThumbprint Cookies: Easy, Indulgent Treats for Everyone

Delicious and easy-to-make thumbprint cookies that are perfect for everyone. These treats are sure to delight with their rich flavors and delightful textures.
- Prep Time: 20 minutes
- Cook Time: 15 minutes
- Total Time: 35 minutes
- Yield: 24 cookies
- Category: Dessert
- Method: Baking
- Cuisine: American
- Diet: Vegetarian
Ingredients
- 1 cup unsalted butter
- 1 cup granulated sugar
- 2 large eggs
- 2 teaspoons vanilla extract
- 3 cups all-purpose flour
- 1 teaspoon baking powder
- 1/2 teaspoon salt
- 1 cup jam or preserves of choice
Instructions
- Preheat your oven to 350°F (175°C).
- In a large bowl, cream together the butter and sugar until light and fluffy.
- Add the eggs one at a time, mixing well after each addition. Stir in the vanilla.
- In another bowl, whisk together the flour, baking powder, and salt. Gradually add to the creamed mixture.
- Roll the dough into small balls and place them on a baking sheet.
- Make a thumbprint in the center of each ball and fill with jam.
- Bake for 12-15 minutes or until lightly golden. Allow to cool before serving.
Notes
- For best results, use room temperature ingredients.
- You can substitute different types of jam for variety.
Nutrition
- Serving Size: 2 cookies
- Calories: 150
- Sugar: 10g
- Sodium: 50mg
- Fat: 8g
- Saturated Fat: 5g
- Unsaturated Fat: 3g
- Trans Fat: 0g
- Carbohydrates: 20g
- Fiber: 1g
- Protein: 2g
- Cholesterol: 30mg