Introduction to Original Sausage Balls
When you’re juggling a hectic professional life, meal prep can often fall by the wayside. Enter original sausage balls—a delightful blend of flavor, convenience, and nutrition that’s transforming the way young professionals approach meals. Why are these tasty bites a game changer? Let’s dig into what makes them so special.
The Perfect Meal for Busy Schedules
Imagine a snack or meal that effortlessly transitions from breakfast to a light dinner. Original sausage balls are the quintessential solution. Packed with protein from ground beef and cheese, these savory morsels not only satisfy your hunger but also provide the energy boost you need to tackle your day.
Think about it: with just a few ingredients—like turkey bacon, chicken ham, and shredded cheese—you can whip up a batch that lasts throughout the week. According to a study by the American Dietetic Association, meal prep is key to maintaining a healthy work-life balance, and incorporating staples like these sausage balls can keep you on track.
Versatile and Adaptable
One of the best features of original sausage balls is their adaptability. Not a beef fan? Swap in turkey for a leaner option. Want more flavor? Toss in some herbs or spices you love. They can be eaten on their own, paired with a dipping sauce, or even served on a salad. The options are endless!
For more inspiration, check out this simple guide on meal prepping.
Cost-Effective and Budget-Friendly
For young professionals mindful of their spending, original sausage balls can be a significant budget saver. Once you have your core ingredients, you can customize the recipe based on what’s on sale or what you have in your pantry. Plus, not having to order takeout every night will positively impact your wallet—allowing those savings to go towards experiences rather than expenses.
Conclusion
In a world where time is often limited, finding simple, delicious, and flexible meal options is a must. Original sausage balls fit the bill perfectly, providing nourishment, convenience, and flavor. They are not just a meal; they’re an essential part of your busy lifestyle. So, why not give them a try and see how they can revolutionize your eating habits?

Ingredients for Original Sausage Balls
Creating delicious original sausage balls is easier than you might think! The following ingredients come together to deliver a flavorful snack perfect for any gathering. Let’s dive right into what you’ll need.
Essential Ingredients
- Beef Sausage: This is the star of the show! Opt for a good quality, heavily spiced beef sausage to impart rich flavor.
- Turkey Bacon: For a healthier twist, chopped turkey bacon adds a delightful smokiness and crunch.
- Chicken Ham: A fantastic alternative, this adds a touch of sweetness that complements the savory sausage beautifully.
- Cheddar Cheese: Shredded sharp cheddar provides not just flavor but also a lovely gooey texture.
- Bisquick Mix: This versatile mix acts as the binding agent—ensuring your balls hold their shape.
- Milk: A hint of milk brings moisture, making your sausage balls tender and fluffy.
Additional Flavorings
Feel free to experiment with your favorite spices, like garlic powder or onion powder, for an extra kick. You can even check out this guide on spice combinations for inspiration!
Each ingredient in these original sausage balls has its role in elevating this classic recipe, making it a mouthwatering delight. Plus, they’re a crowd-pleaser, so don’t be surprised when they disappear fast at your next event!
Preparing Original Sausage Balls
If you’re looking for a savory snack that’s perfect for any occasion, original sausage balls should be on your radar. These bite-sized delights are not only easy to prepare, but they’re also crowd-pleasers at parties, potlucks, or just for snacking at home. So, grab your apron, and let’s dive into the preparation process!
Gather Your Ingredients
Before you get started, it’s crucial to have everything you need on hand. The beauty of original sausage balls lies in their simplicity. Here’s what you’ll require:
- 1 pound of beef sausage
- 2 cups of shredded cheese (cheddar is a classic choice, but feel free to experiment!)
- 2 cups of Bisquick mix
- 1/4 cup of milk (or a plant-based milk alternative)
- Optional: spices like black pepper, garlic powder, or onion powder for added flavor
Getting organized will make cooking much smoother, allowing you to focus on creating that deliciousness without scrambling for ingredients later!
Mixing the Sausage and Cheese
In this step, you’ll set the foundation for your original sausage balls. Start by placing the beef sausage in a large mixing bowl. If you’re using cold sausage, let it sit at room temperature for about 15 minutes; this will make it easier to mix.
Next, add in your shredded cheese. Don’t skimp on this ingredient; the gooey, melty goodness it provides is pivotal to delicious sausage balls. Using your hands or a sturdy spoon, mix these two ingredients together well. The goal is to create a uniform mixture where the cheese is evenly distributed throughout the sausage.
Incorporate the Bisquick
Now that you have a solid sausage and cheese base, it’s time to add in the Bisquick. This is where your original sausage balls start to take shape. Gradually mix in the Bisquick, ensuring that it’s fully combined with the sausage and cheese mixture.
Once you’ve incorporated the dry ingredient, pour in the milk. This will help to bind everything together, giving your mixture the right consistency. You want it to be moist but not runny. If the mix feels too dry, a splash more milk can help.
Shape the Sausage Balls
Now comes the fun part—shaping your original sausage balls! Preheat your oven to 375°F (190°C). While it’s heating up, take small amounts of the mixture (about a tablespoon’s worth) and roll them into balls. Aim for a size similar to golf balls; they’ll puff up slightly when baking.
As you shape the balls, place them on a baking sheet lined with parchment paper. Make sure to leave some space between each ball so they don’t stick together while cooking. This step is all about achieving that perfect golden crust!
Baking to Perfection
With your original sausage balls ready, pop them in the oven! Bake for about 15-20 minutes or until they reach a beautiful golden brown. Pro tip: check halfway through to ensure they are cooking evenly.
For an even tastier finish, consider adding a sprinkle of additional cheese on top just before they finish baking. The result? A melty, cheesy, and oh-so-tempting appetizer that’s bound to impress your friends and family.
And there you have it! Once your original sausage balls are out of the oven and slightly cooled, they’re ready to serve. Pair them with your favorite dipping sauces, such as honey mustard or barbecue sauce, for an extra flavor kick. Happy cooking!
For more ideas on delightful appetizers, check out this guide to party snacks.

Variations on Original Sausage Balls
When it comes to original sausage balls, the possibilities are almost endless! Whether you’re hosting a weekend brunch or just want a tasty snack, here are some exciting variations that will delight your taste buds.
Spicy Sausage Balls with Jalapeños
If you love a kick of heat, try adding jalapeños to your original sausage balls! Here’s a quick way to elevate your recipe:
- Ingredients to Add: Diced fresh jalapeños (adjust to your spice level) and a sprinkle of cayenne pepper.
- Prep Tip: Mix the jalapeños finely into the sausage and cheese mix for an even distribution. You could also top your balls with a dash of hot sauce just before serving for an extra zing!
Jalapeños not only amp up the flavor but also add a vibrant green color to your treats. Try pairing these spicy balls with a cool yogurt or ranch-based dip for delightful contrast.
Vegetarian Sausage Balls Alternative
Looking for a delicious meat-free option? You can create vegetarian sausage balls that still deliver on flavor.
- Main Ingredients: Use a mix of shredded carrots, spinach, and lentils instead of meat. Incorporate nutritional yeast for a cheesy taste without the dairy.
- Binding Agents: You’ll still need some flour and cheese, but feel free to swap in plant-based cheese to keep it vegan.
Many people might be surprised that a veggie version can be just as satisfying! Plus, this alternative can be more inclusive for gatherings, ensuring everyone finds a tasty treat. If you’re curious about vegetarian cooking tips, check out this comprehensive guide from Love and Lemons.
These variations on the beloved original sausage balls not only cater to different palates but also invite creativity into your culinary adventures. Enjoy experimenting, and let your taste preferences guide the way!
Cooking Tips and Notes for Original Sausage Balls
When whipping up delicious original sausage balls, a few simple tips can elevate your dish and make the cooking experience enjoyable.
Choose Your Meat Wisely
Using a good-quality beef sausage is key for the best flavor. Don’t shy away from experimenting with different brands or even making your own! You might surprise yourself with the flavors you can create.
Perfecting the Texture
For that ideal gooey texture, ensure your shredded cheese—cheddar works wonders—is mixed evenly throughout the dough. A blend of turkey bacon and chicken ham can add an extra twist if you’re looking to enhance the flavor.
Baking Tips
Bake at a consistent temperature (350°F is ideal) to avoid uneven cooking. Keep an eye on the baking time; about 20-25 minutes is generally perfect. For golden-brown results, consider using a convection oven.
Storage Suggestions
If you have leftovers—hardly likely—they can be stored in an airtight container for up to three days. You can reheat them in the oven at 300°F for a few minutes. For more tips on proper food storage, check out this guide from the USDA.
With these tips, you’ll be on your way to impressing your friends and family with your tasty original sausage balls. Happy cooking!
Serving Suggestions for Original Sausage Balls
When it comes to enjoying original sausage balls, the opportunities for creative serving suggestions are endless. These bite-sized delights are perfect for any occasion, whether it’s a casual snack or a festive gathering. Here are some ideas to elevate your serving game:
Pair With Dipping Sauces
Consider offering a variety of dipping sauces to complement the savory flavors of your original sausage balls. Some delicious options include:
- Honey Mustard: A sweet and tangy combination that balances the richness of the sausage.
- Barbecue Sauce: Adds a smoky flavor that’s perfect for a hearty bite.
- Spicy Aioli: For those who enjoy a kick of heat, this creamy option is a fantastic choice.
Serve Alongside Sides
Why not turn these sausage balls into a complete meal? They pair wonderfully with:
- Mixed Greens Salad: A refreshing contrast to the hearty sausage flavor.
- Vegetable Crudités: Crisp veggies provide a crunchy counterpoint and a healthy option.
Perfect for Entertaining
Original sausage balls are a fantastic addition to any party platter. Serve them on a wooden board with complementary items like cheese, olives, or even sliced Turkey Bacon or Chicken Ham. This not only enhances the visual appeal but also allows guests to create their own perfect bites.
By considering these serving suggestions, you can transform simple original sausage balls into a centerpiece dish that friends and family will love. For more ideas on pairing sauced appetizers, check out this resource from Serious Eats.
Time Breakdown for Original Sausage Balls
Preparation Time
Getting started on your original sausage balls only takes about 15 minutes. You’ll want to gather all your ingredients—ground beef, turkey bacon, cheese, and baking mix. Feeling prepped? You’re on the right path!
Baking Time
Once your mixture is ready, pop those flavorful sausage balls into the oven at 350°F (175°C). They’ll need about 20-25 minutes to bake until golden and delicious.
Total Time
In total, you’re looking at approximately 40 minutes from start to finish. That’s a short investment for a snack that’s sure to impress! If you’re curious about ingredient variations or tips, check out additional insights on Food Network’s website or Bon Appétit. You’ll have these savory bites ready in no time, perfect for parties or cozy nights in!
Nutritional Facts for Original Sausage Balls
When it comes to savory snacks, original sausage balls are hard to beat! Let’s break down the nutritional facts that make them both tempting and satisfying.
Calories
Each serving of original sausage balls packs about 250 calories. These little bites are perfect for keeping you energized during a busy day!
Protein
What sets original sausage balls apart is their impressive protein content, with approximately 12 grams per serving. This makes them a great option for post-workout or any time you need a quick protein boost.
Sodium
On the flip side, these tasty treats do have around 600 mg of sodium per serving. While they can be enjoyed in moderation, it’s a good idea to pair them with low-sodium options during your meals.
Whether you’re prepping for a gathering or just snacking, keep these figures in mind to make the most of your culinary experience. For more detailed information, visit Nutrition.gov or check out Eat Right for insights on balancing flavor with nutrition!
FAQs about Original Sausage Balls
When making original sausage balls, you might have a few questions. Let’s dive into some common queries to ensure your cooking experience is as enjoyable as possible.
Can I freeze my sausage balls?
Absolutely! Freezing your original sausage balls is a fantastic way to enjoy them later. Here’s how to do it:
- Cool Them Down: Let the sausage balls cool completely before freezing.
- Use an Airtight Container: Place them in a freezer-safe bag or container.
- Label and Date: Don’t forget to label your containers with the date.
You can typically freeze them for up to three months. Just thaw overnight in the refrigerator before reheating, and you’ll be good to go!
How do I make them less greasy?
If you find that your original sausage balls are a bit greasier than you’d like, consider these tips:
- Use Lean Beef: Choose a lean beef sausage or ground beef to reduce fat content.
- Drain Excess Fat: After cooking, place the balls on paper towels to absorb any extra grease.
- Balance with Ingredients: Increase the amount of cheese or add veggies like grated zucchini to help offset the grease.
For more insights on healthy cooking, check out resources like Healthline.
What’s the best way to reheat sausage balls?
Reheating your original sausage balls can be done effectively to maintain their flavor:
- Oven Method: Preheat your oven to 350°F (175°C). Place the sausage balls on a baking sheet for about 10-15 minutes.
- Microwave Method: If you’re in a hurry, use the microwave on a medium setting for about 30-60 seconds.
Remember, reheating in the oven gives you that freshly-baked taste! Enjoy experimenting with your original sausage balls, and soon you’ll be the go-to snack expert among friends. For tasty variations, check our full recipe!
Conclusion on Original Sausage Balls
Creating original sausage balls is not just about mixing ingredients; it’s about crafting a dish that brings joy and comfort to any gathering. These bite-sized delights are versatile enough to fit any occasion, from game nights to brunches.
When you add flavorful ingredients like Turkey Bacon and Chicken Ham, you elevate the classic recipe while keeping it fun and appealing. It’s also a fantastic opportunity for experimenters—consider swapping in different cheeses or spices based on what you love!
Next time you’re hosting, why not whip up a batch of these savory snacks? For even more inspiration, check out this guide on perfect appetizer pairings!
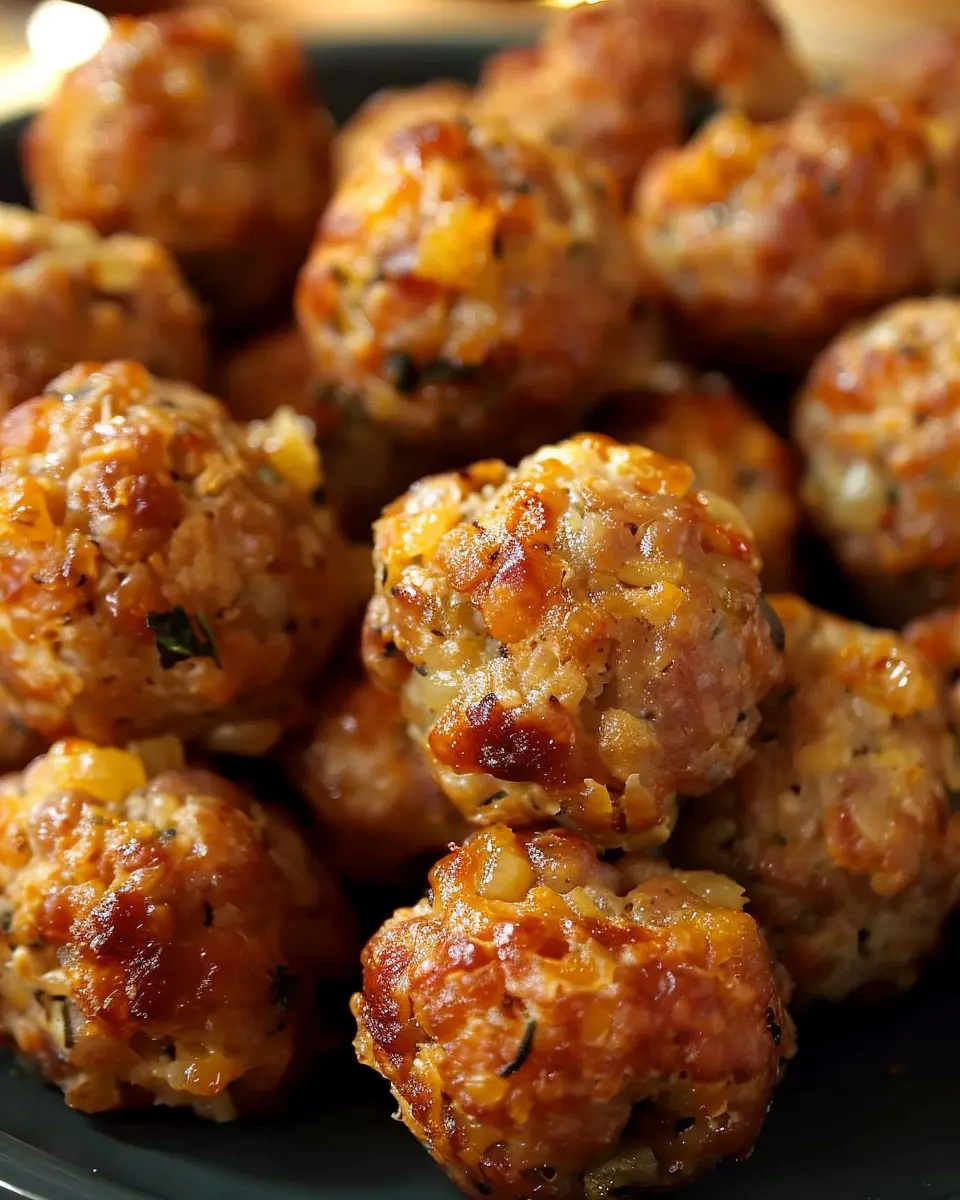
PrintOriginal Sausage Balls: Easy Beef & Turkey Bacon Delight

A delicious and easy recipe for Original Sausage Balls made with beef and turkey bacon.
- Prep Time: 15 minutes
- Cook Time: 30 minutes
- Total Time: 45 minutes
- Yield: 24 servings
- Category: Appetizer
- Method: Baking
- Cuisine: American
Ingredients
- 1 pound ground beef
- 1/2 pound turkey bacon, chopped
- 2 cups shredded cheese
- 1 cup almond flour
- 2 eggs
- 1 teaspoon garlic powder
- 1 teaspoon onion powder
- 1/2 teaspoon salt
- 1/2 teaspoon black pepper
Instructions
- Preheat the oven to 350°F (175°C).
- In a large bowl, combine all ingredients until well mixed.
- Form the mixture into small balls and place on a baking sheet.
- Bake for 25-30 minutes or until golden brown.
- Serve warm or at room temperature.
Notes
- For extra flavor, add herbs like parsley or chives.
- These can be made ahead of time and frozen.
Nutrition
- Serving Size: 2 balls
- Calories: 150
- Sugar: 1g
- Sodium: 200mg
- Fat: 10g
- Saturated Fat: 4g
- Unsaturated Fat: 4g
- Trans Fat: 0g
- Carbohydrates: 2g
- Fiber: 1g
- Protein: 12g
- Cholesterol: 30mg