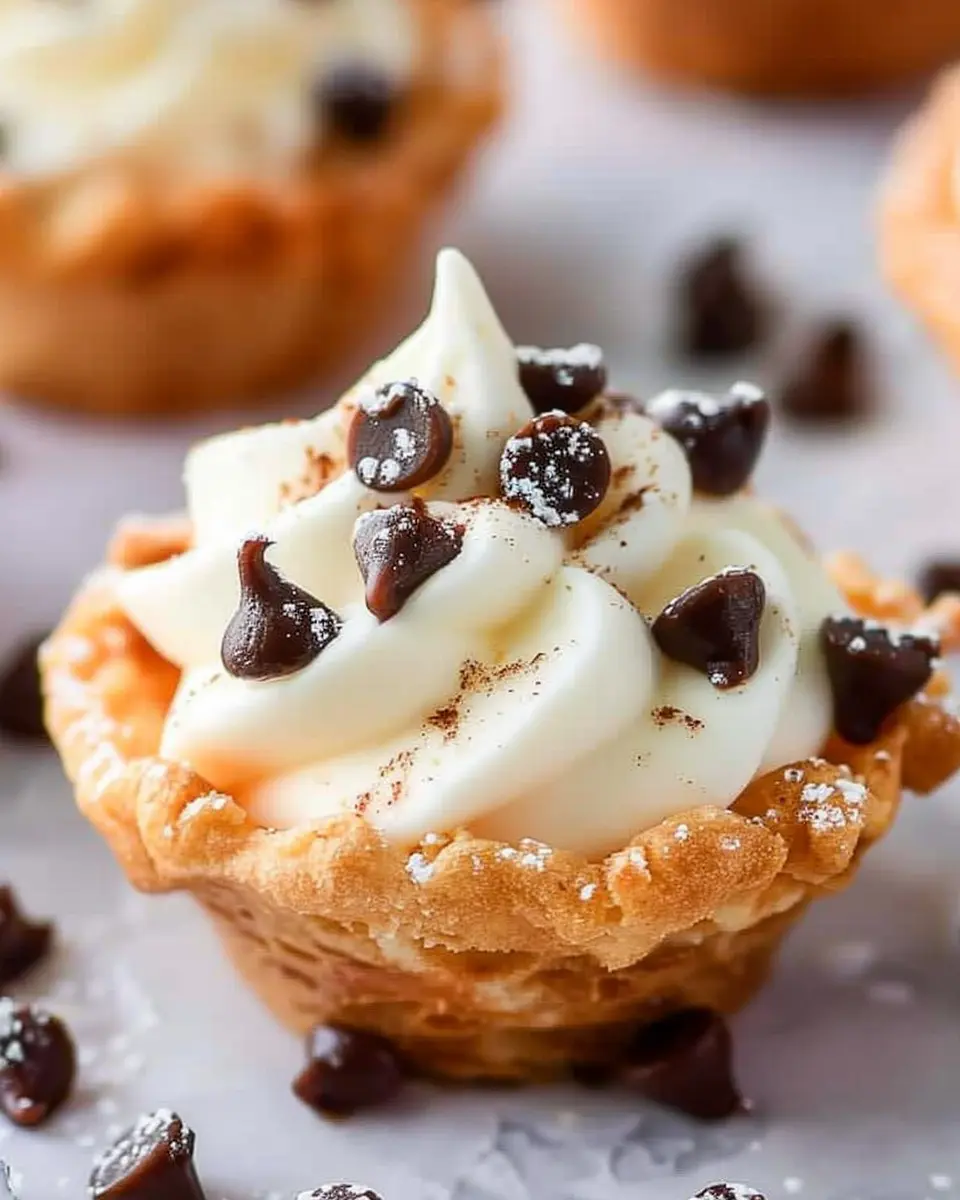
Introduction to Mini Cannoli Cups
When it comes to satisfying your sweet tooth without the commitment of an elaborate dessert, Mini Cannoli Cups are a game-changer. These delightful treats combine the traditional flavors of Italian cannoli with a modern twist, making them the perfect dessert for young professionals who appreciate a slice of nostalgia but are often too busy to tackle the mess of a full-scale pastry.
Why Mini Cannoli Cups are the Perfect Dessert for Young Professionals
As a young professional, your life is likely a balancing act of meetings, deadlines, and social engagements. Finding a dessert that aligns with this fast-paced lifestyle can feel like a challenge, but Mini Cannoli Cups fit seamlessly into your world. Consider these reasons why they’re ideal for busy individuals:
-
Effortless Preparation: With a streamlined recipe, these mini treats require minimal time in the kitchen. You can whip them up quickly before a gathering or simply for a self-indulgent night in. According to a survey by The Harris Poll, 70% of young adults are drawn to recipes that can be made quickly without sacrificing flavor or presentation.
-
Portion Control: Forget about large cakes or heavy pies; these cups come in perfectly portioned sizes that allow you to savor the moment without the guilt. A study from the Journal of Nutrition suggests that smaller servings encourage moderation and help maintain a healthy relationship with sweets.
-
Versatile Flavors: While classic ricotta and chocolate chip are crowd-pleasers, don’t shy away from experimenting. Add some zest with lemon ricotta or toss in seasonal fruits for extra flair. This flexibility lets you personalize your Mini Cannoli Cups to match any occasion or taste preference.
-
Impressive Presentation: Let’s face it—when hosting friends or impressing a date, the aesthetic of a dessert matters. Mini Cannoli Cups are visually stunning, providing that extra “wow” factor with their appealing layers and decorations. A beautiful dessert can elevate any gathering, making it an experience to remember.
So if you’re ready to elevate your dessert game with a quick, delectable option that resonates with your busy lifestyle, dive into this recipe for Mini Cannoli Cups. They’ll not only impress your guests but also provide a fulfilling treat for yourself. For more delicious recipes and ideas, check out sites like Food Network or Bon Appétit for inspiration!
Ingredients for Mini Cannoli Cups
Making Mini Cannoli Cups is not only fun but also a delightful way to treat yourself and impress your friends. Let’s dive right into the ingredients you’ll need.
Essential Ingredients for the Filling
The star of your mini cannoli cups is undoubtedly the creamy filling. Here’s what you’ll need:
- Ricotta cheese: The foundation of your filling; makes it rich and creamy.
- Mascarpone cheese: Just a hint increases the filling’s decadence.
- Powdered sugar: For that perfect sweetness.
- Vanilla extract: Adds warmth and depth.
- Mini chocolate chips: Because who can resist chocolate?
For more tips on selecting quality cheeses, check out this guide.
Ingredients for the Cannoli Cups
The crispy base for your filling is equally important:
- Cannoli shells: You can buy pre-made or make your own—both work!
If you’re up for the challenge, Homemade Cannoli Shells can add a personal touch!
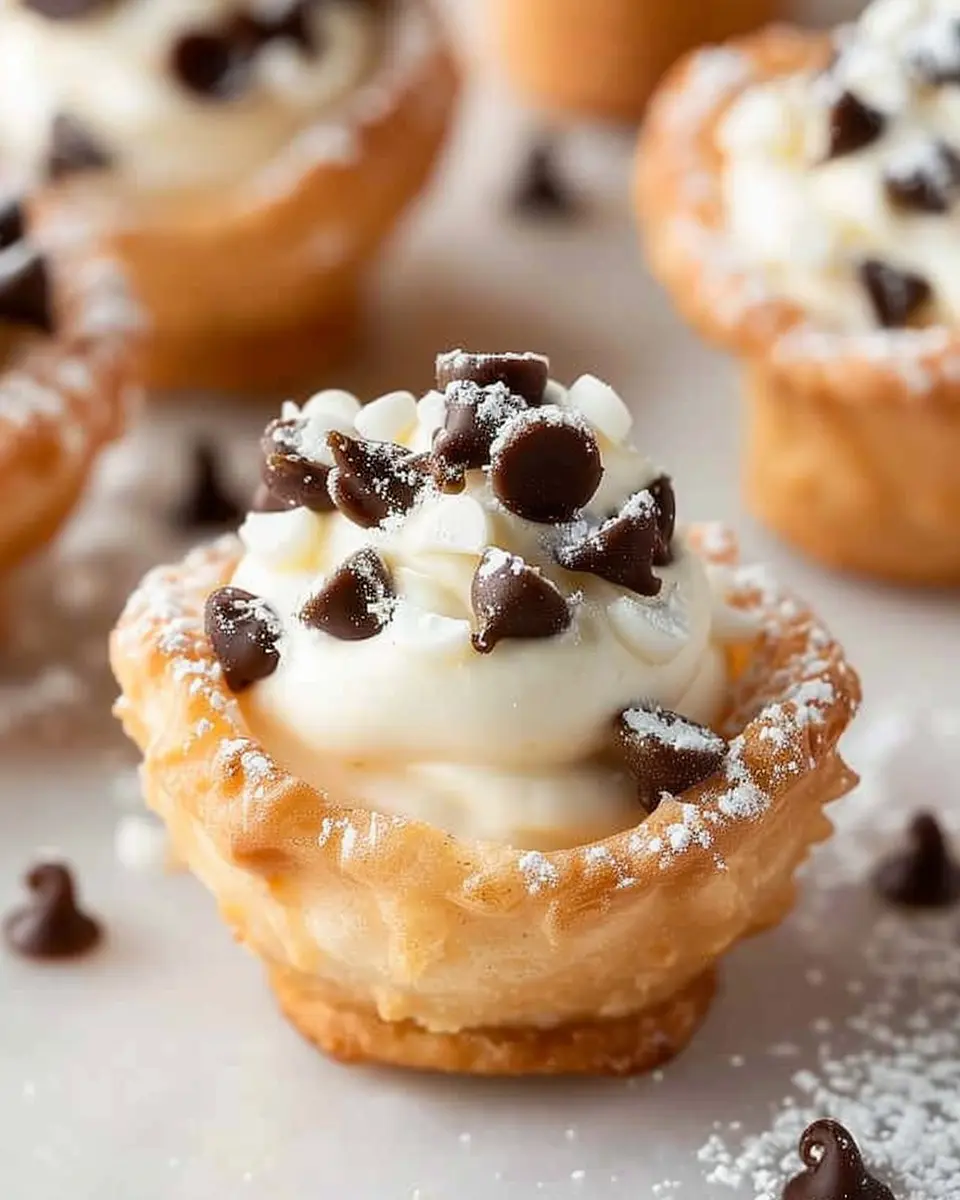
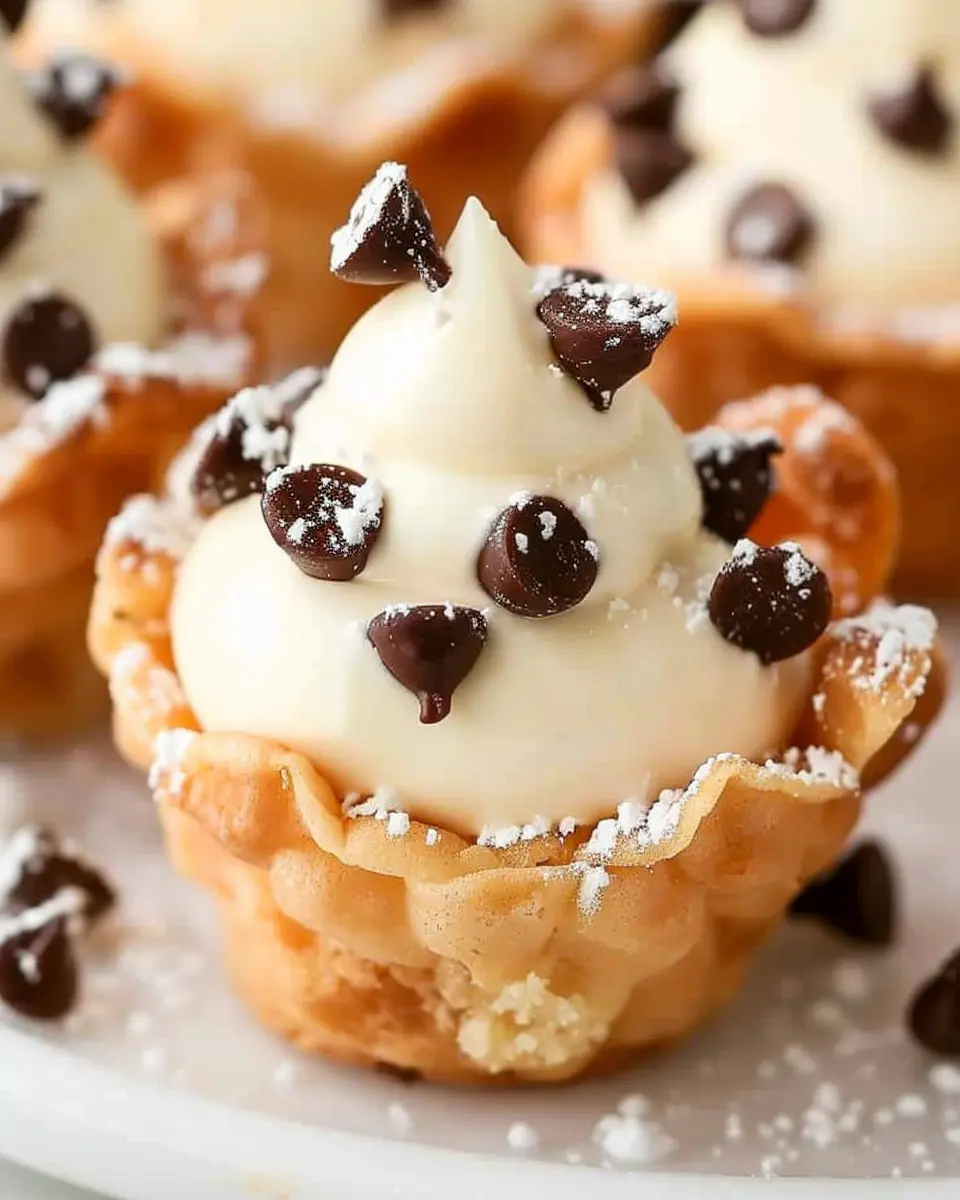
Garnishes to Elevate Your Mini Cannoli Cups
Finishing touches can make all the difference:
- Chopped pistachios: For a bit of crunch and a lovely green contrast.
- Dusting of powdered sugar: It brightens up the presentation.
- Fresh berries: Strawberries or raspberries add a fresh pop of color and flavor.
These garnishes not only enhance the look but elevate every bite of your Mini Cannoli Cups. Enjoy!
Preparing Mini Cannoli Cups
Creating Mini Cannoli Cups is not just about cooking; it’s about crafting a delightful experience, sweets that impress, and flavors that bring people together. Let’s break down the preparation process into simple steps that will make your mini cannoli an absolute hit at your next gathering.
Prepping the Kitchen and Ingredients
Before we dive into the fun part of making these delightful treats, getting your kitchen organized is crucial. Here’s a streamlined checklist to help you set up:
- Gather your tools: You’ll need a mixing bowl, baking sheets, a rolling pin, and a cannoli mold if you have one.
- Prepare your ingredients: You’re going to need:
- Ricotta cheese (about 1½ cups)
- Powdered sugar (to taste)
- Heavy cream (for that rich texture)
- Mini chocolate chips or pistachios (to add flavor)
- Your favorite pie crust (store-bought or homemade)
Make sure all your ingredients are at room temperature. This helps them blend better! If you want to explore more about baking essentials, check out this Handy Kitchen Guide.
Preparing the Ricotta Filling
Now, let’s get to the heart of your Mini Cannoli Cups — the ricotta filling. The sweet creamy surprise that will have everyone coming back for more. Follow these steps:
-
Mix the Ricotta: In a mixing bowl, combine the ricotta cheese and heavy cream. Use a hand mixer or a whisk to blend until it becomes smooth and creamy. This step is really important; a lump-free filling is key to an amazing cannoli.
-
Flavor it Up: Gradually add powdered sugar to taste. Feel free to tweak the amount based on your sweet tooth. You can also throw in a splash of vanilla extract for an added depth of flavor!
-
Fold in Extras: If you like texture, fold in a handful of mini chocolate chips or chopped pistachios. They add flavor and a delightful crunch to your filling.
Making the Cannoli Cups from Pie Crust
For your Mini Cannoli Cups, a crisp pie crust is the ideal vessel. Here’s how to create these crunchy cups:
-
Roll It Out: Take your pie crust and roll it out on a lightly floured surface. You want it to be thin but not too fragile.
-
Cut Out Circles: Use a round cutter or a glass to cut out circles, about 3 inches in diameter.
-
Mold the Cups: Gently press each circle into the cup of a muffin tin. You’ll want to create small cups to hold your filling perfectly. Don’t worry if they seem imperfect; a rustic look adds to the charm!
Baking the Mini Cannoli Cups
It’s time to bake those little beauties! Here’s how to ensure they come out perfectly golden:
-
Preheat your Oven: Set your oven to 375°F (190°C). Preheating is essential for even baking.
-
Bake to Perfection: Place the muffin tin in the oven and bake for about 12-15 minutes, or until they are golden brown. Keep a close eye — no one likes burnt edges!
-
Cool Down: Once out of the oven, let them cool in the tin for a few minutes before transferring to a wire rack. This helps them firm up.
Assembling the Mini Cannoli Cups
Now comes the best part: putting everything together! Here’s how to assemble your Mini Cannoli Cups:
-
Fill the Cups: Using a piping bag (or a simple ziplock with the corner cut off), fill each cup with your creamy ricotta filling. Don’t be shy; a generous amount will make them irresistible!
-
Add Garnish: Top them off with additional chocolate chips or a sprinkle of powdered sugar for that extra touch.
-
Serve and Enjoy: Arrange them on a beautiful platter. Get ready for compliments as your guests indulge in these delicious bites!
By following these steps, you’ll not only master the art of making Mini Cannoli Cups, but you’ll also create lasting memories. Enjoy every bite, and don’t forget to share them with loved ones!
Variations on Mini Cannoli Cups
When it comes to creating mini cannoli cups, the classic filling of ricotta and confectioners’ sugar is hard to beat. However, experimenting with different flavors can make your dessert even more exciting! Here are a couple of flavor variations for the filling that you might enjoy:
Flavor Variations for the Filling
-
Chocolate Chip Delight: Mix mini chocolate chips into your ricotta filling for a delightful crunch and added sweetness. This combination will satisfy any chocolate lover’s cravings.
-
Citrusy Twist: Add the zest of an orange or a lemon to brighten your cannoli filling. This tangy flavor will balance out the sweetness and add a refreshing layer to your dessert.
-
Nutty Infusion: Incorporate finely chopped pistachios or hazelnuts to your ricotta for an earthy taste. You could also drizzle a bit of nut butter to enhance the richness.
Feel free to explore different flavor combinations that resonate with your palate!
Alternative Cup Options
Why stick to traditional pastry when there are so many delicious mini cannoli cups alternatives? Here are a couple of ideas:
-
Phyllo Dough Cups: If you’re looking for a lighter, crispier option, using phyllo dough to create your cups can elevate your dessert. Just layer the dough, brush with some melted butter, and bake until golden.
-
Shortbread Cookies: Consider making small shortbread cookie cups. They add a buttery flavor and a nice crunch that pairs beautifully with creamy fillings.
By varying the filling and the cup itself, you can create a whole dessert buffet that caters to everyone’s tastes. Be adventurous and mix up the elements to discover your unique take on these delightful mini cannoli cups! For more inspiration, check out Delicious Magazine for creative dessert ideas.
Cooking Tips and Notes for Mini Cannoli Cups
Tips for Achieving the Perfect Filling Consistency
To make delightful Mini Cannoli Cups, the filling’s texture is crucial. Aim for a creamy yet thick consistency; it should hold its shape without being too stiff. Start with room temperature ricotta cheese to avoid lumps, and consider a quick spin in a food processor for smoothness. Don’t forget to add powdered sugar gradually until you reach your desired sweetness! For extra flavor, a teaspoon of vanilla extract or a sprinkle of cinnamon can elevate your filling wonderfully.
Baking Tips for Crispy Cups
For truly crispy Mini Cannoli Cups, use a blend of all-purpose flour and unsweetened cocoa powder for a subtle richness. Ensure your oil is hot enough (around 350°F) when frying to create that golden, crunchy exterior. Frying in small batches prevents temperature drops, ensuring even cooking. If you’d prefer a baked option, preheat your oven to 375°F and use a mini muffin tin for shaping the cups – it’s a healthier alternative and still delicious!
Curious about other variations? Check out this recipe guide on pastries for more inspiration!
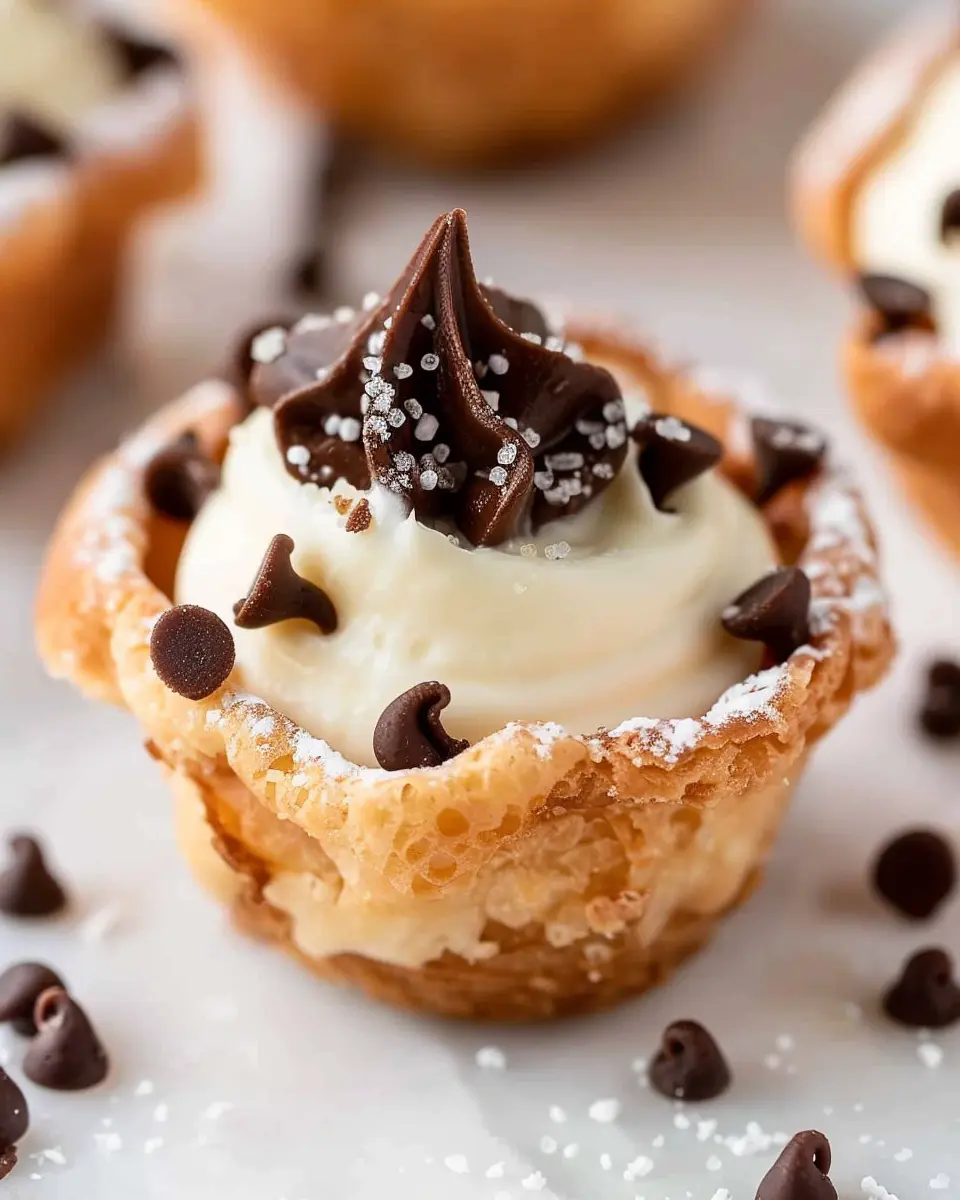
Serving Suggestions for Mini Cannoli Cups
Creative Plating Ideas
When it comes to presentation, don’t underestimate the power of aesthetic appeal. Start with a simple white plate to make your mini cannoli cups truly pop. Arrange them in a circular pattern with a sprinkle of chocolate shavings or pistachios in the center for a fun touch. For a more festive vibe, consider using colorful dessert cups or even edible flowers for garnishing. You can also present them on a tiered dessert stand—it not only saves space but also adds height and drama to your table setup!
Pairing Mini Cannoli Cups with Different Treats
Why stop at just mini cannoli cups? These delightful treats pair beautifully with various other desserts. Try serving them alongside fresh berries or a scoop of creamy gelato to enhance the overall experience. For a cozy gathering, a side of Italian pastries like biscotti or tiramisu can elevate your dessert table. You can also serve them with a chilled cup of coffee or herbal tea for a lovely after-dinner treat. The combination of flavors will leave your guests raving!
For more inspiration and serving ideas, check out this guide on dessert pairings from Fine Cooking.
Time Breakdown for Mini Cannoli Cups
Planning to whip up some delicious Mini Cannoli Cups? Here’s a handy time breakdown that will help you organize your cooking session perfectly!
Preparation Time
You’ll need about 20 minutes to prepare the ingredients and get your assembly line set up. Make sure to gather everything you need, from the ricotta cheese to the mini cups.
Baking Time
Once you’ve prepped your shells, they’ll take approximately 10-12 minutes to bake until golden. Keep an eye on them; you want them crispy but not burnt!
Total Time
Overall, you’re looking at a delightful experience of around 30-35 minutes from start to finish. Quick, right? With these mini treats, you can impress your friends in no time! Check out tips from experts on baking techniques if you’re looking to hone your skills further.
Happy baking!
Nutritional Facts for Mini Cannoli Cups
Calories and Macronutrients Overview
When indulging in Mini Cannoli Cups, you’ll find each one offers about 120 calories, making them a guilt-free treat to satisfy your sweet tooth. These delightful desserts typically contain around 5 grams of fat, 15 grams of carbohydrates, and 2 grams of protein per serving. For those mindful of their sugar intake, each cup has roughly 6 grams of sugar. Keeping track of these macronutrients can be helpful for managing dietary goals.
For more specific details, consider checking out authoritative sources like the USDA FoodData Central or similar nutritional databases.
Healthier Ingredient Substitutions You Can Make
You can elevate your Mini Cannoli Cups while keeping them on the lighter side with some easy swaps:
- Low-Fat Ricotta: Try substituting regular ricotta with low-fat versions for a creamier texture without added calories.
- Honey or Maple Syrup: Swap out refined sugar for natural sweeteners like honey or maple syrup to cut down on sugar intake.
- Whole Wheat Wraps: Use whole wheat or alternative grain wraps instead of traditional pastry shells for added fiber.
- Cocoa Powder: For a chocolate twist, include unsweetened cocoa powder in the filling for a rich flavor with fewer calories.
Making these substitutions not only keeps your Mini Cannoli Cups delicious but healthier too! Exploring healthier alternatives can benefit your overall wellness journey. For more tips on healthy cooking, check out resources like Nutrition.gov or similar sites focused on dietary advice.
FAQs about Mini Cannoli Cups
How can I make Mini Cannoli Cups ahead of time?
Planning a party or a gathering? You can definitely prepare Mini Cannoli Cups ahead of time for a seamless dessert experience. Here’s how:
- Shells: Bake and cool your cannoli shells a day beforehand. Store them in an airtight container to keep them crisp.
- Filling: Prepare the ricotta and cream mixture a day in advance as well. Just be sure to store it in the refrigerator until you’re ready to assemble.
- Assembly: It’s best to fill the cups just before serving to avoid soggy shells. A quick tip: if you need to save time, use a piping bag for a neat and speedy filling process.
Is it possible to freeze Mini Cannoli Cups?
You might be wondering if you can freeze Mini Cannoli Cups. Good news!
- Shells can be frozen: If you make extra shells, freeze them in a single layer, then transfer them to a sealed bag. When you’re ready, simply thaw and fill.
- Filling should not be frozen: The creamy texture can change upon freezing, so stick to refrigerating it instead.
While frozen shells can be a lifesaver, fresh is always best.
What are some common mistakes to avoid when making Mini Cannoli Cups?
Here are mistakes that could trip you up while making your Mini Cannoli Cups:
- Overfilling: Resist the urge to pack too much filling. A generous dollop is great, but too much will spill over and ruin the aesthetic.
- Skipping the chill: Make sure your filling is chilled before piped into the shells; it keeps the texture firm.
- Ignoring temperature: Make sure all ingredients are at room temperature before combining. This helps achieve a smooth, creamy filling.
For more tips, check out this cooking guide from Bon Appétit on perfecting your desserts. Happy baking!
Conclusion on Mini Cannoli Cups
Recap of Why You’ll Love Mini Cannoli Cups
In wrapping up, mini cannoli cups are more than just a dessert; they’re an unforgettable experience. Perfectly sized for bite-sized indulgence, these treats combine a rich, creamy filling with a crispy shell that’s simply irresistible. Ideal for parties, they add a touch of sophistication without the fuss. Plus, they’re easy to customize—just think about all the flavors you can experiment with!
Whether you’re celebrating a special occasion or just treating yourself, these delightful desserts bring joy in every bite. If you want more inspiration, check out sites like Serious Eats or Food Network for a plethora of innovative recipes and tips.
PrintMini Cannoli Cups: Easy Indulgence for Sweet Tooth Lovers

Mini Cannoli Cups are the perfect bite-sized dessert for anyone who loves sweet treats. These delightful little cups are filled with creamy ricotta and chocolate, making them an irresistible indulgence.
- Prep Time: 15 minutes
- Cook Time: 0 minutes
- Total Time: 45 minutes
- Yield: 12 servings
- Category: Dessert
- Method: No-Bake
- Cuisine: Italian
- Diet: Vegetarian
Ingredients
- 1 cup ricotta cheese
- 1/2 cup powdered sugar
- 1 teaspoon vanilla extract
- 1/2 cup mini chocolate chips
- 12 mini phyllo cups
Instructions
- In a mixing bowl, combine the ricotta cheese, powdered sugar, and vanilla extract until smooth.
- Fold in the mini chocolate chips.
- Fill each mini phyllo cup with the ricotta mixture.
- Refrigerate for at least 30 minutes before serving.
Notes
- For a more chocolatey flavor, you can add cocoa powder to the filling.
- These can be made ahead of time and stored in the fridge.
Nutrition
- Serving Size: 1 cup
- Calories: 120
- Sugar: 5g
- Sodium: 50mg
- Fat: 4g
- Saturated Fat: 2g
- Unsaturated Fat: 0g
- Trans Fat: 0g
- Carbohydrates: 18g
- Fiber: 1g
- Protein: 3g
- Cholesterol: 15mg