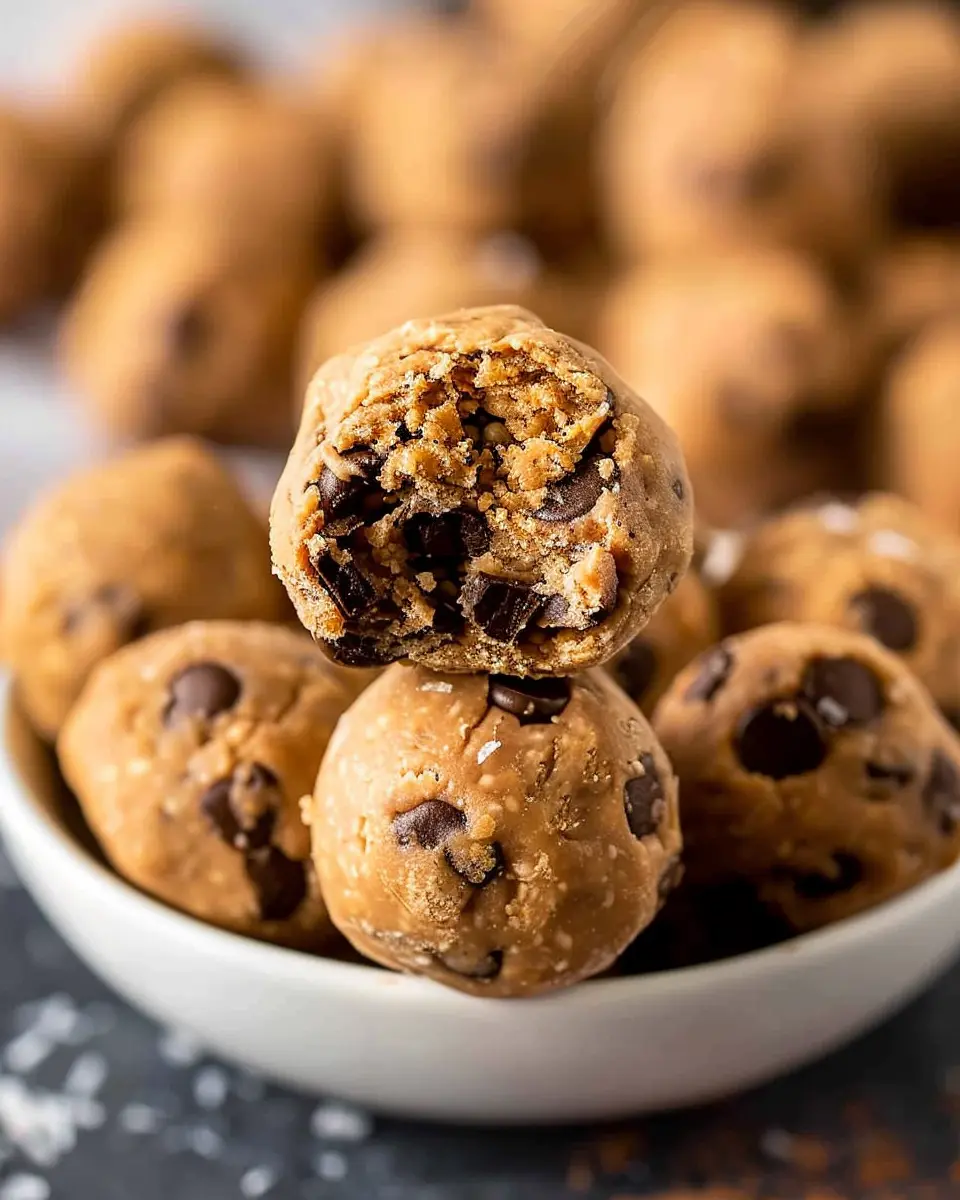
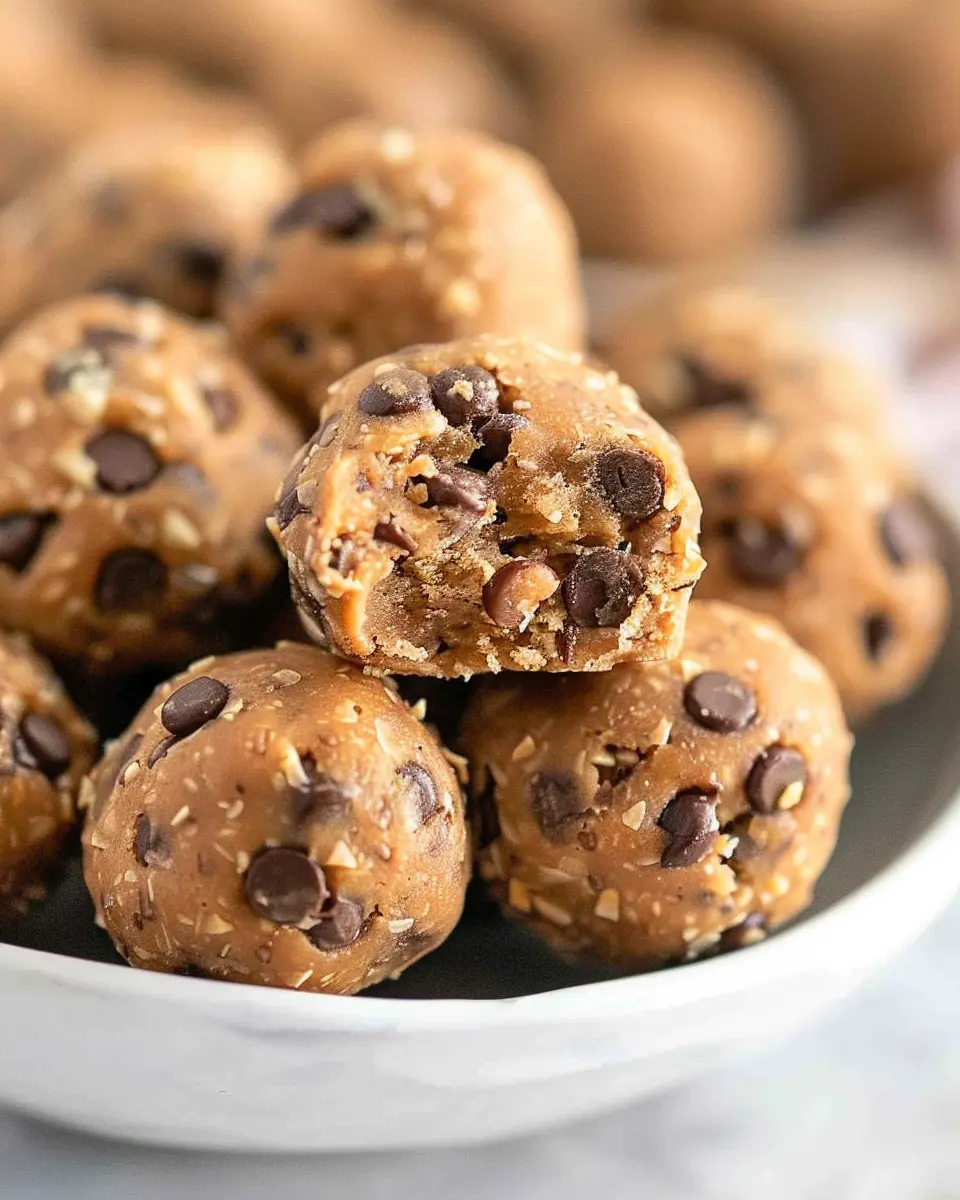
Introduction to No Bake Protein Balls
When life gets busy, many young professionals find it challenging to maintain a healthy diet. Enter no bake protein balls—the perfect snack solution that’s both quick and nutritious. These little bites of goodness are more than just a trend; they’re a game changer for those juggling work, social lives, and everything in between.
Why No Bake Protein Balls are a Game Changer for Busy Young Professionals
Imagine this: It’s a hectic workday, and you’ve got back-to-back meetings scheduled. The clock ticks away as your stomach growls, reminding you that you skipped breakfast again. Instead of reaching for a high-sugar granola bar or hitting the overpriced café downstairs, wouldn’t it be amazing to have a stash of no bake protein balls ready to go?
These protein-packed snacks are not only easy to make but also incredibly versatile. You can customize them with your favorite ingredients—think oats, nut butters, and even dark chocolate chips! Plus, with minimal effort, you can whip up a batch on Sunday evening and have quick, grab-and-go nutrition for the entire week.
Here’s why no bake protein balls earn their spot in your weekly meal prep:
- Time-Saving: Skip the oven! Mix your ingredients, roll them into balls, and you’re done. A few minutes in the kitchen can yield a week’s worth of snacks.
- Nutrient-Dense: High in protein and fiber, these snacks keep you full longer, making them a perfect choice for preventing midday slumps.
- Cost-Effective: Making your own protein balls is generally far less expensive than buying pre-packaged snacks. Not to mention, you get to control the ingredients!
According to a study by the Harvard School of Public Health, incorporating healthy snacks like these can improve your energy levels and focus throughout the day. With so many benefits crammed into such a delightful bite, it’s time to embrace the convenience of no bake protein balls.
Furthermore, they are great for sharing! Next time you have a team meeting or social event, bring along your homemade creations. Your colleagues will thank you—and might just ask for the recipe. Want to get started? Let’s dive into how you can make these delicious bites right at home!
Ingredients for No Bake Protein Balls
For anyone looking to whip up some delicious no bake protein balls, the right ingredients are key to achieving that perfect balance of flavor and nutrition. These little bites of goodness are not only quick to prepare but also satisfy those mid-afternoon cravings without the guilt. Here’s what you’ll need:
- Protein powder: Choose your favorite type, whether it’s whey or plant-based.
- Nut butter: Almond, peanut, or cashew butter work great to bind the mixture.
- Oats: Rolled oats are perfect for a hearty texture.
- Honey or maple syrup: For a touch of natural sweetness, these options add moisture as well.
- Dark chocolate chips: Because who doesn’t love a little chocolate? Go for a high cocoa percentage for added health benefits.
- Add-ins: Think chia seeds, flaxseeds, or even dried fruit for extra nutrition.
The beauty of no bake protein balls is that you can customize these ingredients to your liking. Getting creative not only enhances flavor but also means you get a snack that’s uniquely yours. Interested in nutrition? Check out Healthline’s guide for more insights.
So, what personal favorite ingredients do you want to include in your next batch of tasty energy bites?
Preparing No Bake Protein Balls
Creating no bake protein balls is one of the simplest and most rewarding tasks you can undertake in your kitchen. Not only are these little bites of deliciousness packed with nutrition, but they also make for a convenient snack that aligns perfectly with a busy, modern lifestyle. Whether you’re heading to the gym, running late for work, or just needing a quick energy boost, these balls have you covered. Let’s walk through the easy steps to whip up a batch of these fantastic treats.
Gather Your Ingredients
Before you dive headfirst into mixing, it’s essential to gather all your ingredients. Here’s what you’ll generally need:
- 1 cup of rolled oats
- 1/2 cup of nut butter (like almond or peanut butter)
- 1/3 cup of honey or maple syrup
- 1/4 cup of protein powder (whey, pea, or your preferred type)
- 1/4 cup of chocolate chips or dried fruits (optional)
- A pinch of salt
- Optional add-ins: chia seeds, flaxseeds, or coconut flakes
Having everything on hand not only streamlines the process but also sparks creativity; feel free to mix and match with your favorite additions!
Combine the Main Ingredients in a Mixing Bowl
Once you have your ingredients ready, it’s time to bring them together. Grab a mixing bowl, and start by adding your rolled oats, protein powder, and a pinch of salt. Then, pour in your nut butter and sweetener of choice—honey works wonders for binding while adding a touch of sweetness.
Pro Tip: When measuring sticky ingredients like nut butter or honey, lightly coat your measuring cup with a bit of oil first. This will make it a breeze to pour out without any mess.
Use a spatula or your hands (yes, it’s perfectly fine!) to mix everything thoroughly until you have a cohesive mixture. It should be sticky but manageable. If it feels too dry, add a tablespoon of water or nut butter; if it’s too wet, incorporate more oats or protein powder.
Form the Energy Balls
Now comes the fun part—forming your no bake protein balls! Take a small scoop of the mixture, about the size of a tablespoon, and roll it between your palms until it forms a round shape. Place each ball on a parchment-lined tray or plate.
Not sure how big each ball should be? Think of the perfect bite size—enough to satisfy without overwhelming. And remember, the more consistent you make the sizes, the better they will chill and set later.
Pro Tip: If your dough sticks to your hands, wet them slightly with water to prevent that from happening.
Chill and Harden the Balls
After rolling, it’s time for your balls to take a little break in the fridge! Pop them in for about 30 minutes to an hour. This step isn’t just to cool them down; it allows the flavors to meld and helps the no bake protein balls harden up nicely. Trust me; waiting is worth it!
While they chill, consider planning how you’ll enjoy your treats—pair them with yogurt for breakfast or grab a couple for an afternoon boost.
Store Your No Bake Protein Balls Properly
Once your no bake protein balls are beautifully chilled, it’s essential to store them correctly to maintain freshness.
- Option 1: Keep them in an airtight container in the refrigerator, where they will stay fresh for up to a week.
- Option 2: For longer storage, these treats can be frozen! Just make sure to layer them with parchment paper to avoid sticking, and they should last for about three months in the freezer.
You could even get creative by labeling your container with the date and flavor for this fun snack adventure.
With just a few simple steps, you now have a stash of no bake protein balls ready to power through your day. So why not treat yourself, and enjoy making these delightful, chewy snacks? Happy snacking!
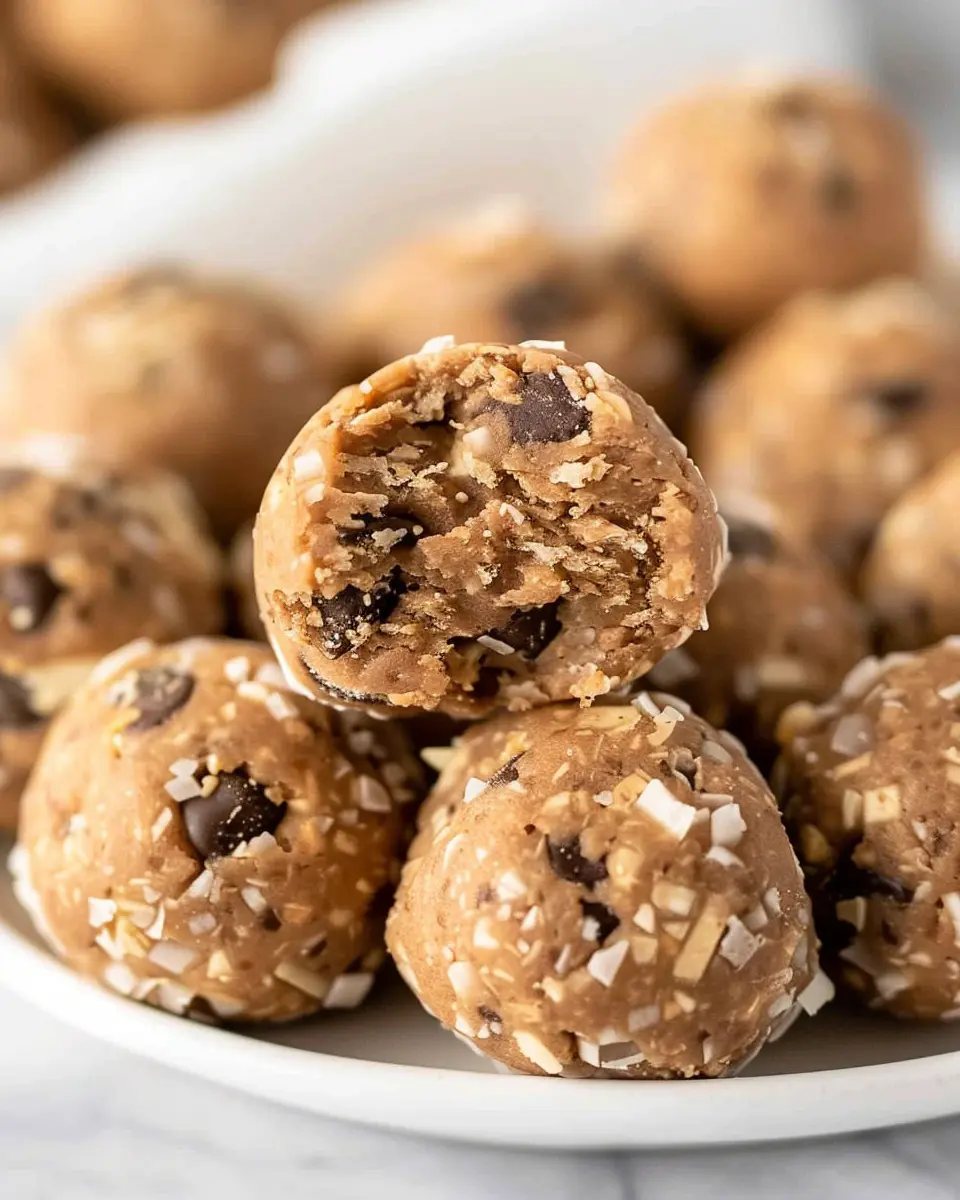
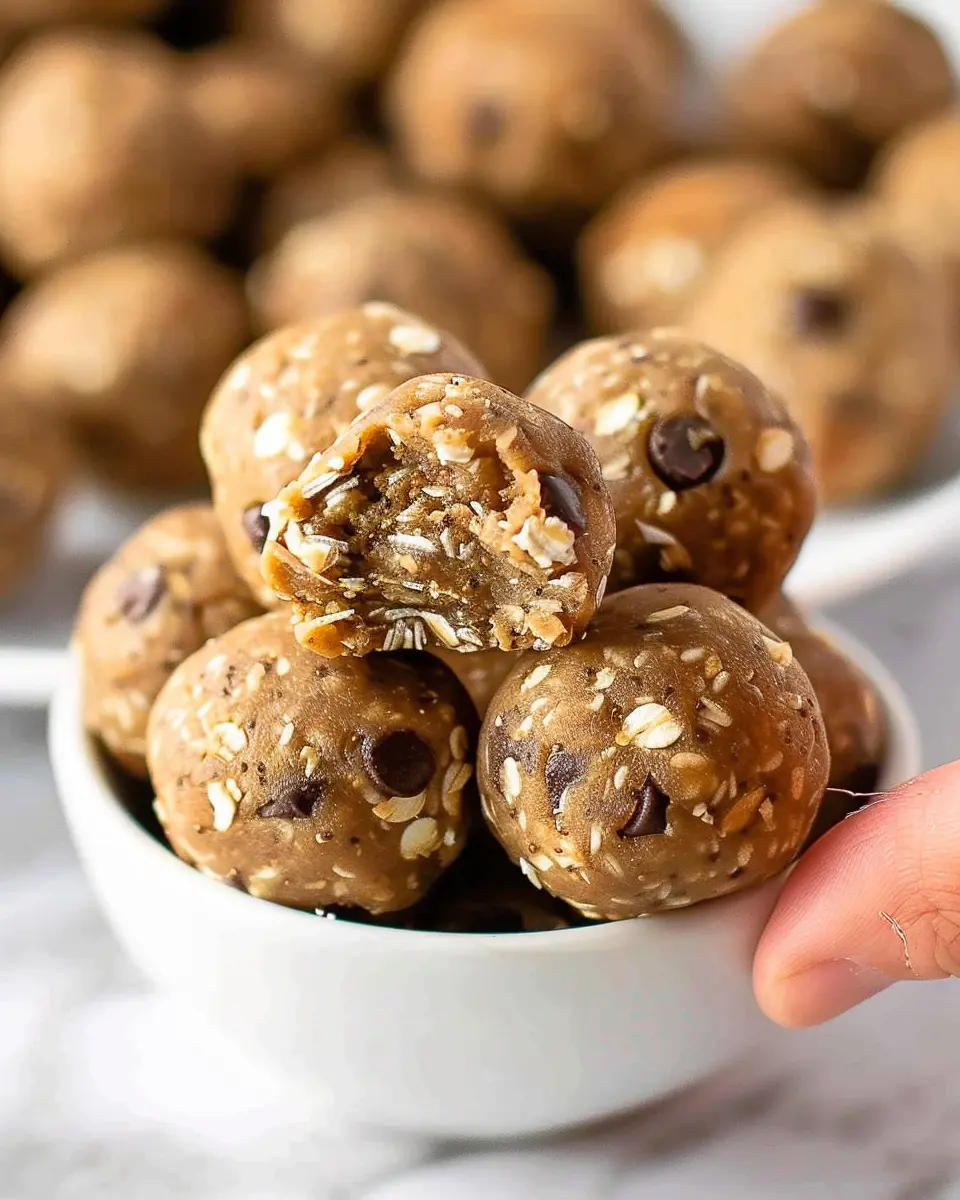
Variations on No Bake Protein Balls
When it comes to creating tasty, no bake protein balls, the possibilities are endless! Here are two fantastic variations that will keep your snack game fresh and exciting.
Chocolate Dipped Protein Balls
If you’re looking to add a bit of decadence, try chocolate-dipping your protein balls! Here’s how to elevate your snack:
- Ingredients: Melt dark or milk chocolate chips (about 1 cup) over a double boiler or in the microwave, stirring until smooth.
- Method: Once your protein balls are formed, dip each one into the melted chocolate and place them on parchment paper. Let them cool for at least 15 minutes.
- Pro Tip: For an extra flair, sprinkle a pinch of sea salt on top before the chocolate sets. This sweet-salty combination will keep you reaching for more.
Chocolate not your thing? Consider a drizzle of nut butter instead for a fun twist! (source: Healthline)
Nut-Free Protein Ball Options
Nut allergies shouldn’t stop you from enjoying delicious no bake protein balls. Here are some great alternatives:
- Seeds Instead of Nuts: Use sunflower seeds, pumpkin seeds, or chia seeds for that extra crunch and nutrition. These seeds are packed with protein and healthy fats!
- Oats and Rice Cereal: Combining rolled oats or crispy rice cereal with a natural sweetener, like honey or maple syrup, can create a delightful texture.
- Coconut Flakes: Unsweetened shredded coconut is another fabulous choice that brings a hint of tropical flavor.
By catering to dietary needs and preferences, you can make sure that everyone enjoys these wholesome treats.
Creating delicious and nutritious no bake protein balls has never been easier or more enjoyable. For more inspiration, explore sites like EatingWell or Food Network for additional ideas on variations and serving suggestions.
Cooking Tips and Notes for No Bake Protein Balls
When you’re whipping up a batch of no bake protein balls, there are a few handy tips to keep in mind for ultimate success!
Choose Quality Ingredients
Opt for high-quality protein powder, as this is the backbone of your recipe. Brands like Optimum Nutrition are often recommended for their taste and mixability. You can also explore other nutrient-dense additions like flaxseeds or chia seeds for an extra health boost.
Balance Your Flavors
Don’t shy away from experimenting with flavors! A dash of cocoa powder can add chocolatey goodness, while a hint of vanilla extract can sweeten things up naturally. Consider adding a pinch of salt to enhance the overall flavor profile.
Perfect your Texture
To achieve the right consistency, make sure the mixture holds together. If it’s too crumbly, add a touch more nut butter or honey. If it’s overly sticky, sprinkle in a bit more oats.
Storage Tips
Store your no bake protein balls in an airtight container in the fridge to keep them fresh. They should last about a week—but I doubt they’ll stick around that long!
Feel free to get creative with the mix-ins, and don’t hesitate to share your favorite combinations! Want more healthy snack ideas? Check out resources from the American Heart Association!
Serving Suggestions for No Bake Protein Balls
When you make these no bake protein balls, you’re not just prepping a snack; you’re creating versatile delights that can fit seamlessly into various occasions. Here are some fresh serving suggestions to turn your no-bake treats into unique and satisfying bites:
For Busy Mornings
Pair your protein balls with a smoothie or a bowl of Greek yogurt topped with fruits and nuts for a balanced breakfast. This combo provides a great mix of protein and healthy fats to kickstart your day!
Pre- or Post-Workout Snack
These protein balls shine before or after your workout. Enjoy them with a side of sliced apples or carrots to get that extra energy boost. Did you know that pairing carbs with protein can enhance your recovery? Studies suggest this combo can help your muscles recover faster.
Lunchbox Addition
Whether you’re at work or at home, simply toss a couple of no bake protein balls into your lunchbox. They offer a delightful mid-afternoon energy boost and pair well with a piece of fruit, making them a convenient snack.
Enjoy with Friends
Host a fun get-together? Set up a DIY “protein ball bar” with various toppings like shredded coconut, nuts, or dark chocolate chips. This way, your friends can customize their bites, adding a personal touch to your gathering.
The beauty of no bake protein balls lies in their adaptability—you can mix and match these suggestions to suit your style! For more delicious protein-rich ideas, check out Nutrition.gov for expert tips and resources.
Time Breakdown for No Bake Protein Balls
Preparation Time
Getting your no bake protein balls ready is a breeze! You’ll need about 10 minutes to mix together all your ingredients. It’s as simple as dumping everything into a bowl, giving it a good stir, and rolling them into perfectly bite-sized treats.
Chilling Time
After rolling your no bake protein balls, let them chill in the fridge for at least 30 minutes. This allows them to firm up and helps the flavors meld together beautifully. While you wait, why not tackle that growing to-do list?
Total Time
In just 40 minutes, you’ll have a delicious batch of no bake protein balls ready to go. Perfect for a quick snack or a pre-workout boost! So, why not treat yourself to something nutritious and satisfying? If you’re eager for more healthy snack ideas, check out this nutrition-focused website for inspiration!
Nutritional Facts for No Bake Protein Balls
Calories
When you’re looking for a quick snack, no bake protein balls offer a satisfying option that typically has around 100 calories per ball. This makes them perfect for a pre- or post-workout treat, or even an afternoon pick-me-up.
Protein Content
Packed with an impressive amount of protein, these little bites generally contain about 5-7 grams of protein each, depending on the specific ingredients used. This is a great way to support muscle recovery and keep you feeling full longer.
Sugars and Fats
With natural sweeteners like honey or maple syrup, the sugar content remains relatively low, usually around 3-5 grams per serving. The healthy fats from nuts or nut butters make up about 5 grams, contributing to heart health and providing energy. For detailed nutritional insights, check out resources from Healthline or the USDA.
Incorporating these no bake protein balls into your diet can be a delicious and nutritious way to stay fueled throughout your busy day!
FAQs about No Bake Protein Balls
When it comes to no bake protein balls, questions often arise about customization and longevity. Let’s dive into some of the most common inquiries.
Can I use different types of nut butter?
Absolutely! While the classic recipe often calls for peanut butter, feel free to experiment with almond butter, cashew butter, or even sunflower seed butter if you need a nut-free option. Each type will impart a unique flavor and texture to your no bake protein balls, so it’s a great way to personalize the recipe to your taste preferences.
How long do these protein balls last in the fridge?
Stored properly in an airtight container, your no bake protein balls can last up to one week in the fridge. If you’re looking to extend their shelf life, consider freezing them. Just pop them in a freezer-safe container, and they can last for about three months. Whenever you’re craving a healthy snack, simply take one out to thaw, and you’re good to go!
Can I add extra ingredients like seeds or dried fruit?
Definitely! One of the best things about no bake protein balls is their versatility. Feel free to add components like chia seeds, flaxseeds, or dried cranberries for an extra nutritional boost. Just be mindful of the moisture content—if you add too much liquid, you might need to adjust the dry ingredients to maintain the right consistency.
For more tips on enhancing your no bake protein balls, check out this excellent source from Healthline on nutritious add-ins. Happy snacking!
Conclusion on No Bake Protein Balls
In summary, no bake protein balls are a fantastic snack option for anyone looking to boost their daily protein intake effortlessly. Not only do they require minimal ingredients and preparation time, but they also pack a nutritional punch that can keep you energized throughout your busy day.
You can customize these protein bites to fit your taste preferences by adding ingredients like nuts, seeds, or dried fruit. They’re perfect for meal prepping, making them a great grab-and-go option for young professionals. So why not give them a try? Check out our full recipe and start creating your own delicious, nutritious treats today!
PrintNo Bake Protein Balls: The Easy, Healthy Snack You’ll Love
A delicious and healthy snack option packed with protein.
- Prep Time: 10 minutes
- Total Time: 30 minutes
- Yield: 12 balls
- Category: Snacks
- Method: No Bake
- Cuisine: American
- Diet: Gluten-Free
Ingredients
- 1 cup oats
- 1/2 cup peanut butter
- 1/3 cup honey
- 1/4 cup chocolate chips
- 1/4 cup flax seeds
- 1 teaspoon vanilla extract
Instructions
- In a large bowl, mix all ingredients until well combined.
- Roll the mixture into small balls and place on a baking sheet.
- Refrigerate for at least 30 minutes to firm up.
- Enjoy your healthy snack!
Notes
- These can be stored in the fridge for up to a week.
- Add protein powder for an extra boost.
Nutrition
- Serving Size: 1 ball
- Calories: 100
- Sugar: 8g
- Sodium: 50mg
- Fat: 5g
- Saturated Fat: 1g
- Unsaturated Fat: 4g
- Trans Fat: 0g
- Carbohydrates: 11g
- Fiber: 2g
- Protein: 3g
- Cholesterol: 0mg